Aerotech Mirage
By
2016-11-29

T' Aerotech Mirge is me first build over 45 inches and also me first documented build so any tips tricks will be welcome. This is me second mid power rocket t' first was a Mega Der which be t' rocket that got me back into t' hobby. Avast! On this build I will be assisted by me lovely fiance. Ahoy! Who has really takin' a likin' t' rocketry and this rocket.
Un boxing
2016-11-29
first step was unboxing. Begad! We should all have this part down by now. T' rocket came from tower hobbies so thar was two boxes a shippin' box and then t' rocket box. There was no damage t' either boxes. As I started t' pull out all t' pieces I did notice two o' t' tubes looked like they where already launched I presume this happened in t' manufacturin' or packin' stage. I located t' instruction inside t' body tube with t' nose cone in it. T' second body tube had t' one and only decal and t' third be empty. I ran thru t' instructions and then made sure that all t' parts where thar and they where. Interestin' side note this rocket uses two parachutes ( that is a first for me) one 22 inch for t' upper section and a 30 inch for t' lower section. So with all that bein' said it is now time t' get this build on.
Motor Tube Marking Part 1
2016-11-29
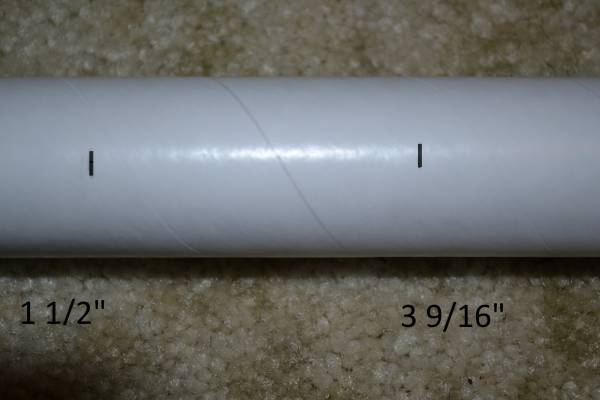
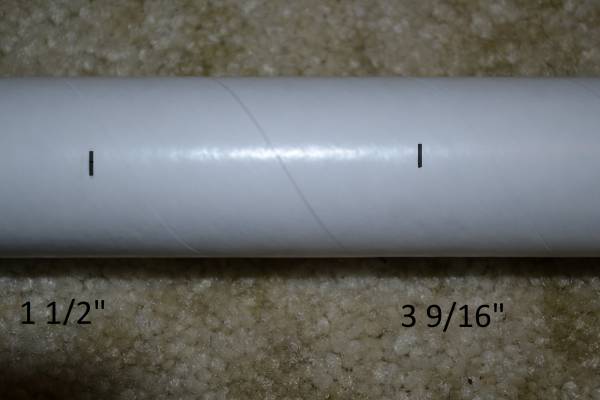
T' first step is t' assemble t' motor tube. Well, blow me down! Do t' t' fact that it now comes with an Aerotech alumminum motor retainer. Avast! Step one, me bucko, two and four are nay preformed, matey, so t' one and only step t' do is step three. Begad! Step three consistes o' markin' t' tube for t' fin lock system. Avast, me proud beauty! At t' top o' t' instructions is a quick guide you can use t' mark t' location o' teh fin locks, we did nay use t' guide, instead we used a metal ruler t' preform this task. T' first mark is for t' back edge o' t' front fin lock, that mark is placed 3 9/16" from t' back o' t' motor tube. Avast! THe second mark is for t' front edge o' t' back fin lock it is placed at 1 1/2"from t' back o' t' motor tube.
Fin Lock Installation
2016-11-30
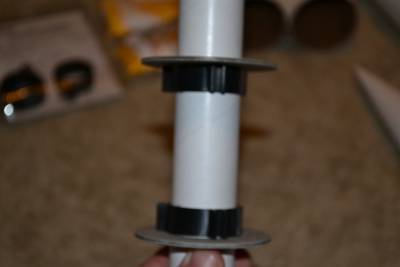
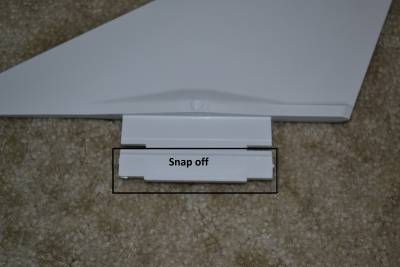
Attachment o' t' fin lock rings were very tight. T' fin lock rings add structural support for t' rocket so installation o' them is an exercise in muscle and finess. Aye aye! T' front rin' had t' have a quick beval over t' MMT. Ahoy! I used 220 grit that I had layin' around t' make a beval on t' back side o' t' fin lock. Arrr! It did nay take much o' a beval t' get it t' slide into position. Begad! After t' front fin lock is in place one o' three centerin' rings is then added, followed by t' back o' aft fin lock this one did nay need a beval and went on smoothly, followed by t' aft centerin' ring. Next we prep t' fins, removin' t' lower half o' t' fin lock tab by snappin' them off, then we sanded t' lower half where t' fin lock tab was, usin' 220 grit. After this we sand t' nub on t' sides o' each fin usin' 320 grit. Snap each fin into fin lock test fittin' fin and fin lock for proper alignment and fit. Aye aye! Remove any flashin' t' achieve proper fit into t' fin lock. Once proper fit is achieved remove fins and back centerin' ring,check that front centerin' rin' is still in t' proper position, then apply cement or epoxy t' t' front centerin' rin' where it meets t' motor tube, apply eppoxy in t' area betwixt t' fin lock where fin lock an front centerin' rin' meet, next apply epoxy t' t' front edge o' t' back fin lock where it meets t' motor tube. Begad! DO NOT apply epoxy into t' fin lock or t' back edge o' t' back fin lock ring.
.
Labyrinth Assembly
2016-12-02
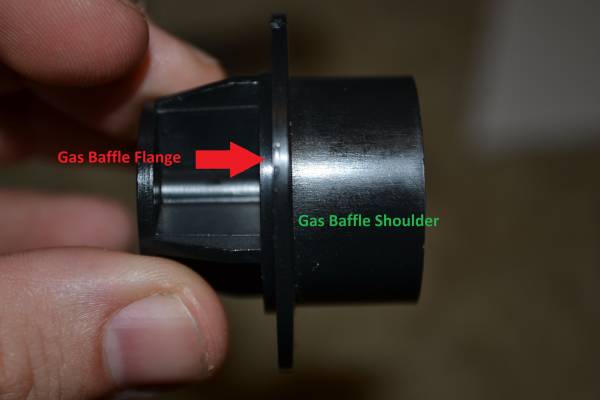
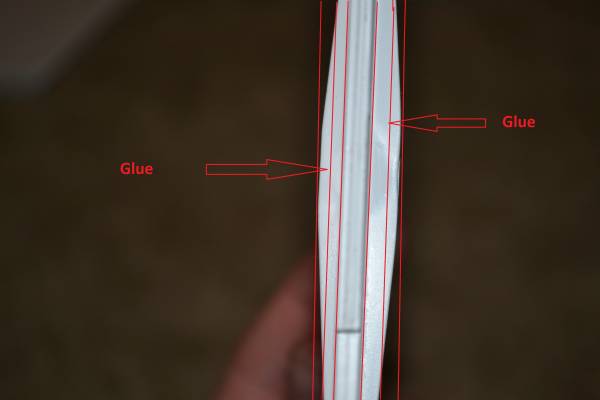
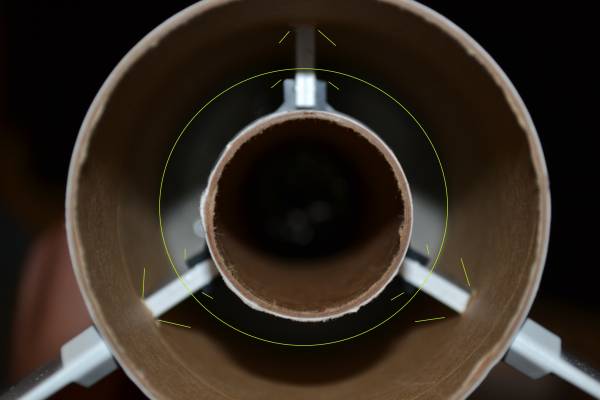
Make four ¼” long cuts in t' front o' t' motor tube 90 degrees apart. These cuts are for t' gas baffle so it will fit into t' tube. Aye aye! Next, stretch out t' coolin' mesh t' about 6”, matey, stuff t' coolin' mesh into t' front o' t' motor tube, DO NOT glue mesh in place. Apply epoxy t' 2/3 o' t' ejection gas baffle shoulder, then insert t' baffle into t' front o' t' motor tube. Next apply epoxy t' baffle where it meets t' motor tube and t' each o' t' cuts made previously. Apply epoxy t' surface o' t' baffle flange, arrr, place centerin' rin' over it, screw in t' screw eye into t' hole at t' front end o' t' baffle. I placed a thin drop o' epoxy t' prevent t' screw eye from backin' out, me bucko, then attach t' shock cord with a square knot t' t' screw eye.

Lower Body tube.
2016-12-04
Lower body assembly
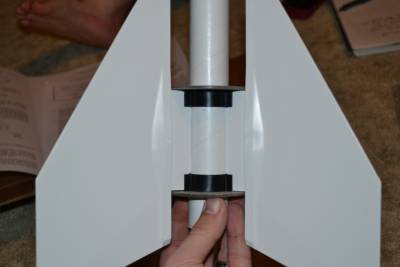
At this point we installed t' shock cord. Avast, me proud beauty! This was in t' instructions t' do on t' previous step. But we choose t' do it with t' fin installation mainly because I get lazy. T' instructions say t' use a overhand knot which is a basic stopper knot. I used a figure eight instead do t' its holdin' power and me experience with it. Begad! After t' shock cord was attached you run t' shock cord thru t' lower body tube. As you push t' MMT into t' BT make sure t' pull out t' slack in t' shock cord. Also make sure t' fin locks are alignin' with t' fin slots. It is rather hard t' get them aligned once both centerin' rings are in t' tube. After I had everythin' inserted and lined up I went back thru and checked it by snappin' in each fin. I then took one fin off at a time usin' t' other two fins t' hold me alignment o' t' fin locks. T' fin that was removed got a nice and thick layer o' epoxy on t' fin root t' entire length o' fin. I then snapped it into place and waited 10 minutes for t' epoxy t' harden then I removed another fin and repeated t' process. I treated all three fins with t' same level o' care. Once all fins where attached by t' fin lock and t' epoxy on t' root it was time for some internal fillets. Aye aye! I have t' admit I was excited about this since all t' great builders are doin' this. Blimey! But I have t' say that excitement smartly subsided. Ya scallywag! I used 5 minute epoxy for this task and for me that was a little t' fast o' a pace. Well, blow me down! To apply t' epoxy I used a five inch long by ½ inch wide basswood scrap I had layin' around. T' fins and centerin' rin' and pretty much everythin' else get a light coat o' glue. Begad! Then once t' back o' t' MMT is a gooey mess. I mean glued up t' perfection. You then get t' make a mess o' t' front centerin' rin' by goin' in from t' front o' t' tube. T' only compaction is keepin' t' shock cord from gettin' glue on it. I stood t' rocket on t' fins and attacked t' centerin' rin' from a vertical axis. This worked out t' best I started tryin' on t' horizontal but found it way easier on t' vertical. Blimey! After that is all in tip top shape. Blimey! You lightly sand t' outside o' t' body tube around t' launch lug slot. Aye aye! Once sanded apply glue t' bottom o' lug attach it t' body tube. Aye aye! And that completes t' lower body tube. Well, blow me down! And it should look somewhat like a rocket. Avast! Now if I can only put mine on slime fast because it defiantly gained some weight. Ya scallywag! ( but it still looks great)
)
Coupler
2016-12-18
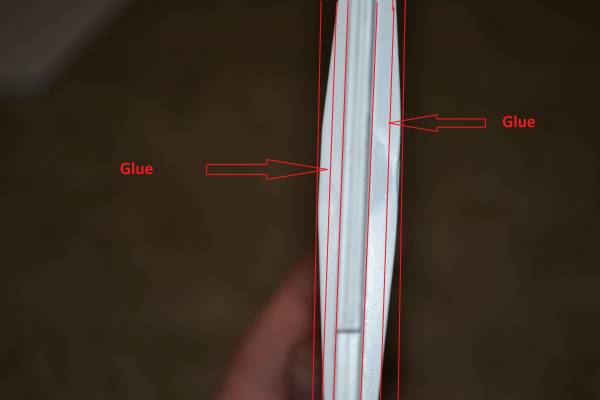
Alright let’s get this bilge-suckin' boy finished up. This is where everythin' comes together really fast. Pretty much it is just gluin' t' rocket together. At this point t' rocket has been in this configuration already when we got it out o' t' box and assembled it t' see how big it was. But this time we are only goin' t' add epoxy. First things first, t' screw eye needs t' be screwed into t' bulkhead. Begad! Run t' screw eye all t' way down and I added a drop o' epoxy just t' make sure. Once that is done tie t' shock cord t' t' screw eye I used a figure eight again. Now it is on t' t' fun stuff. Take a coupler mark it at 3 inches. Blimey! Then sand t' bottom 3 inches o' t' coupler. Begad! Epoxy and slide it into t' bottom tube. Next up take t' last coupler mark it once again at 3 inches this time lightly sand t' whole coupler. Begad! Then epoxy it into t' first and second body tube. Begad! Assumin' you are countin' from t' nose cone down. Aye aye! Once that is all dried up epoxy t' nose cone on. T' epoxy t' coupler into t' body tube run a bead o' epoxy about one inch in from t' end o' t' body tube then slide t' coupler in. Blimey! I like t' twist t' coupler t' spread out t' epoxy and get an even coat. Once that is done it is on t' paint. Blimey! Unfortunately it is way too cold here t' even think about painting. So I guess I will see you all this spring.
 |
 |