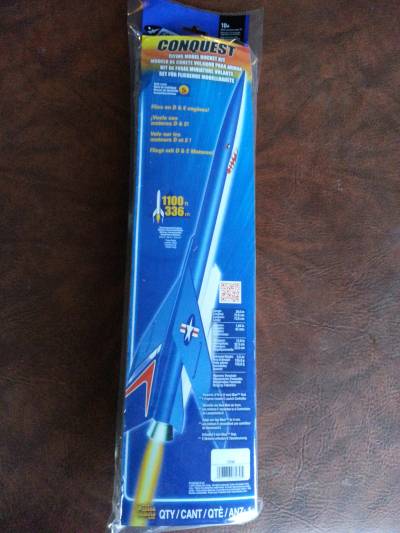
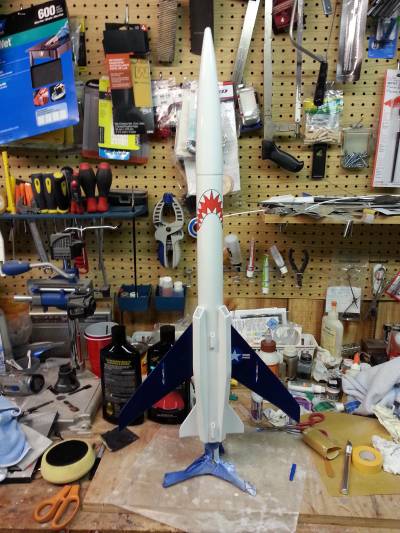
Conquest
By Jim Hodge
2014-04-03
| Manufacturer: | Estes  | |
| Diameter: | 1.6400 inches | |
| Length: | 28.6000 inches | |
| Skill Level: | 5 | |
| Style: | Futuristic/Exotic |
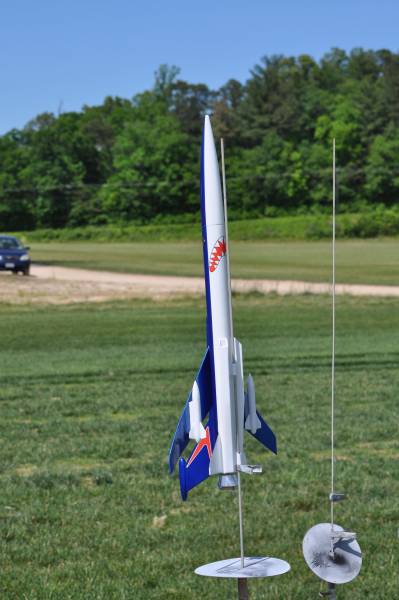
T' Conquest is t' new skill level 5 kit from Estes. It is a BT-60 sized winged rocket that stands 28.6" tall with a wingspan o' 12.8". It's suggested engines are t' D12-3, ya bilge rat, E9-4 and t' E12-4 with a projected max altitude o' 1100 ft. Avast! We'll see about that. I love winged rockets and this looks to be an interestin' build.
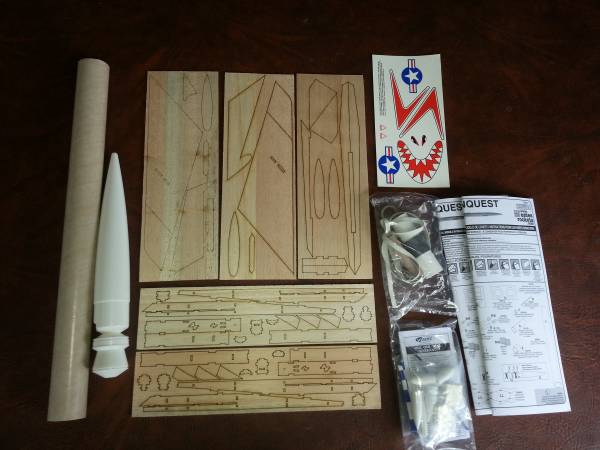
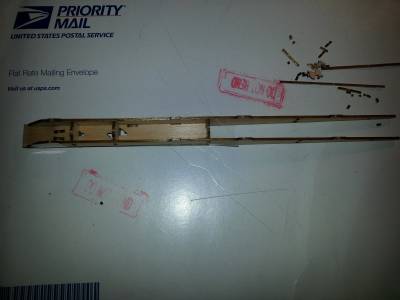
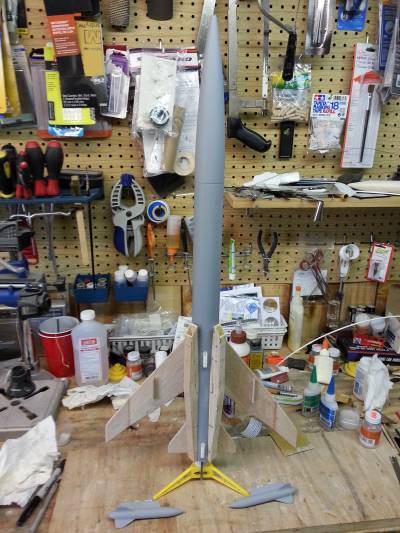
Kit contents.
2014-04-03
T' Conquest kit includes t' followin' items.

- 8" nosecone with aft skirt attached.
- 18" BT-60 body tube.
- 2 2.5" BT-5 body tubes.
- 4 plastic cones. Nose and aft for missiles.
- 3 3/32" wood sheets.
- 2 1/16" wood sheets.
- Decal sheet(waterslide).
- E engine mount with D adapter.
- Clay.
- Elastic shock cord.
- Plastic pre-assembled 18" parachute.
- Instructions.
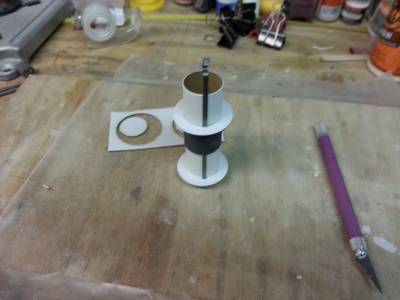
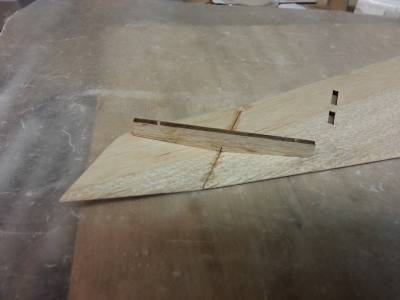
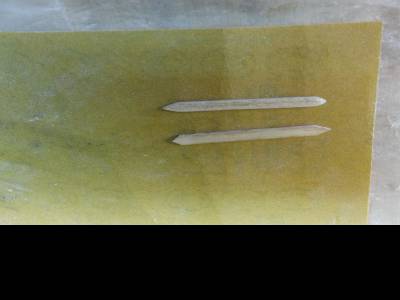
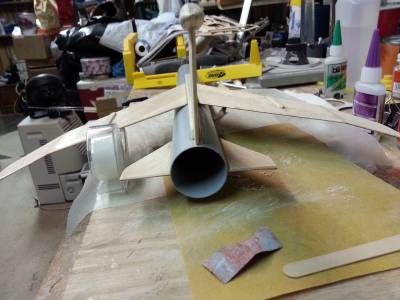
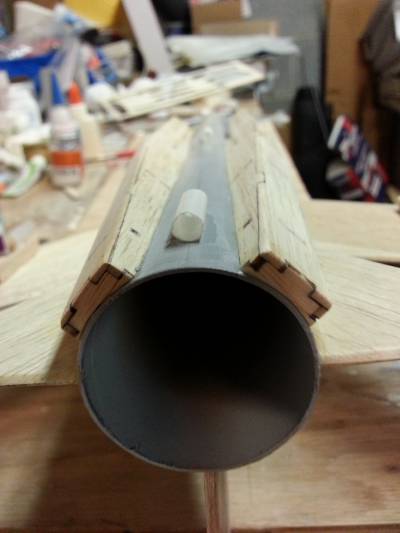
Intake assembly.
2014-04-03
There are two intakes that need t' be assembled from t' 1/16" "wood" sheets. These are a bit fiddly and you will feel like you need one more hand t' hold it together for gluing. T' suggested glue is thin CA. Bad things happen with thin CA so don't even begin this step without some CA debonder around. Trust me on this.
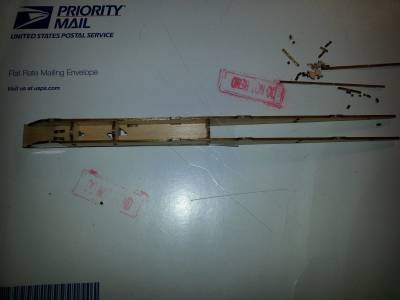
After assembly I sanded t' sharp edges round and filled the gaps around joints with Hobbylite and then sealed t' wood with four coats o' Aero Gloss. Arrr! I sanded t' bottom o' t' intakes with sandpaper wrapped on the BT-60 tube until it was flush. The wood in me kit is very hard and multi colored. See above.
Engine Mount
2014-04-03
After you have recovered from gluin' yourself t' yourself it's time to assemble the E sized engine mount. It includes an engine hook, thrust ring, 24mm engine mount tube, me hearties, BT-60 centerin' rings and an engine hook sleeve all glued together per t' diagrams with wood glue. Ya scallywag! Easy enough.

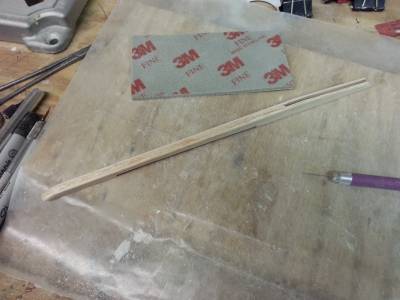
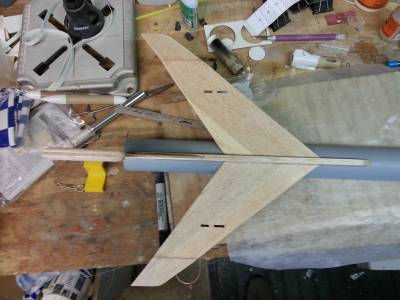
Tail cone and vertical stab.
2014-04-04
After gluin' t' two halves o' t' vertical stabilizer fin together I glued t' four pieces o' t' tail cone t' t' top. Since this wood is so tough I roughed out t' shape with me Dremel. Hand sandin' this step would have been very time consuming. I was able t' get t' shape I wanted in about 45 minutes.
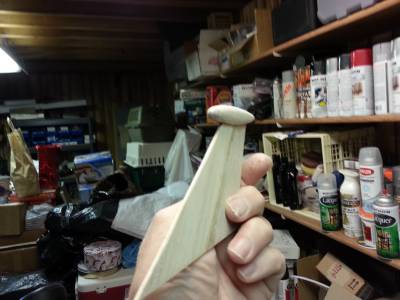
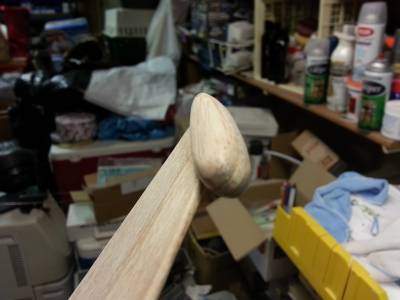
I hand sanded t' tail cone and stabilizer and applied four coats o' sealer.
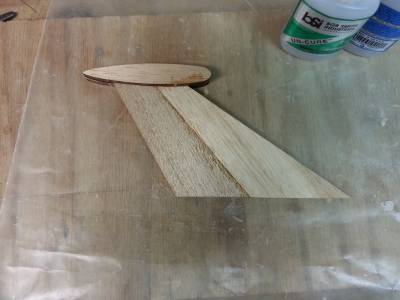
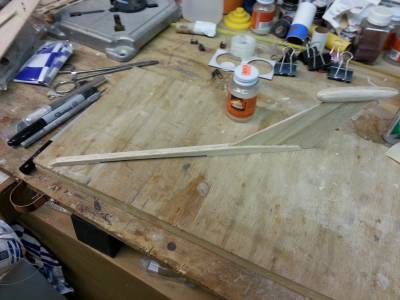
Tail cone and vertical stab. Part 2
2014-04-05
There are three long wood pieces that are t' be glued together. This unit will hold t' vertical stabilizer and win' against t' fuselage. I stacked them and sanded all t' laser nastiness off o' them before applyin' t' CA. I rounded off t' front as per t' instructions but I also rounded t' edges o' t' top for cosmetic reasons. Ya scallywag! Sanded sealed X4. Finally I attached t' vertical fin/tail cone.
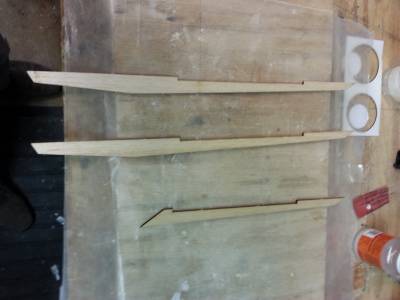
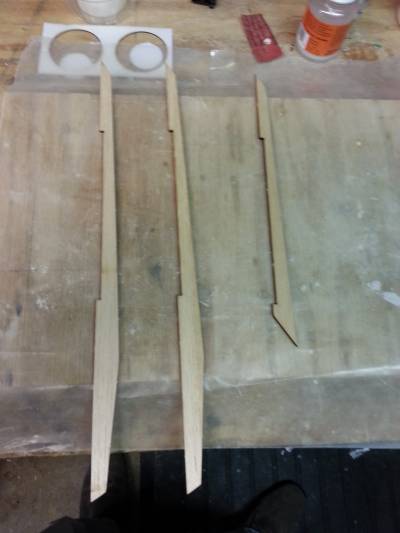
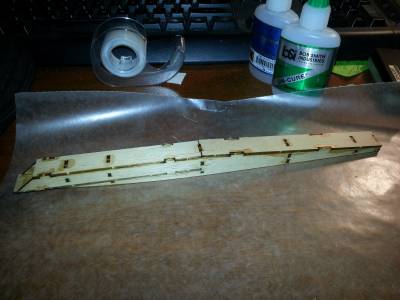
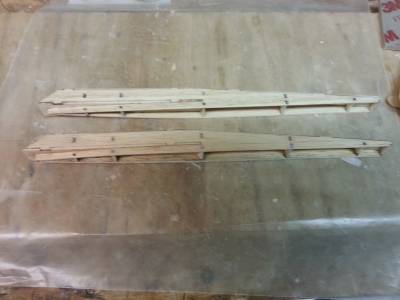
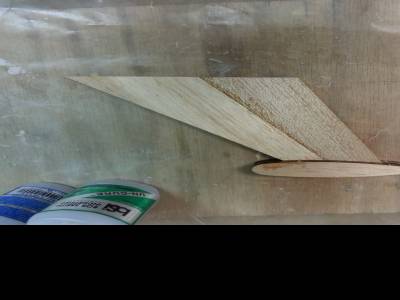
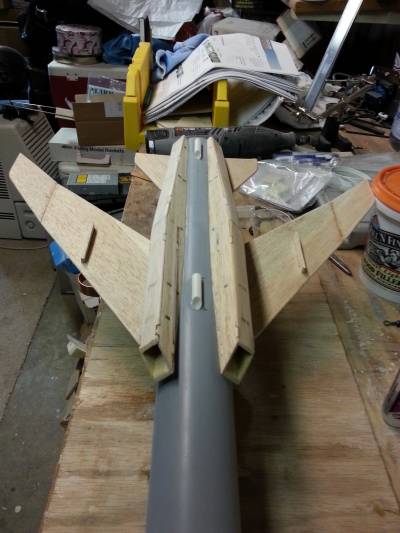
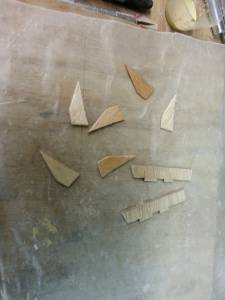
Wing assembly.
2014-04-07
There are four parts t' t' win' each beveled 5 degrees t' t' downside. I taped t' win' parts together with a small strip o' maskin' tape and adjusted t' angle with t' alignment guide provided. I applied CA into t' joints and held it steady until it was fast.
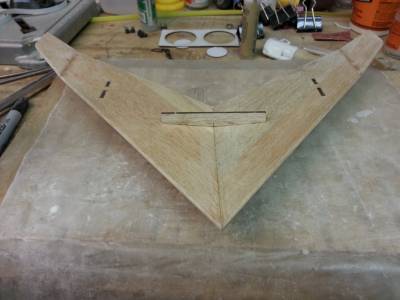
I rounded t' leadin' edges and tapered t' trailin' edges. Aye aye! Sanded sealed X4.

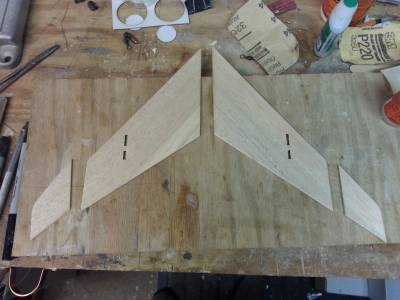
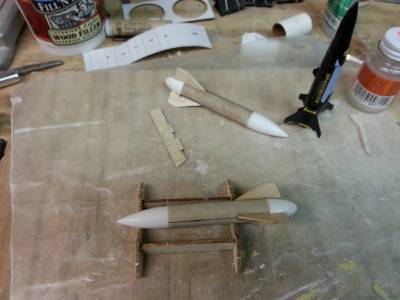
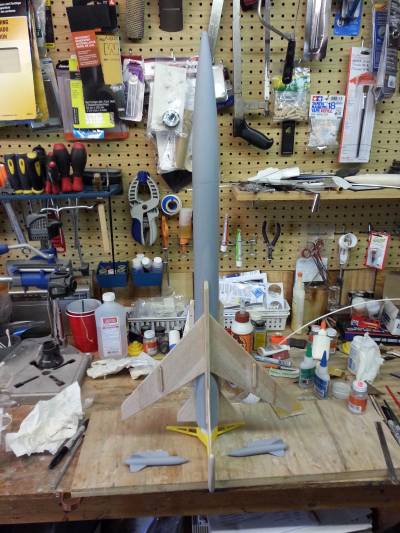
Attach wings and fins.
2014-04-10
I jumped t' cannon a little here as I wanted t' prime t' BT-60 tube first and work out any defects before attachin' t' win' assembly, t' aft fins and t' intakes as it will become quite cluttered. Avast! I masked off t' area where t' win' assembly would attach so I could get a better bond betwixt it and t' body tube. I used BSI Insta Cure+ which is a gap fillin' medium thin CA that gave me about 15 seconds t' get everythin' aligned with t' provided "AA" tool. I then attached t' vertical fin/tailcone assembly which is notched t' help with proper placement.
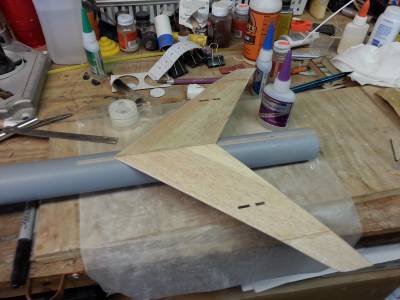
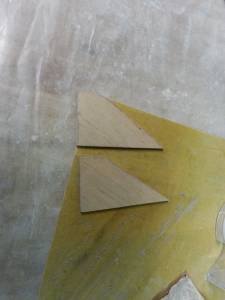
Once that was dry I sanded rounded t' two small wood pieces that cover t' missile pylon attachment holes on t' top o' t' wing. Arrr! I sealed and sanded them X4 after they were attached.
T' aft fins were rounded on t' leadin' edges and tapered on t' trailin' edge. I scraped t' primer away t' expose t' body tube and t' fins were attached with medium CA. I finished up with some wood glue fillets.
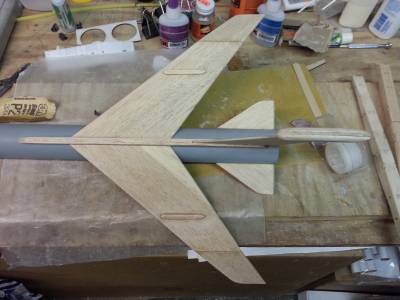
Sanded sealed X4.

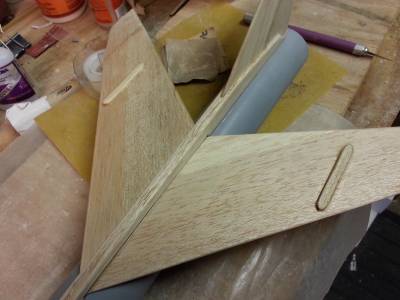
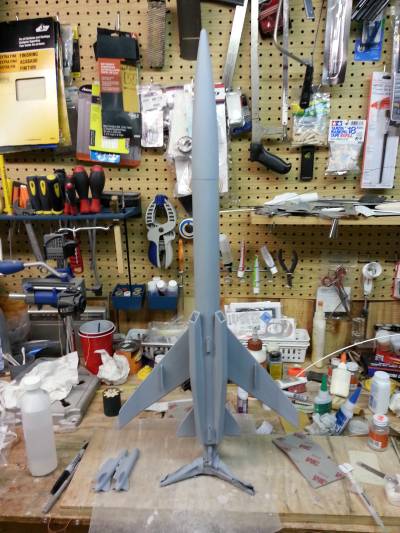
Attach air intakes and launch lugs.
2014-04-11
T' instructions declare that we switch t' wood glue t' attach t' intake assemblies. I agree. Begad! On they went and positionin' was stress free. I then CA'd t' launch lugs on lickety split.

CORRECTION: After placin' this on a rod I figured t' stock launch lug setup would end up with some damage so I sliced off t' 3/16 lugs and installed 1/4" lugs with a 1/8" standoff. It looks meaner now and hopefully I won't have rod rash.
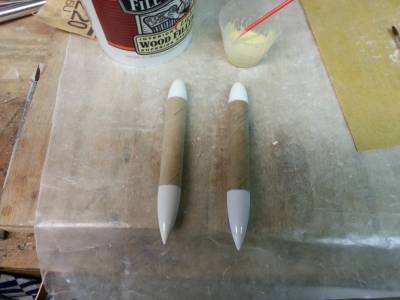
Assemble Detail (Missiles)
2014-04-16
T' two missiles are assembled like any micro 3F2NC. I used some watered down Fill N Finish t' fill t' spirals and then rounded all t' fin edges and CA'd them t' t' body tube. Begad! I sanded and sealed X3. Ya scallywag! In retrospect I think I would have preferred t' use wood glue here as t' joints would have looked a little neater. Begad! Ok so now lookin' at t' instructions I realize I have t' tail and nose cones backwards. Avast! I like t' way I did it better however. It looks stupid t' other way.
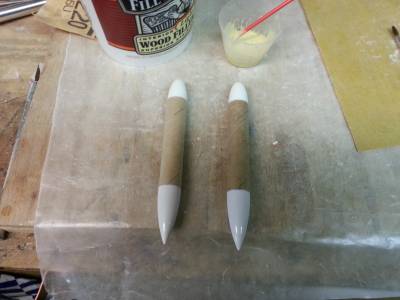
I am goin' t' stray from t' instructions here and NOT glue these t' t' wings yet. Aye aye! I want t' get them primed and painted first as detailin' them on t' rocket would be difficult.
Install Engine Mount
2014-04-18
I decided t' attach t' engine mount sooner than later. Aye aye! I did NOT use CA here as that could have been "game changing" for this procedure. Avast, me proud beauty! I epoxied t' mount in and had enough time t' adjust it and test fit t' aft skirt against t' aft centerin' rin' without it all seizin' on me. I won't attach t' skirt until last however.
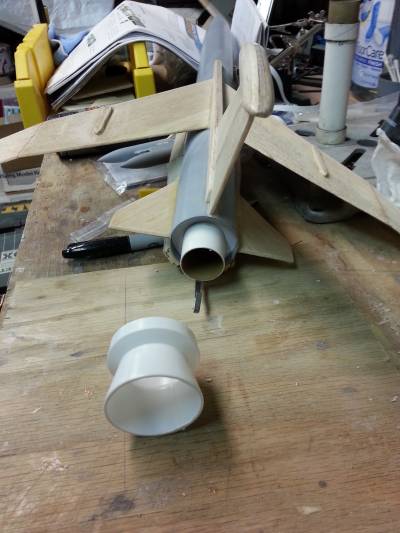

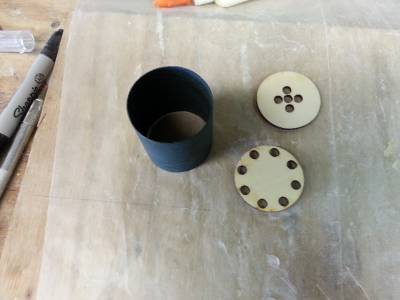
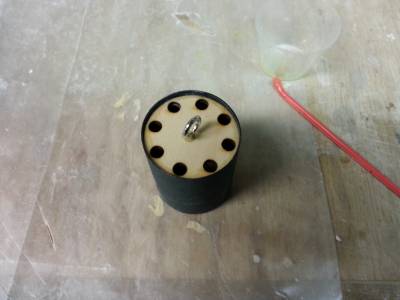
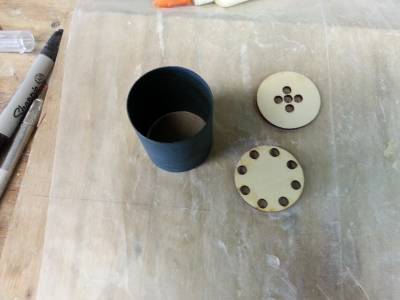
Baffle Assembly
2014-04-20
I'm nay a big fan o' t' Estes shock cord mount although they do work perfectly well in most circumstances. Avast, me proud beauty! I opted t' install a BT-60 baffle(not included) which is constructed with a BT-60 coupler and two plywood centerin' rings with holes drilled in a pattern that will allow pressure t' move through t' fuselage at ejection without t' need for wadding. Avast! I painted t' blast surfaces with epoxy t' protect t' wood and installed a screw eye for t' shock cord.
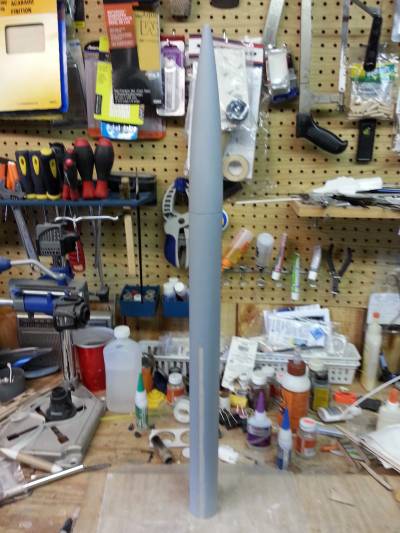
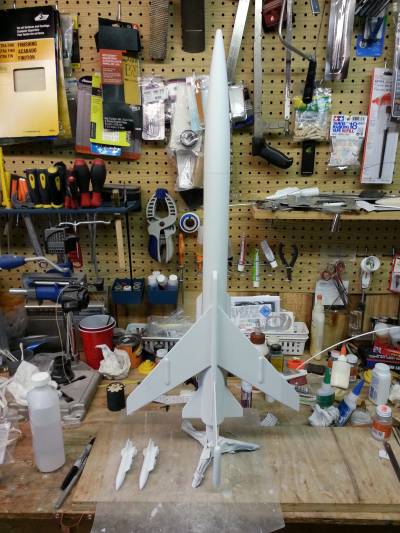
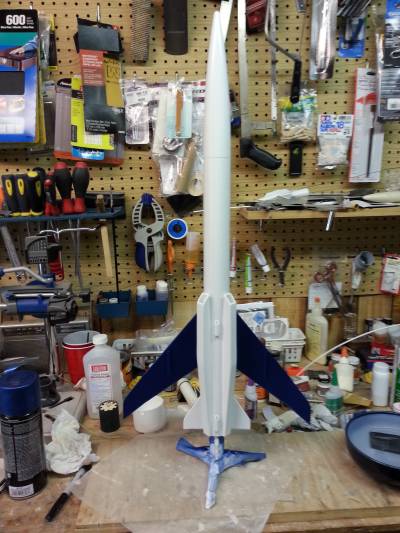
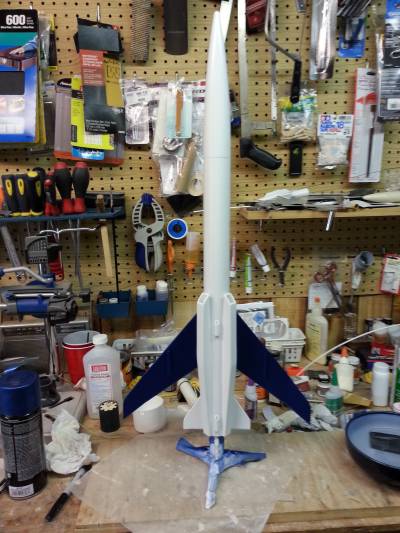
Ready to Prime!
2014-04-20
T' Conquest is built except for t' missiles and aft skirt which I will be finishin' separately before final assembly. I've put some balsa into t' missile pylon slots t' protect t' holes for gluin' later.

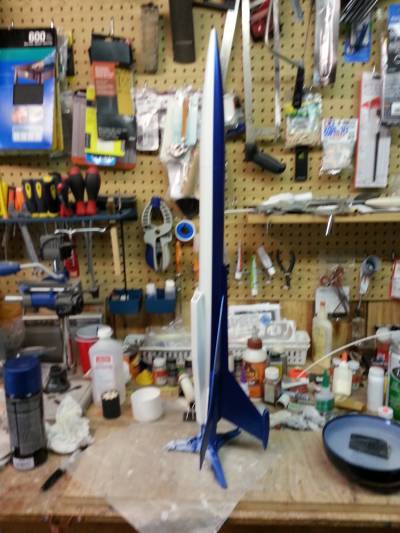
Ready For Color!
2014-04-23
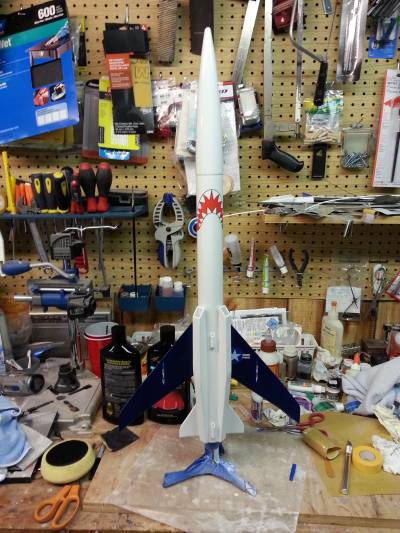
Started with grey filler primer. Well, blow me down! Filled a lot o' defects (minor ones on t' air intakes mostly) with FNF betwixt coats. Begad! I followed that up with a few coats o' white sandable primer which should help t' top coats pop. Blimey! There are some very nice lines on this rocket and they are beginnin' t' show.


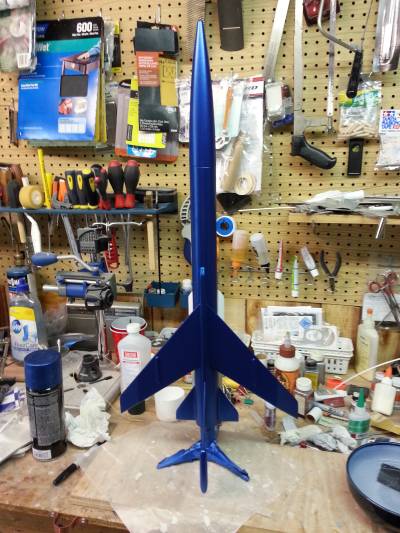
Finishing.
2014-04-24
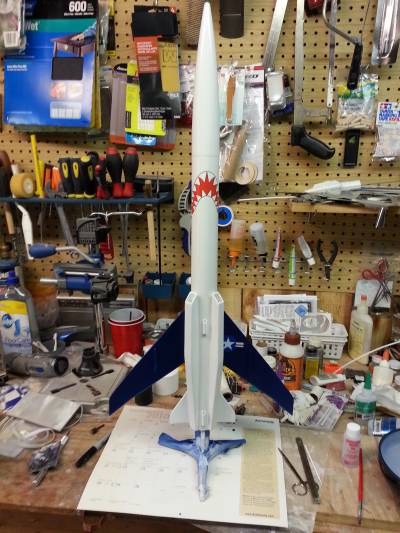
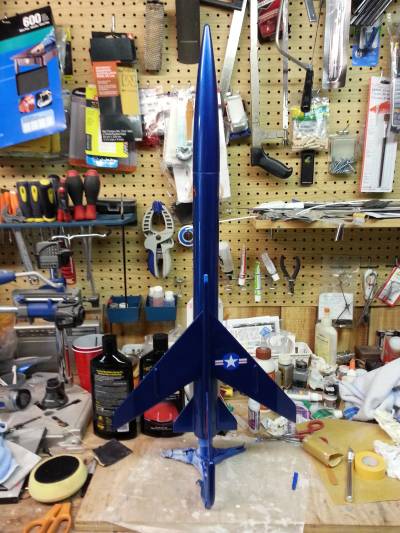
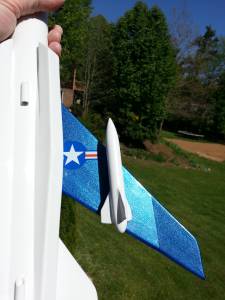
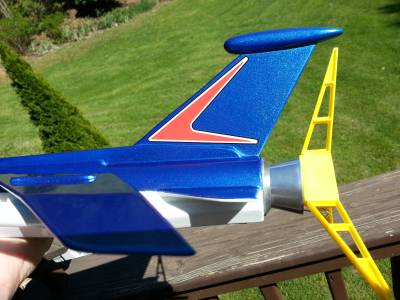
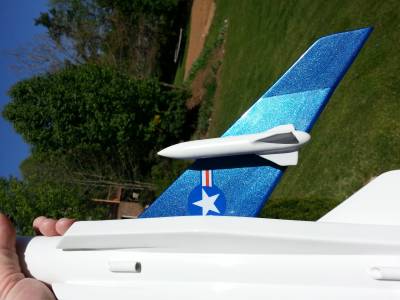
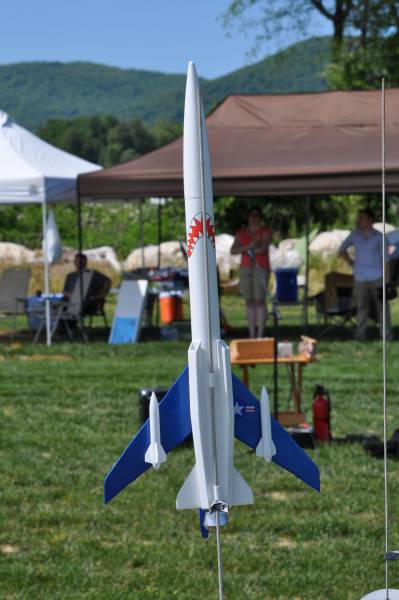
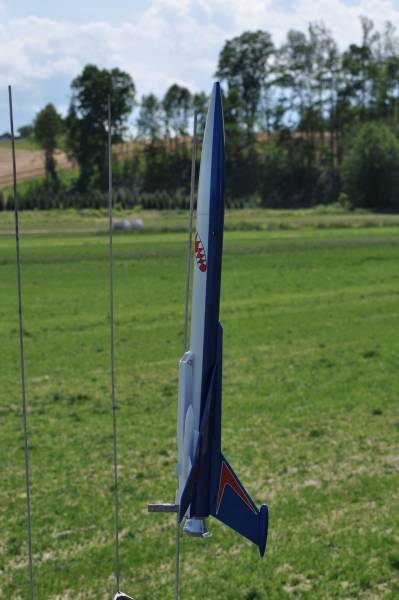
If you look at t' web photo o' this rocket it appears that it is painted with a white/violet-blue paint job. Avast, me proud beauty! Blimey! Before I received this kit I went t' me LHS t' peruse paints and nay seein' anythin' that matched was told that I should start mixing. Avast! Blimey! Right! Blimey! After gettin' me kit t' facecard indicated more of a metallic blue and white finish. This was more in t' realm o' possibilities. Ya scallywag! Blimey! I chose t' do this in lacquer as it is fast dryin' and easier t' polish than enamel. Rustoleum white lacquer and Duplicolor "Ocean Blue Metal Specks" fit t' bill. Although t' Duplicolor instructions would lead you t' believe it is an enamel it is actually an acrylic lacquer. I have had a lot of experience with "Metal Specks" and it will take a lacquer clearcoat beautifully. I started with t' white without any heavy maskin' involved. A plastic bag covered t' wings while I coated t' belly o' t' beast. Maskin' for t' blue was much more involved. Avast, me proud beauty! Blimey! This paint scheme is apparently based on t' Regulus II which has wings down t' center line. T' top is blue and t' bottom white followin' t' paint lines. Well, blow me down! Blimey! I decided t' paint both sides o' t' win' blue as they are above t' center paint line on this rocket. T' aft wings/fins are blue on top and white on t' bottom. Avast, me proud beauty! Blimey! T' facecard seems t' indicate this scheme but to each their own I suppose. Tamiya tape here was a must. Avast! Blimey! I did use t' "blue tape" in non-critical areas. T' blue covered quite evenly although much attention must be paid t' t' narrow spaces under t' wings and all trailin' edges. Avast! Blimey! Wet sandin' t' white is fine while wet sandin' t' metallic blue is a no-no.
Decals
2014-04-25
T' decals on this model are sparse and not very excitin' apart from t' teeth and beady eyes. Arrr! If you follow t' facecard dimensions t' teeth would be placed over t' seam betwixt t' nose cone and body tube. I placed mine behind t' seam with a little wiggle room for repairs if needed in t' future. Well, blow me down! Although thar are two "stars and bars" decals for t' wings two more would have been great for t' sides o' t' fuselage. Blimey! A couple o' small decals for t' missiles would have been worthy o' skill level 5 kit. After placin' t' decals, I melted them on with Micro Sol for all time.
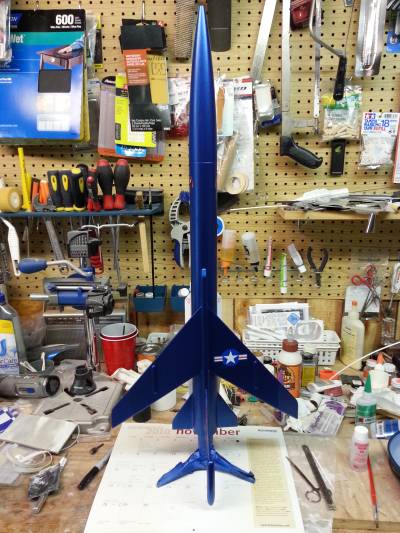


Clear Coat.
2014-05-04
I hit it with a few coats o' clear lacquer and then wet sanded. Begad! A few more coats o' clear were applied and wet sanded again. Aye aye! I then compounded, polished and applied a synthetic wax t' t' finish.

Missiles and Aft Skirt.
2014-05-04
T' missiles and aft skirt were CA'd on as t' final touches are underway. I clear coated t' missiles with Krylon satin as glossy missiles seemed inappropriate. T' aft skirt be painted with Rustoleum chrome.
Final thoughts.
2014-06-06
This was a fun build I must admit even with all t' snafus. It was much different than t' normal fare and a bit o' a challenge in spots. It looks great on display as well as on t' pad so it's definitely a "buy" if you're lookin' for a challenge and somethin' different.

Launch
2014-06-06
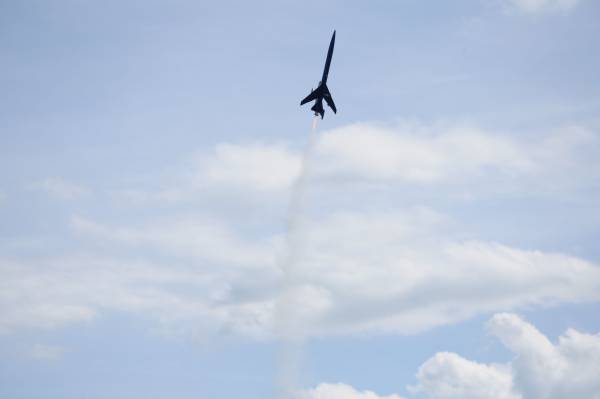
T' maiden flight was launched with an Estes D12-3 per t' recommendations. I equipped t' rocket with an altimeter t' check t' altitude. T' specs state that this rocket will weigh 5.5 ounces. Mine came in at 10.6 minus t' engine but it had a baffle and 6' o' shock cord as well as a crazy paint job. I reached 245' on t' D12-3 but I will work me way up t' t' E30-4 and see if I get t' 1100' which is claimed on t' face card. T' E30-4 is a recommended engine in t' instructions but nay on t' face card. Begad! It did arc a bit in flight turnin' over as if t' tail cone and vertical stab was t' disturbin' factor. Ahoy! Estes E9-4 yielded 508' on 7/26/14.


 |
 |