Der Shred Max
By Bas Dickson Leach
2013-08-31

This is a stock BT60 Der Red Max kit modified t' take a 29mm MMT.
T' other changes from stock all come from t' requirements o' mid/high power engines on t' Estes kit.
Initial planned changes - Through t' wall fins, Pro Series II motor retainer. Aye aye! Blimey! Also lookin' at streamer recovery and possibly radio trackin' as it sims out t' several thousand feet... Well, blow me down! Blimey! Nay plannin' t' reinforce t' fins externally yet. I will see how much flex thar be after t' internal fillets are done as I want t' keep t' weight down ( due t' streamer recovery).
Step 2
2013-09-04
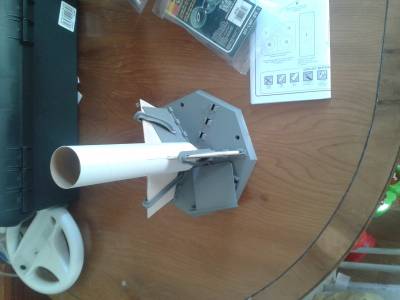
Cut some fin slots and mounted t' fins t' t' fin can, cut t' slots t' allow t' fin can t' be slid into t' body tube. Begad! Lookin' at t' spaces inside I have decided t' do some nose cone adaptations based around me big daddy conversion, me bucko, involvin' cuttin' off t' shoulder and mountin' an attachment point in t' tip o' t' nosecose.
T' fins have been tacked semi seriously in place with yellow glue and once they are dry epoxy internal fillets will be put in. Ahoy! Either that or some gorilla glue.

Nosecone attachment
2013-09-04
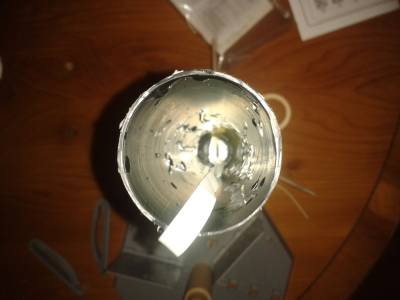
Nosecone attachment point has been created out o' some epoxy and a small steel curtain hook.
First I cut t' nosecone shoulder off and then scratched t' inside o' t' tip o' t' nosecone. I tied t' stock elastic t' t' curtain hook, nay worried about heat damage as t' elastic will be attached t' t' nosecone and then a flameproof streamer will wad up and protect it. T' other end will be flameproof as it attaches t' t' motormount/bodytube.
T' curtain hook is then lowered into t' nosecone and epoxy poured over it. Ahoy! T' curtain hook is in a double J shape, ya bilge rat, t' elastic is tied t' t' top and t' bottom o' t' J is under t' epoxy. This should give a strong attachment. I have used a similar set up in a modified Big Daddy with only one failure (which was a knottin' issue) in almost a dozen flights.

Most of the way there
2013-09-08
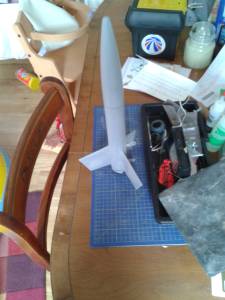
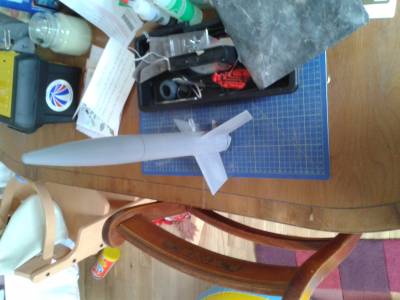
Managed a couple o' days doin' bits and pieces. Arrr! Ended up doin' internal foam Gorilla glue t' t' motor mount/fin can assembly. This was followed by external expoy fillets. This should give enough strength t' t' fins and rigidity t' avoid flutter destruction.
Keelhaul®©™ from an upper centerin' rin' t' a D ring, Flameproof streamer all installed and attached. Then managed t' get t' first coat o' primer on and sanded smooth. Second coat will wait for t' heavy rain currently beatin' down outside t' finish.
Decided on Rail buttons given t' size motors this will be flyin' also as lugs if needed will be easy and quick t' attach at t' flyin' field, and also I can't wait t' see how ridiculous this looks on t' HPR rails...
Also tried somethin' I've nay done before but wished I had on a couple o' me other balsa finned rockets and took some extra epoxy and gave a coatin' t' t' fin edges along all sides. This should hopefully protect a little against dings from t' nosecone and landings.
Mostly Done
2013-09-12
Apologies for no photos. Ya scallywag! Life got a bit hectic and I've had t' pack t' rocket away for a bit. Paint is done but might give nosecone another try. Decals are on and I think they are ok. Well, blow me down! I tried t' "Shred" t' lower decals a bit, and while it looked ok on t' paper it isn't really noticeable on t' rocket.
Also when all packed came in at 126 grams, but t' COG be a little far back for t' F/G motors I was thinkin' o' usin' so some lead shot and epoxy has been added t' t' nose t' brin' that forward.
Pics and flight posts once it has been done!
 |
 |