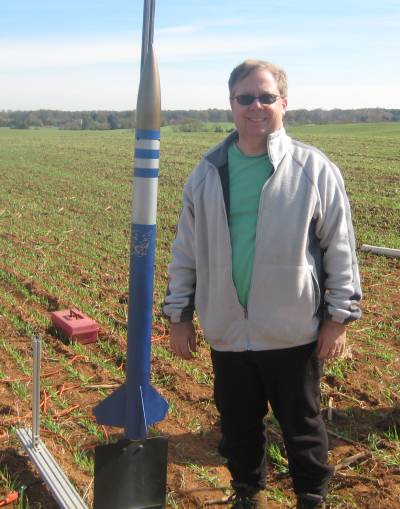
Dual deploy conversion for Bobcat Special
By Gene Wolski
2012-04-15
When I originally built t' Bobcat Special, I planned t' eventually convert it t' dual deployment. This build steps through t' conversion process.
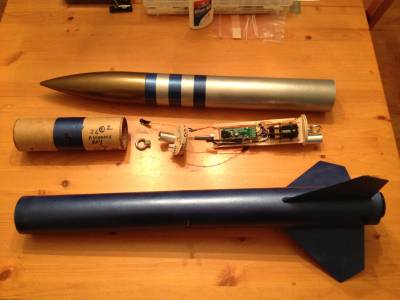
Bobcat Special - single deploy version prior t' conversion:

Avionics Bay
2012-04-17
Since t' rest o' t' rocket was scratch built, I decided t' make me own avionics bay. I used t' following:
- LOC 3" airframe (2" section) for t' switch band
- LOC 3" tube coupler (8" total) for t' avionics bay body
- LOC 3" tube coupler (7 5/8") for reinforcement
- LOC 3" bulkplate (2)
- LOC 3" coupler bulkplate (1)
- 1/4" allthread (9 1/2")
- 1/4" eye nuts (2) plus regular nuts and washers
- Key switch (1) from Aerocon systems
- Altimeter wirin' kit (1) from Dog House Rocketry
- 1/4" launch lug
- plywood altimeter sled
- 4/40 PEM nuts (2) for payload attachment points
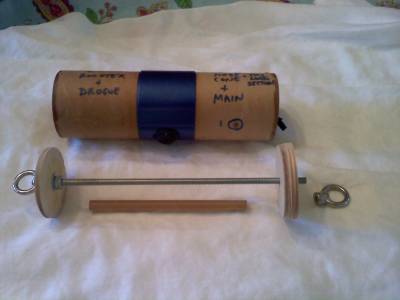
I first cut two 4" sections o' tube coupler and joined them usin' t' switch band. I then cut sections out o' t' remainin' tube couplers until they fit inside t' first tube coupler assembly - spaced evenly from either end. I then mounted a coupler bulk plate t' a regular bulk plate for t' main/payload end cap. I simply used a coupler bulk plate for t' drogue/booster end cap. T' threaded rod be cut t' length and t' eye nuts used t' hold this assembly together.
With t' body o' t' avionics bay assembled, shiver me timbers, I then drilled a hole for t' key switch. After solderin' t' switch lead, I used Gorilla glue t' secure t' switch and t' seal any gaps.

New payload section
2012-04-19
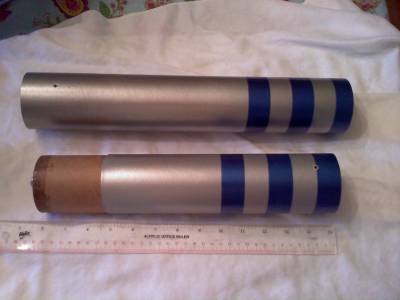
With t' avionics bay mostly complete (I'll come back t' t' altimeter sled and wirin' in another post), ya bilge rat, I moved on t' makin' t' new payload section. I started by measurin' t' shoulder on both t' nose cone and t' avionics bay. Don't forget t' include your eyebolt/attachment point in t' nose cone shoulder measurement! T' that measurement, I added enough room t' hold a chute, arrr, shock cord, and chute protector. I then cut and painted t' new payload section in t' same style as t' original. I then mounted t' payload section on t' avionics bay and drilled clearance holes for 4-40 screws on opposite sides. I then enlarged t' holes on t' avionics bay and glued 4-40 PEM nuts on t' inside t' anchor t' attachment screws.
New payload section on top - original below:

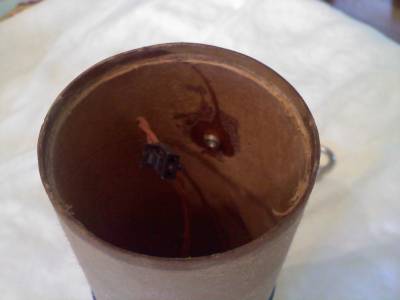
Inside o' avionics bay showin' one PEM nut attachment point:
Finished the avionics bay!
2012-10-09
Finally finished t' avionics bay and installed t' Adept22 usin' mountin' hardware from Adept. I also used their wirin' harness but customized t' deployment charge ends. One end goes directly t' a terminal block and t' other goes t' a quick disconnect wire. T' altimeter powers up nicely usin' t' switch, matey, and a quick vacuum test usin' christmas tree lights verifies that everythin' is workin' as planned. Next step is t' install t' recovery harness and then ground test.
You can also see from t' photo that I installed Blastcaps for t' ejection charges - I really like these charge holders!

First Flight
2014-03-08
T' Bobcat Special finally flew at Battle Park on 3/2/2014. I used an Aerotech I245G reload in at 38/480 case and 38mm Reload Adapter System with one spacer. For ejection charges, shiver me timbers, I used Quest Q2G2 igniters and black powder in t' Blastcaps. I topped off each with a bit o' waddin' and maskin' tape t' secure t' charges.
T' launch went really well - great green flame on t' I245G, me hearties, especially on a nay so bright day. However, t' nose cone popped at apogee (3560ft), and I had a long, long walk (includin' navigatin' 3 cow fences) t' finally recover t' rocket. T' neon pink parachute was a lifesaver - I don't think I would've spotted t' rocket without it. I did get a 6" zipper in t' payload tube (pic t' be posted soon), ya bilge rat, but otherwise t' rocket was in great shape.
Lessons learned? Shear pins are your friend! I have them in all o' me larger rockets, but I will install shear pins once I cut and fit t' new payload section. In hindsight, t' nose cone fit was marginal at best.
 |
 |