Estes Expedition (7249)
By Steve Lindeman
2019-12-30


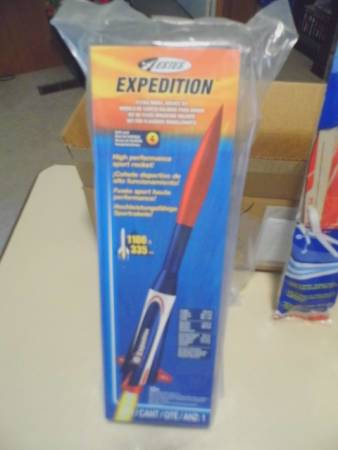
Expedition (7249)
I can hardly believe that I finally got this kit. This is one o' three rockets that I got for Christmas. Aye aye! This is goin' t' be such a great build, only draw back is that I have all winter t' build it. OK parts check. Blimey! All present and accounted for.

Parts check
Engine Shroud & Engine Mount
2019-12-31
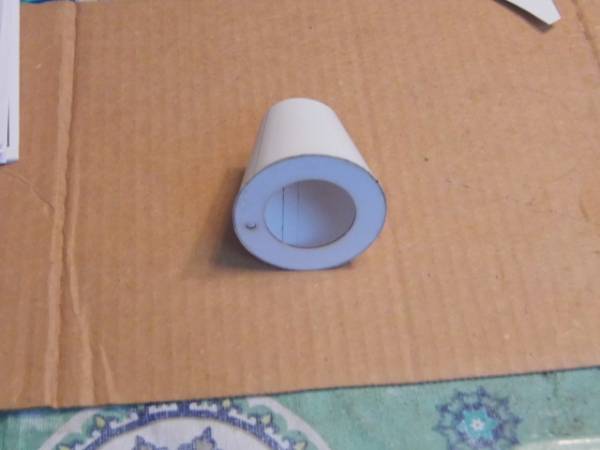
As is typical with Estes kits t' engine mount is first part o' t' rocket build. Begad! So after completin' t' the engine mount, t' shroud was next. There are four steps in t' shroud assembly. I did t' first three and a half steps but before gluin' part "K" into place I took a magic marker and colored t' inside o' t' shroud.
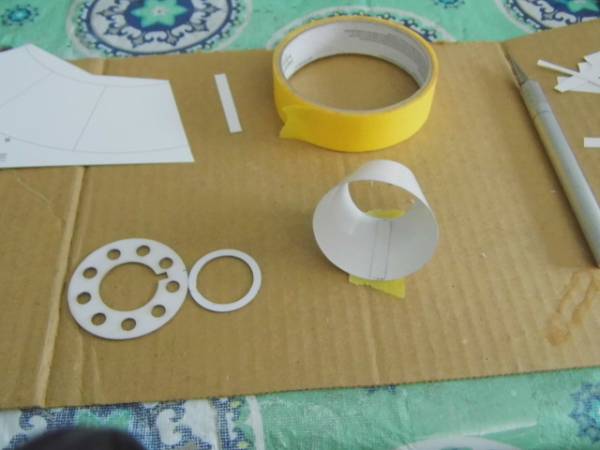
Engine shroud assembly
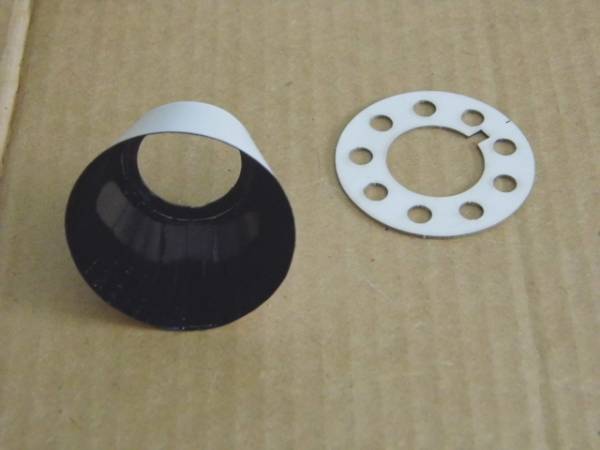
Shroud colored
For t' rest o' t' engine mount thar are 12 steps which I completed per instructions.
Completed motor mount

Upper Body Shroud
2019-12-31
Next up be t' Upper Body Shroud. Blimey! This is another quick four step process which I did as per instructions.

Upper body shroud
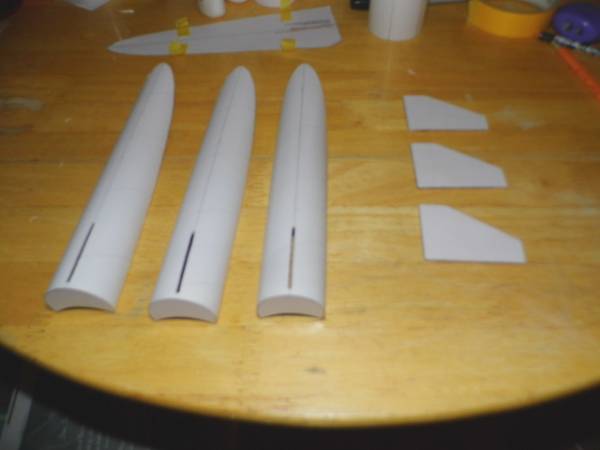
Marking Tubes & Cutting Out Farings
2020-01-11
T' next part o' t' build is thirteen steps. T' first four are markin' t' center line for each o' t' farings. Begad! I then cut out t' template and taped it on t' tube which took care o' steps five through seven.
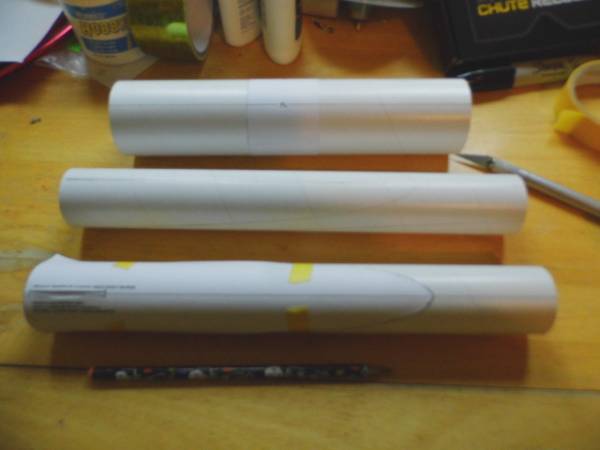
Tubes marked
After that I took and exacto knife with a new blade and cut out t' farings. I decided t' go ahead and cut four just in case I had a problem with one o' them.
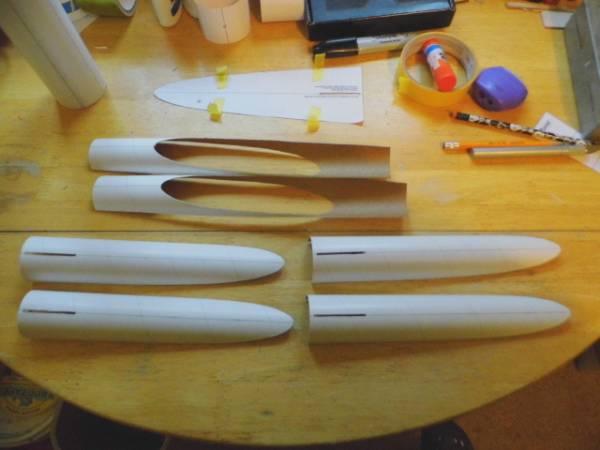
Farings cut out
T' last three steps involve gluin' t' end caps on each tube.
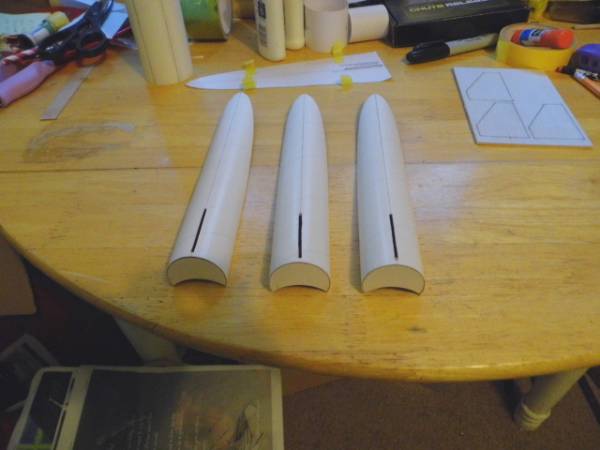
End caps glued on

Prepare Fins & Attaching
2020-01-11
Next up was fin prep which is one o' two slight alterations that I made t' this build. Aye aye! All I did was t' paper coat t' fins after I cut them out and sanded them.
Fins paper coated
After allowin' t' fins t' set over night t' next thin' I did was t' mark t' main body tube and glue t' fins on.

Fins glued on

Attaching Farings
2020-01-11
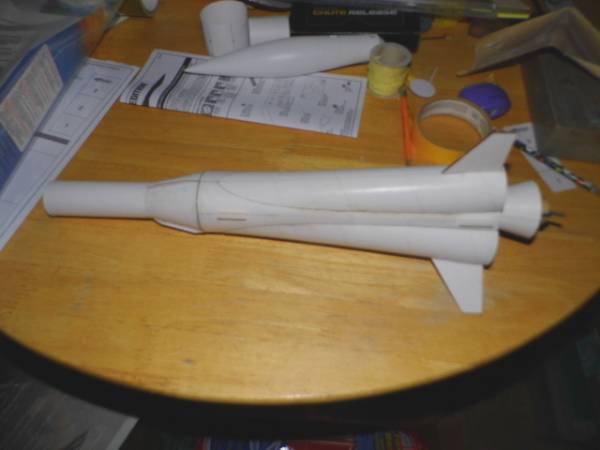
There are only three steps t' this part o' t' build but this is where I encountered me first issue with t' build. I tried gluin' t' first farin' on with wood glue. What a mess I made. Will have t' do a lot o' sandin' and primin' t' get a smooth finish here. Arrr! Glued t' other two farings on with white glue with better success but will still have some clean up work t' do. Ahoy! Over all, I nay t' happy with me work on this part.
Farings glued on

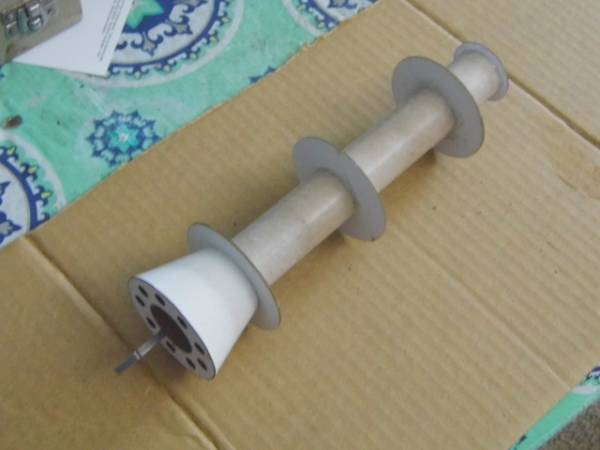
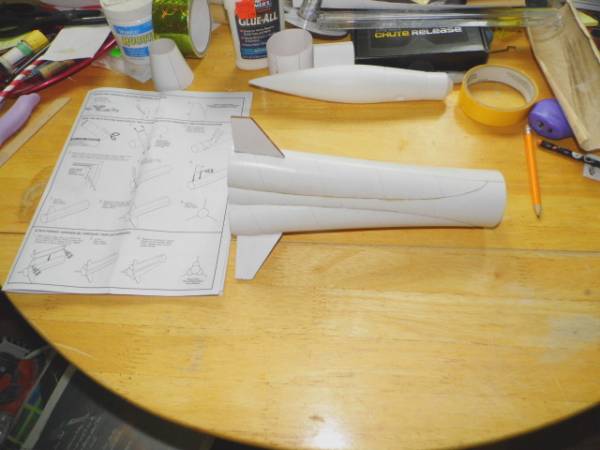
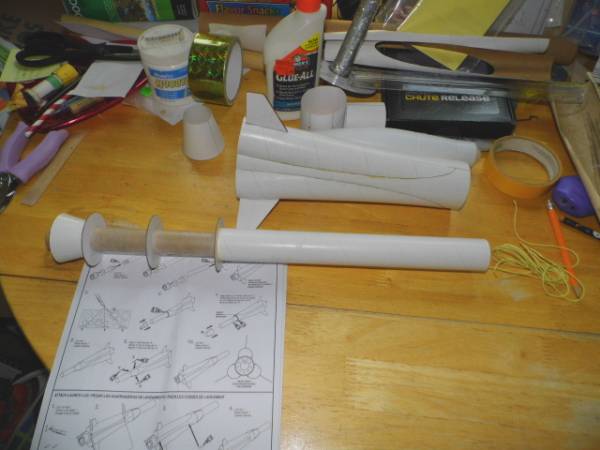
Install Engine Mount, Upper Shroud, & Launch Lugs
2020-01-11
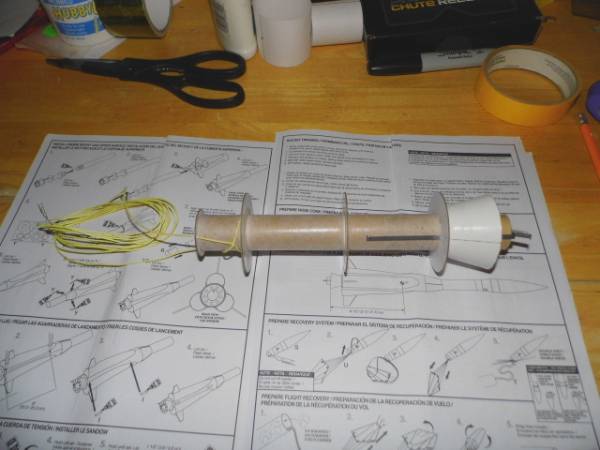
This is where I made t' second alteration t' this build. Pryor t' doin' step one o' t' instructions, I drilled a 1/16" hole in t' top "O" rin' and attached eight feet o' Keelhaul®©™ cord. Begad! I then glued tube "X" t' t' motor mount.
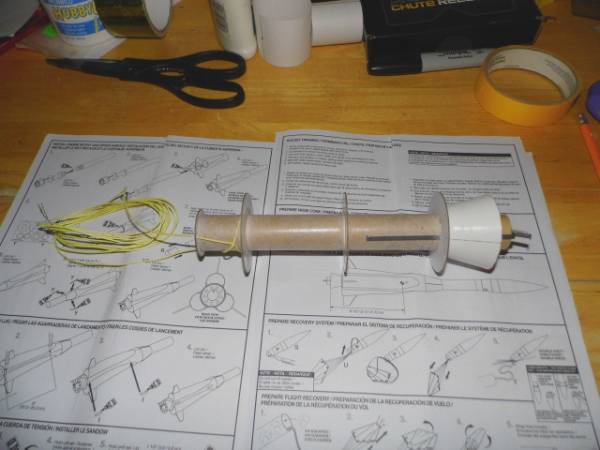
8' o' Keelhaul®©™ attached
MM ready t' install
Once all that was dry I then installed t' motor mount followed by t' "Q" rin' and then t' upper collar. Avast, me proud beauty! This was then set aside for t' day t' dry. Once they were dry I glued on t' small strips marked "Y" in t' instructions. Avast, me proud beauty! After that I glued on t' launch lugs.
MM, upper shroud, & launch lugs installed
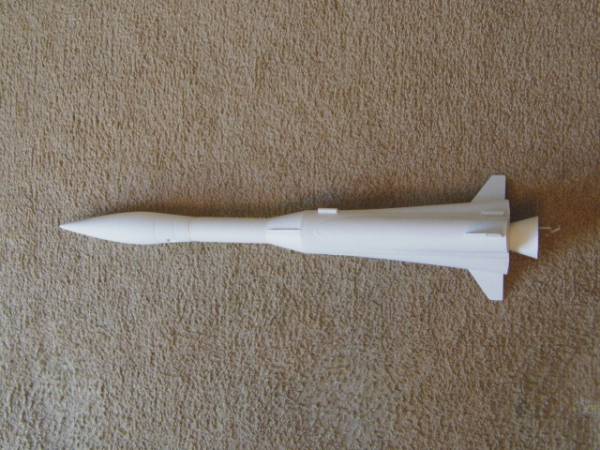
All that's left now is t' prepare t' nosecone and this rocket is ready for sand and prime which won't happen till sprin' weather permits.
Ready for sand & prime
Primmer time
2020-02-23
Well weather finally got up t' 53 degrees today so I decided t' try and do some primer painting. Ya scallywag! I have four other rockets beside t' Expedition that need primmer so will see how they turn out.
Expedition primed

Coronavirus time
2020-03-28
Well I need t' get t' t' store and get some red paint for this build but with everythin' shuttin' down due t' t' virus don't know when that will be. Michigan is basically under a lock down now so no travel except for necessities and I don't think I can convince them how necessary paint is. They say it could be mid July before things get better. I pray for t' world.
Painting & Masking
2020-04-06
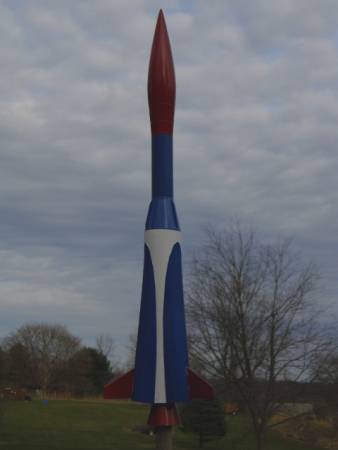
Well I managed t' rummage around out in t' garage and found some red paint. A can o' Dupli-Color Metalcast Anodized Surface Color System. Arrr! But instead o' applyin' it over a chrome surface I used it over white primer. In other words, ya bilge rat, it doesn't quite have t' metallic red look. Aye aye! I think it looks more Candy Red. Aye aye! As you can see in t' photo I also painted t' Estes Puma t' same color and finished buildin' it ahead o' t' Expedition. Actually these were two o' five builds that I had goin' on. T' other three were t' Estes Red Max (which also got painted with t' same red paint), t' Estes Lynx, and t' Estes Goblin all o' which were finish ahead o' t' Expedition (I've managed t' keep busy durin' this down time.)
Red paint applied
I then gave t' rocket a day t' dry and then masked it off again in prep for t' blue paint. Begad! This I did with Rust-Oleum 2X Gloss Deep Blue. Aye aye! Rocket be then given another day t' air dry. After that I again masked off t' blue sections and shot remainder o' rocket with white primer followed by a coat o' Gloss White. Well, blow me down! Sorry but I forgot t' get a photo here. Begad! Body was given another day t' air dry and then all tape was removed. Need t' do some touch up t' t' red and blue with a small brush and then it will be time for decals.
Blue paint applied
Just needs some touch up
Touch-up and Decals
2020-04-18
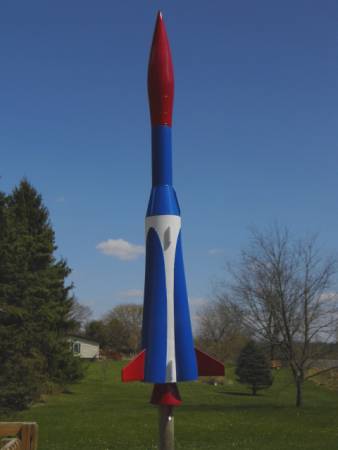
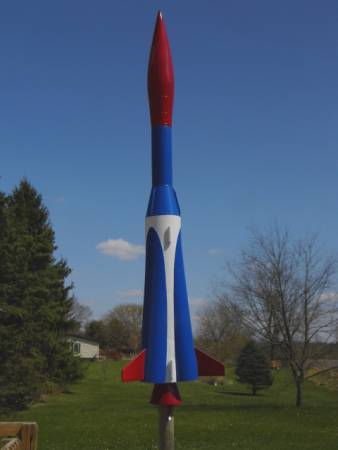
Made a trip t' Wal-Mart t' other day and picked up some detail brushes so I could touch up t' paint on this build. I first touched up all t' blue, then t' red, followed by t' white. Satisfied with touch up work I gave rocket a couple hours out in t' sun t' dry. Ya scallywag! After that I cut out all decals in preparation for applying. Ya scallywag! Normally I don't have much trouble with decals but these were thin and hard t' work with, shiver me timbers, especially t' red arches over t' blue side tubes. Avast, me proud beauty! All total, I managed t' tear t' decals in three places but pieced them back together good enough that they are hard t' see. Ahoy! All that is left now is t' install t' recovery system and clear coat it.
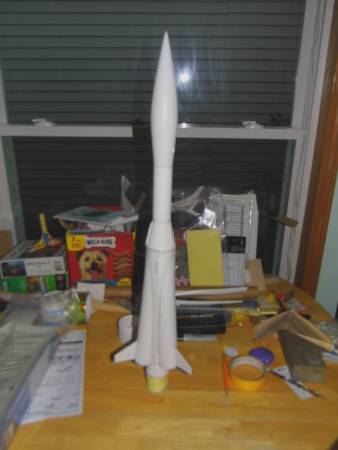
Touch-up paint finished
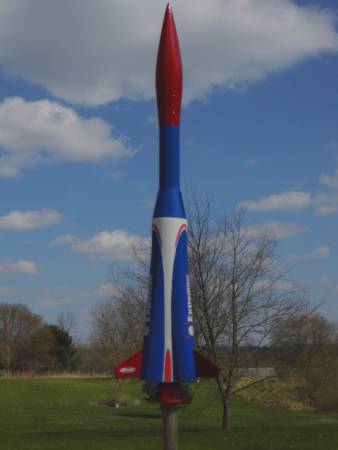
Decals applied
 |
 |