Estes Laser Lance (3218)
By Steve Lindeman
2015-10-05

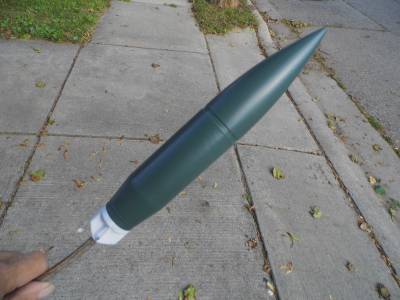
T' "Laser Lance" looks like a military styled guided missile. Estes started releasin' this kit in t' summer o' 2011 and me decal sheet was stamped 12/09/11 makin' it one o' t' early kits. Blimey! This rocket is 20.3" long with a dia. Avast! o' 1.64" and an estimated wt. Ahoy! o' 2.8 oz. Recommended engines are: C11-3*, C11-5, shiver me timbers, D12-5, matey, D12-7. Altitudes up t' 925 ft. Begad! This be another rocket that I scored direct from Estes on thar last clearance sale. My only regret is that I didn't buy more o' these. At $3.79 a piece I should have bought at least a half dozen (original catalog price was $16.99).


Components
2015-10-05
Components are standard Estes materials and consist o' t' following:
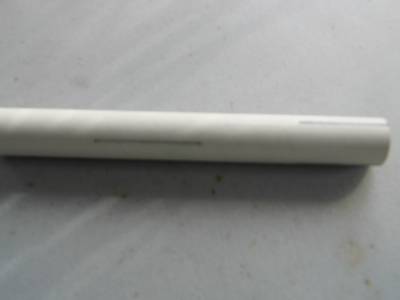
A - 1 Engine Mount Tube
B - 1 Green Split Adapter Ring
C - 1 Black Engine Hook Retainer
D - 1 Engine Hook
E - 1 Engine Block
F - 1 Green Adapter Ring
G - 1 Body Tube (BT-55) 10.75"
1 Laser Cut Balsa Sheet
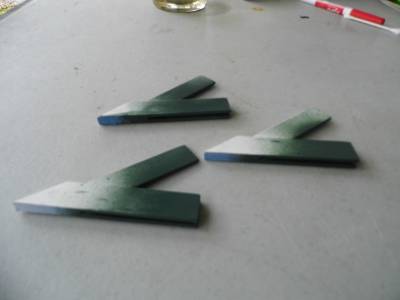
H - 9 Fins
I - 3 Fin Spacers
J - 1 Launch Lug Stand-off
K - 1 Launch Lug
L - 1 Tube Adapter
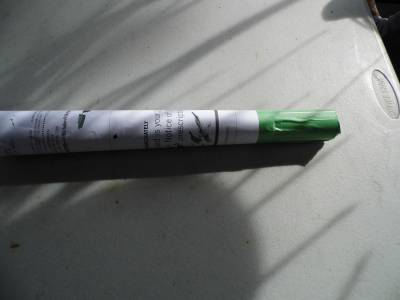
M - 1 Body Tube Nose Section (BT60) 3.25"
N - 1 Nose Cone
O - 1 Shock Cord
P - 1 Preassembled Parachute
1 Decal Sheet
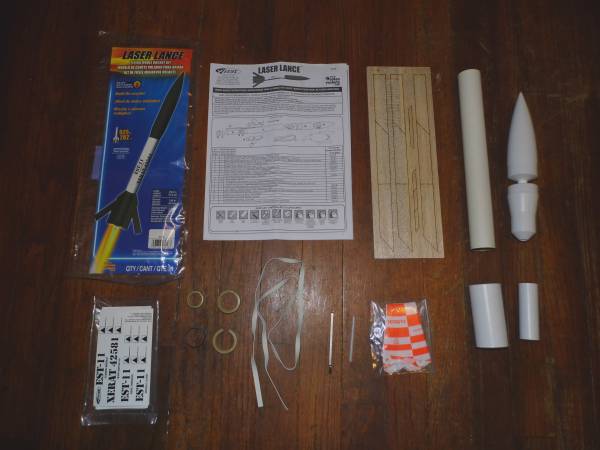
Parts layout

Actual construction
2015-10-05
Actual Construction began almost two weeks ago but it has taken me this long t' decide if I wanted t' post this one or nay as I didn't take all t' photos that I should have. Ya scallywag! This be because at times I spent more time paintin' and buildin' than takin' photos plus I lost a number o' photos due t' operator error (inserted wrong memory card in camera). By rights this should have been only a two or three day build but because t' fin assemblies are unusual they were a bit difficult t' paint and I had some minor issues with them. Unlike most estes builds, shiver me timbers, this kit has you start by sandin' t' balsa wood and cuttin' out t' fins instead o' doin' t' motor mount first. I however started with t' MM as this was t' one area that I be goin' t' modify. From this point on I merely referred t' t' instructions for reference as I jumped around a bit.
Motor Mount
2015-10-05
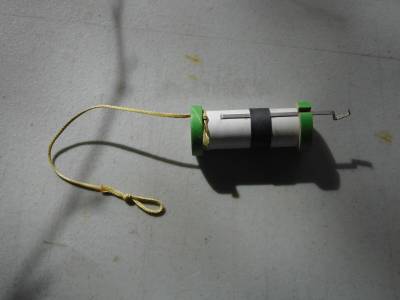
This be t' one change I made t' this build. Begad! I cut a small V notch in t' top centerin' rin' (F) before gluin' it on and tied 12" o' Keelhaul®©™ around t' MM and then slid t' rin' over it and secured it with yellow wood glue. I then tied a loop in t' opposite end t' attach 5' o' 1/4" elastic for NC and parachute assembly. Well, blow me down! I then checked t' length o' t' Keelhaul®©™ by insertin' it into t' BT-55 tube t' make sure it did nay extend past t' end o' t' tube. Begad! Once satisfied with t' length I ran a large bead o' wood glue around t' back side o' top rin' t' seal it all up.
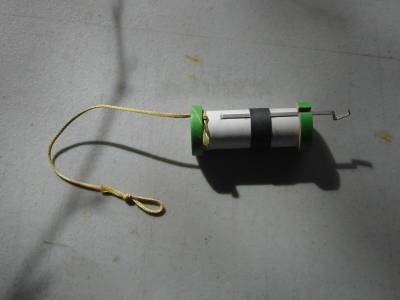
Laser Lance Motor Mount
Fins
2015-10-05
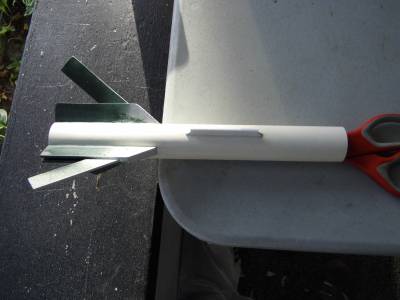
At this point I started on t' fins. T' first step was t' grab a clean sheet o' printer paper and a glue stick t' use on all balsa parts and paper coat them (these were t' first set o' photos I lost). Begad! Each balsa piece be treated with t' glue stick on one side and then attached t' t' white paper. They were then cut out with an exacto cutlass and t' process repeated on t' other side. Ahoy! After that t' fins were glued together. This was t' first o' several hurdles I had t' overcome. I used a small plastic clamp t' hold t' pieces together at t' front o' t' fin and then slid a scrap piece o' balsa in t' back part o' fins and held it together with a clothespin. Ahoy! After all three fins were assembled they were set aside t' dry overnight.
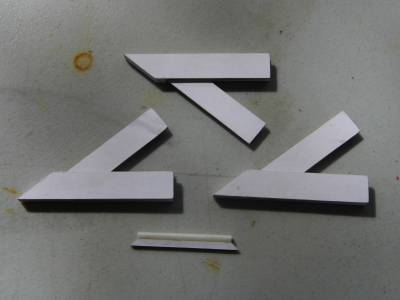

Fins paper coated & assembled
While they dried I grabbed t' main BT-55 and marked it for all three fins and t' launch lug (another lost photo).
T' followin' day I did t' next step in t' instructions and wrapped a sheet o' 320 grit sandpaper around t' main body tube and sanded t' bottom o' t' fins t' match t' curve o' t' body tube. I then took 400 grit paper t' t' edges o' all fins and smoothed them out. Ya scallywag! Next I masked off t' bottoms o' t' fins and opened up t' slots with an exacto knife. I did this in hopes o' bein' able t' spray paint betwixt t' fins. Blimey! I then measured t' bottom openin' o' t' fins and marked them accordingly on t' BT-55 tube for all three fins.
BT-55 marked (sorry for t' fuzzy photo)
Initial Priming
2015-10-05
Next up I did t' initial primin' o' t' fins. Begad! These were done one side at a time with Rust-oleum 2X white primer and then allowed t' dry outside (yet another photo I lost). Blimey! I followed this up by maskin' off t' BT-55 tube for t' green paint betwixt t' fins as I knew this was goin' t' be another problem area t' paint once t' fins were glued on.
BT-55 masked off
Nose Cone Assembly
2015-10-05
I next moved t' t' NC assembly. Nose cone and Tube Adapter were separated with a hobby saw and then t' ends sanded smooth along with t' mold lines. Begad! Plastic modelin' glue was used t' glue t' tube coupler (L) onto one end o' t' BT-60 tube but nay t' NC. T' NC I friction fit with green painters tape as I plan on usin' this rocket t' pull double duty and serve as a payload rocket as well. Well, blow me down! After glue dried I went over t' slight gap betwixt Tube Adapter and BT-60 tube with Hobby-Lite and then set it aside t' dry for an hour or so before sandin' it smooth.
NC Assembly prior t' painting
NC assembly was then given two heavy coats o' Rust-oleum 2X white primer and allowed t' dry overnight. Aye aye! T' next day I sanded it down smooth and gave it another light coat o' primer. NC was then set up outside t' air dry and I jumped back t' t' fin assemblies.
Green Paint Added
2015-10-06
Here is where I encountered me biggest hurdle. Begad! As I said I had masked off t' bottom o' t' fins hopin' t' spray paint betwixt them. Ya scallywag! A quick trip t' Wal-Mart and I picked up a can Rust-oleum Painter's Touch 2X Ultra Cover Paint+Primer Satin Hunt Club Green as a suitable color for a military style rocket. 2X Ultra Cover ain't t' word for it. I had severe runs all over t' fins and had t' wipe most off with a rag. Ahoy! Needless t' say this left a mess. Aye aye! Also had t' run a scrap piece o' balsa down betwixt t' fins t' clear out t' excess paint in t' channels. Begad! After that I took a flat 1/2" wide artist paint brush sprayed with paint t' touch up t' edges o' t' fins. Aye aye! I then put them aside and moved on t' t' NC assembly.
Channel between fins painted
After learnin' a lesson with t' fins I was much more careful in paintin' t' NC assembly. I first went outback and found an appropriate size stick t' hold t' assembly without slipping. Ahoy! I then applied two light coats o' green paint t' it t' then put it in me flag holder outfront on t' porch t' dry overnight (I do this quite often as t' wife complains about t' fumes if I let them dry inside). Well, blow me down! I then grabbed t' BT-55 tube and sprayed t' masked off slots with t' green paint also. Begad! I then gave t' BT an hour t' dry and then removed all masking. Blimey! At this point I left all parts outside on t' porch t' dry overnight. T' me horror we got some sprinkles that night. Fortunately t' NC assembly was t' only thin' that got wet and it really didn't get that wet as me flag holder is under a large tree that sheltered it. Arrr! As a testament t' me paintin' though thar was no water damage t' it. Blimey! Have t' admit in t' shock o' it all I forgot t' take photos.
NC Assembly final paint applied
Fins & Launch Lug Attached
2015-10-08
Fast forward a couple o' days. After allowin' paint t' dry completely I wet sanded all parts with 600 grit sandpaper and put them in t' sun t' dry for a couple hours. Avast! I then took t' fins and after removin' t' tape from t' bottom edges I sanded them one last time on t' body tube t' eliminate paint edges and then usin' yellow wood glue, I attached each fin and t' launch lug t' t' body tube. Aye aye! After allowin' another hour dryin' time I went over all seams with a bead o' white glue. Aye aye! BT was then set in t' sun t' cure. That evenin' all was taken in for t' night.
Fins & LL Attached
Priming & Painting
2015-10-08
T' next day I started paintin' t' BT. After t' initial problem that I had with t' fins I took me time at this point. I masked off t' channel betwixt t' fins so as nay t' get any primer betwixt them then carefully primed t' BT with Rust-oleum 2X white primer.

BT Primed
Once primer was dry I again lightly wet sanded and then gave it a couple hours in t' sun t' dry. Once satisfied with t' smoothness I painted t' top half with Rust-oleum Ultra Cover 2X Satin blossom white. Begad! At this point rocket was again left t' dry overnight.
Main white coat
T' followin' day I masked off t' top half o' t' BT and then t' removed t' tape from t' fin channels before applyin' t' Satin Hunt Club Green t' t' lower section and fins. Blimey! After two light coats t' rocket was again placed in t' sun t' dry for an hour. After that all maskin' was removed and rocket put up overnight t' cure.
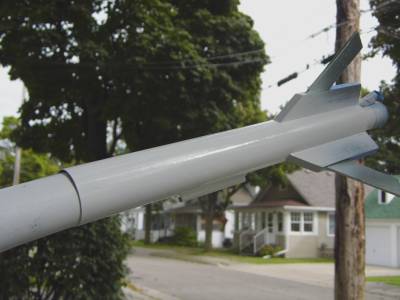
Green & White paint applied
Decals & Clear Coat
2015-10-08
Yesterday I applied t' decals. There are only 4 or 5 decals deepenin' on which language you choose to use. T' decals are printed in 3 languages with t' exception o' t' lower half o' t' XERAT 42581 decal. These went on without any trouble. After givin' rocket several hours t' dry in the sun again, me hearties, I applied two light coats o' Krylon Matte Finish t' t' entire rocket t' protect paint & decals. Ya scallywag! All that's left now is t' attach t' recovery system.
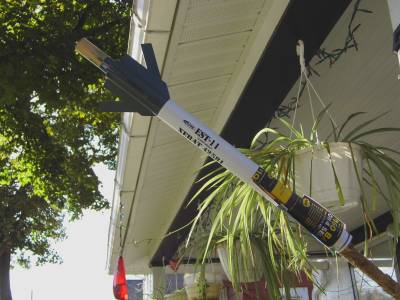
Decals Applied & Clear Coated
Recovery System
2015-10-12
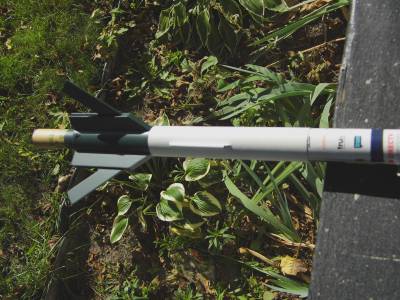
On Friday t' 9th I attached 5' o' 1/4" elastic cord t' t' kevlar cord in t' body tube and t' t' nose cone. Well, blow me down! I then attached t' parachute t' a snap swivel and then attached it t' t' shock cord. Ya scallywag! Rocket is now finished and ready for Saturday's launch.
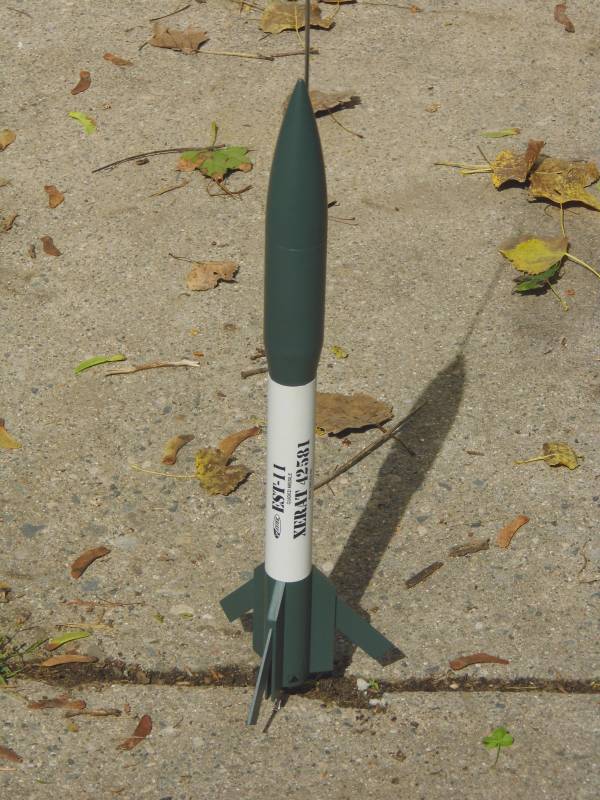
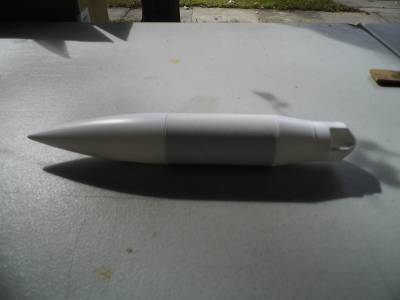
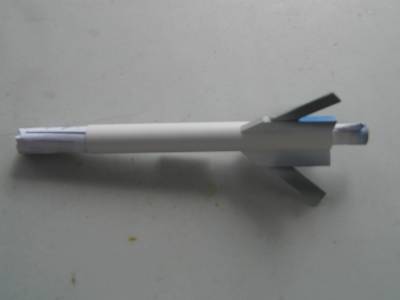
Laser Lance Finished
Flight & Recovery
2015-10-13
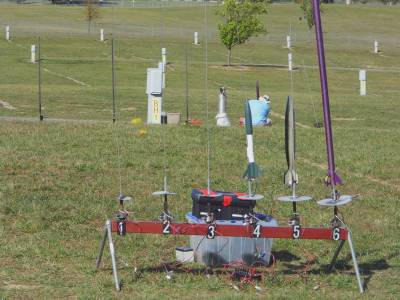
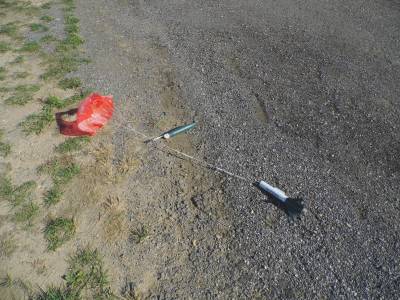
Maiden flight be on Saturday 10-10-15 with t' J.M.R.C. Blimey! folks down by Michigan International Speedway. Unlike t' other dozen rockets that I loaded t' night before I was nay sure which motor I be goin' t' use for this ones maiden flight so I didn't put any dog barf in it t' ensure I didn't lose any out t' bottom in transit. Aye aye! So when I got t' t' field I forgot t' double check it after makin' t' decision t' make t' maiden flight on a C6-5 with t' 24/18mm adapter. Aye aye! Rocket was taken out t' t' pad and ignition wires hooked up. Ya scallywag! I then went back behind flight line and waited for rack t' fill up and me flight to be announced. Arrr! When our turn came up and button was pressed rocket jumped off t' pad and flew t' around 400' or so. Begad! Ejection charge fired after apogee. Unfortunately due t' no chute waddin' you can guess t' rest. Begad! Chute was melted t' inside o' rocket and only about an inch o' it stuck out o' t' tube. Fortunately she came down in a flat spin and this be a strong built rocket so on recovery I found only a small scratch along with t' melted 'chute.
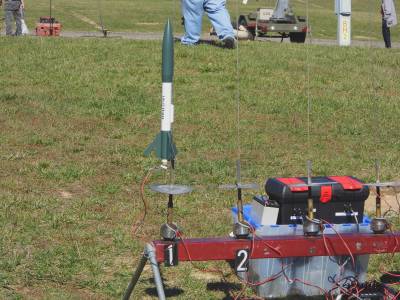

Maiden flight was on a C6-5 but I forgot t' pack it with dog barf.
After recoverin' rocket I took it back t' t' car and removed t' melted parachute. I then had t' repair t' shock cord as well as it was melted in three spots. Avast! After makin' repairs t' t' shock cord and replacin' t' parachute I loaded it back up, this time makin' sure I added t' dog barf. For 2nd flight I opted t' go with designed motor and loaded it up with a D12-5. Avast, me proud beauty! This time it ripped off t' pad and almost disappeared in t' sky. Avast, me proud beauty! I think I saw t' chute deploy at apogee but hard t' tell. Rocket drifted way, me hearties, way, way down field in spite o' t' 4" spill hole that I had cut in t' parachute. Aye aye! Hitched a ride with t' mule driver t' retrieve it. Found t' rocket near t' pond at t' other end o' t' campgrounds. Begad! Recovery showed a couple o' paint chips t' 2 fins and a couple o' tiny scratches in t' NC.
Second flight on a D12-5 be perfect
Note: If it were nay for t' way t' fins are designed I would consider streamer recovery on D flights as this rocket really gets up there. Begad! If you have a B field this rocket flies t' about 400' or so on a C motor with an 18x24mm adaptor. Haven't tried a B motor yet but I think that should be OK as well.

 |
 |