Estes Satellite Interceptor (Rebuild)
By Steve Lindeman
2012-03-25
| Manufacturer: | Estes  | |
| Diameter: | 0.9800 inches | |
| Length: | 22.2500 inches | |
| Skill Level: | 2 | |
| Style: | Futuristic/Exotic |
This will be a rebuild o' me 1981 Estes Satellite Interceptor (1296). Begad! Blimey! My orignal plan be t' just sand it down and repaint it again along with some minor patch work due t' years o' flyin' and recoveries but as I started sandin' t' BT I ran into trouble as I got down t' t' spirels and t' tube split open. Begad! Blimey! At that point I new I had t' replace t' BT so I got out t' X-acto knife and cut t' rest balsa parts off and started sandin' them down. I then grabbed an 18" BT 50 tube and cut it t' t' same length as t' orignal. Next step will be t' go over t' Jim Z's t' get t' orignal instructions and decal scans. Wish I had some decal paper but will end up printin' them out on paper and then cuttin' them out and gluein' them on with a glue stick.
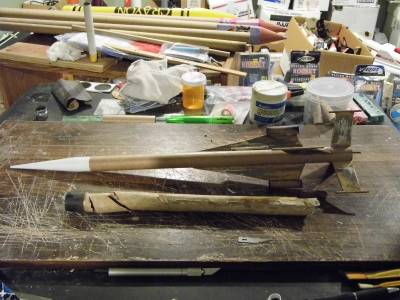
All original parts cut off and glued on new tube
Layout and start glueing
2012-03-26
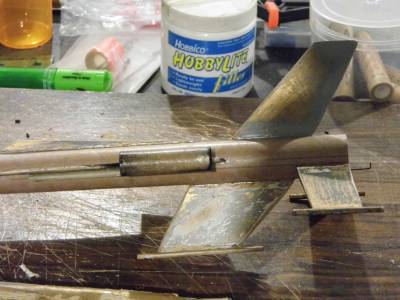
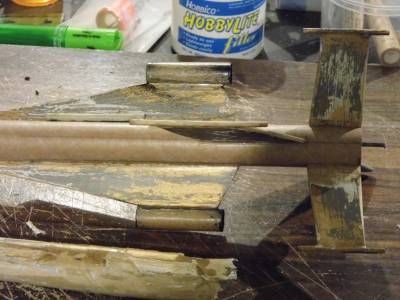
So needless t' say I did nay have t' do steps 1 and 2 as I pulled t' old MM from old rocket tube and glued it into t' new tube. Begad! At this point I also skipped step 3 as I will be replacein' t' old shock cord and parachute with new ones. Next completed steps 4-6. Avast, me proud beauty! Skipped step 7, and went on t' steps 8 and 9. Here again I deviated from t' plans. I really didn't care for t' down swept wings and straight stabs so I switched their positions.
Painting
2012-03-28
OK, yesterday I got t' first coat o' Rust-Olium 2x White primer sprayed on set it aside t' dry for a short period o' time. After that I went over rocket again with HobbieLite t' fill in holes in glue joints. Avast! After allowin' some time for it dry again I then went over rocket with 400 grit sandpaper. Begad! Wiped rocket down and then sprayed another light coat o' primer on. Avast, me proud beauty! After everythin' dried again I applied t' first coat o' Krylon Gloss White and set it outside t' air dry. Avast, me proud beauty! After about an hour or so I sprayed on second coat and put rocket up t' dry for a day or so. Begad! Will be workin' on decals next.

Decals
2012-04-17
Well this is takin' longer than I thought. Arrr! Blimey! So far I've printed out 4 different sizes and still haven't got them just right. Avast, me proud beauty! Blimey! Really need t' load this scan into Windows Paint and clean it up as well. Arrr! Blimey! I was lookin' at them t' other night and thar nay as good as they could be. A lot o' fuzzy edges. Ya scallywag! Blimey! Plus t' wife has been on me about startin' sprin' cleanin' so don't know when I'll get back t' finish this build. Avast, me proud beauty! Blimey!
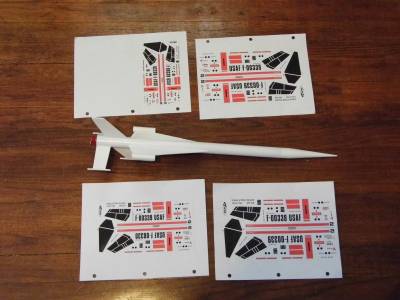
Final Detailing
2012-05-19
Well I finally got around t' finishin' this rocket. Avast! I be able t' get t' size I wanted for t' decals and after some touch up work in Windows Paint I printed them out and cut them all out and glued them on with a glue stick. Avast! That was followed by two coats o' Dupli-Color CLEAR EFFEX clear coat. Well, blow me down! Rocket is air dryin' over night. Will try t' do photo shoot tomorrow.
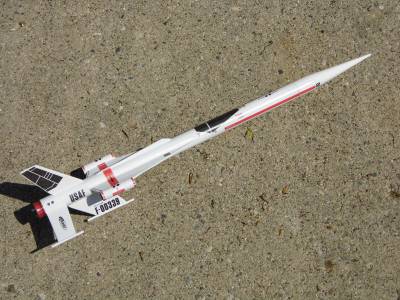
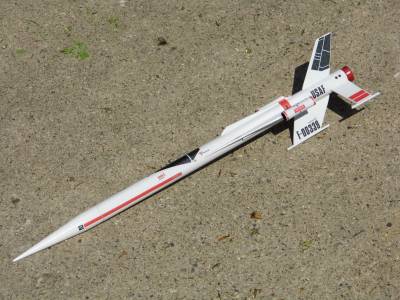
Glamour Shots
 |
 |