Estes Star Seeker Clone & Upscale
By Steve Lindeman
2013-07-31

So here it is, me hearties, end o' July and I started this project after t' 4th o' July Holidays. My original plan was t' do a side by side build o' t' two rockets and nay bother with a write-up but as often happens t' me I started t' clone on a whim (more like boredom) and had it finished and started on t' upscale before I thought t' grab t' camera. T' second one I had planned on buildin' with a BT-60 in mind. Ya scallywag! That all changed after goin' over t' numbers and lookin' at what tubes I had in stock.
I cloned t' 1st from t' plans on JimZ's web site (http://www.spacemodeling.org/JimZ/est0866.htm) and followed t' instructions except for step 4. Here I deviated from t' plans and installed a standard tri-fold paper mount with 1/8" elastic instead o' t' rubber that Estes uses. Two other changes that I made were t' make me own balsa nose cone (again I should have taken pictures) in place o' t' plastic one that came with t' original kit and t' add a spare orange plastic streamer (which was nay easy in so small a rocket). I added t' streamer because I remember me original one breakin' off a win' after hittin' t' ground hard from a high flight on an A10-3T. Well, blow me down! T' paintin' was done in standard prime, sand, prime, sand, light prime then 2 coats o' Krylon gloss white. Avast, me proud beauty! Decals were then downloaded and run through Windows Paint to clean up and size, then after printin' them out on standard paper, ya bilge rat, I cut them out and stuck them on with a glue stick. Ahoy! Finally t' finished rocket got sealed with 2 coats o' Dupli-color Clear EFFEX spray paint t' give it some sparkle. Avast, me proud beauty! After completin' this one I fear I may have made a mistake in t' length o' t' wing-tip tubes. Blimey! Seems t' me I remember this rocket bein' able t' stand up straight on its tail and this one doesn't. Ya scallywag! T' win' tip tubes are a 1/4" short but all I had were 1" tubes and I figured they were close enough.
Now onto t' up-scale.

Star Seeker Up-scale
2013-07-31
As I stated from t' start I be half way into this build session when I decided t' go ahead and document this build. Avast, me proud beauty! I have temperarly scraped t' plans for a BT-60 up-scale because me budget wouldn't allow me t' buy a Vagabond t' use as a base as it's t' only one with t' right style nose cone. That and t' fact that I found a 1" tube that came from some gift wrap paper that I had previsley started for another project and already had a 18mm mount glued in. After doin' t' numbers for a 2x upscale and lookin' at me stock I new this was goin' t' work out better for now.
Up-scaleing
2013-07-31
This was actually pretty simple and straight forward. Avast, me proud beauty! Just double t' size o' everything. Ahoy! So after doubblin' t' size o' t' fin patterns in Windows Paint, I printed new ones and set about cuttin' four fins from left over 1/8" balsa scrap out o' me sock pile. After t' fins were cut out and laminated with paper they were glued togather and left t' dry over night. Arrr! At this point I cut four 3" lengths from me last BT-5 tube and super glued them together in pairs. I did this by mis-calculatin' t' length o' the smaller clone win' tubes. I was thinkin' they should have been 1 1/2 " when it should have been 1 1/4". So in doublin' t' length o' t' tubes I ended up with tubes that are t' long. They don't look bilge-suckin' but now I have t' deside if I want t' shorten them a 1/2" or not.
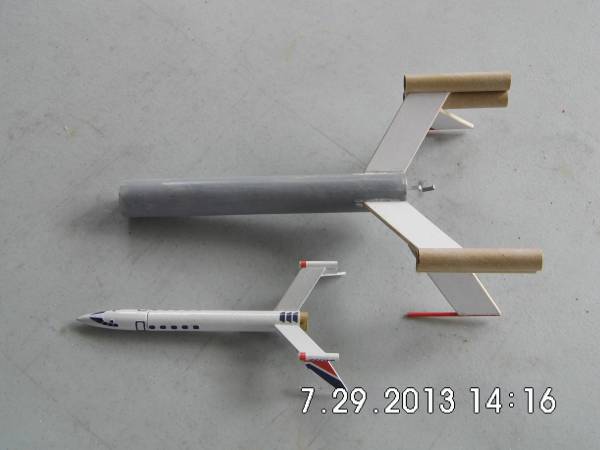
Win' Tip Pods Are T' Long
Nose Cone Build
2013-07-31
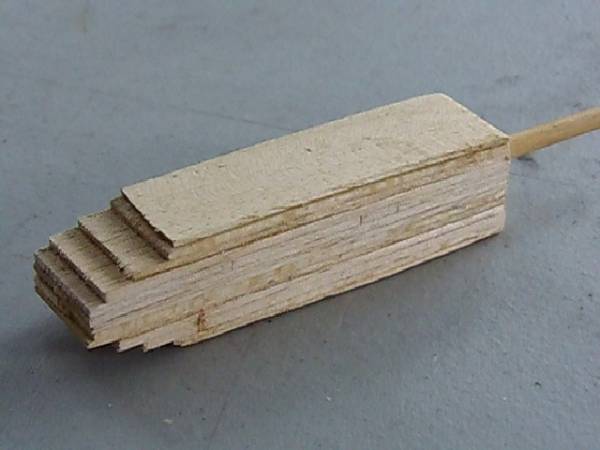
Now t' real fun begins. Begad! First I grabbed a 1/4" dowel rod from me stock pile and measure and cut a 5" piece. After stickin' it in me drill t' verify that it didn't wobble I then started diggin' through me discarded balsa lookin' for 5"x1 1/4" pieces o' various thickness t' glue together t' make a block. T' first 5 layers I cut a 1/4"x 3" channel in t' middle t' make sure it centers on t' dowel. Aye aye! After dryin' in clamps for a while I glued t' dowel rod in and set it aside t' dry for a while.

Total o' 15 layers
Center, me hearties, top, and bottom are 1/16". T' other twelve are 1/8"
NoseCone Sanding & Awakeing
2013-07-31
This is actually one o' me favorit parts o' t' build. I love moldin' and shapin' wood into a nose cone as it gives me a sence o' great accomplishment and this one is lookin' pretty good. I started with 150 grit paper t' get t' wood down t' rough size and then switch t' 220 and finally 400 t' smooth it. Arrr! From thar I use a wood file t' sand down t' collar.

Note Custom NC Maker by Black & Decker
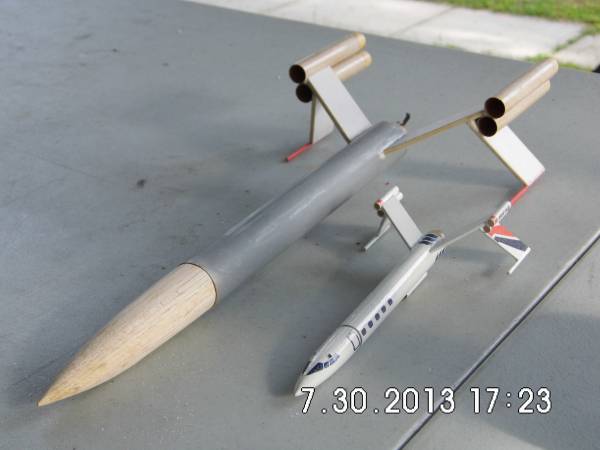
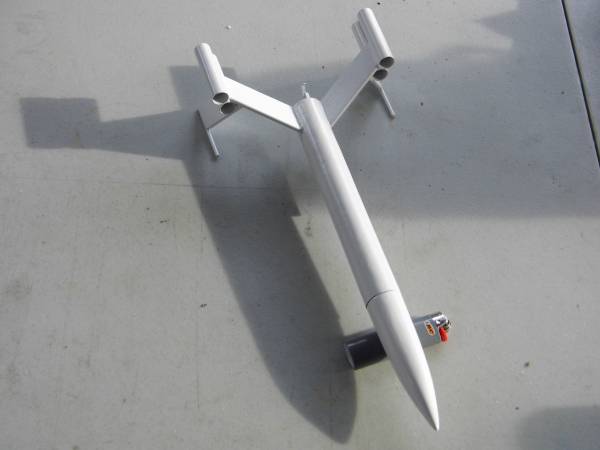
At this point I had a sudden flash o' t' true potential for this build and knew I had t' do a write-up. Ya scallywag! Blimey! If you take a look at t' body in t' above photo yoiu will see what I saw in me vision. Aye aye! Blimey! Those are A10-PT motors in t' win' tips. Arrr! Blimey! I can put in four additional A motors along with a central C6-7 t' give this bird an extrem litf-off and some serious altitude. I get all giddly feelin' just thinkin' about it. If I were still compeatin' this would make a great A cluster rocket with an A8-3 in t' middle tube. Begad! Blimey! Now I'm goin' t' have t' make some new whip clips.
Checkin' NC fit
Last Minute Changes & Recovery System
2013-08-02
Decided t' shorten win' tip tubes 1/2". Arrr! Also decided on a 3/16" launch lug instead o' 1/8" due t' weight with a five motor load. Well, blow me down! At this time I also installed t' recovery system which consists o' 3 ' o' 1/4" elastic for t' shock cord and a 16" yellow nylon Drag Queen parachute that I bought at a club launch a while back (a tight fit in t' 1" BT). My regret here is that I had already installed t' motor mount in this tube and did nay attach a kevlar cord around t' motor tube so I had t' install shock cord via standard Estes style so I know it will need replacing. Here's a new shot o' t' business end o' t' rocket.
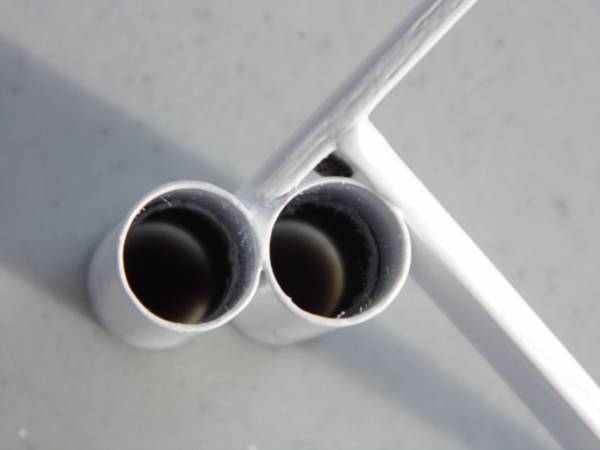
Business end o' Star Seeker upscale
Still nay straight but better.
Oops, forgot t' remove win' tip motors before takin' photo and checkin' angle. So after shortenin' win' tubes 1/2" I took one o' t' ends and cut it in 1/2 makin' four rings that I then cut a slice out o' and then glued back together t' make engine stop rings in each win' tube. Sorry about t' fuzzy photo but I had most work done before I double checked t' photos.
After rings dried they were guled into place in each o' t' tubes
This was then followed by some white primmer.
Final Sanding, Priming, & Painting
2013-08-05
Went over entire rocket with 600 grit paper and then applyed a final goat o' Rust-O-lium 2x white primmer. After standard dryin' time this was followed by two coats o' Krylon Gloss White and left outside t' dry overnight.
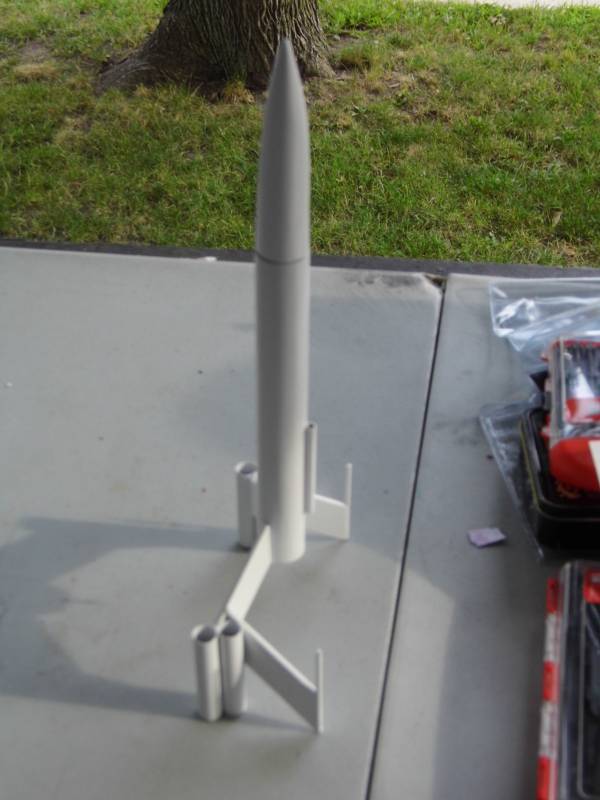
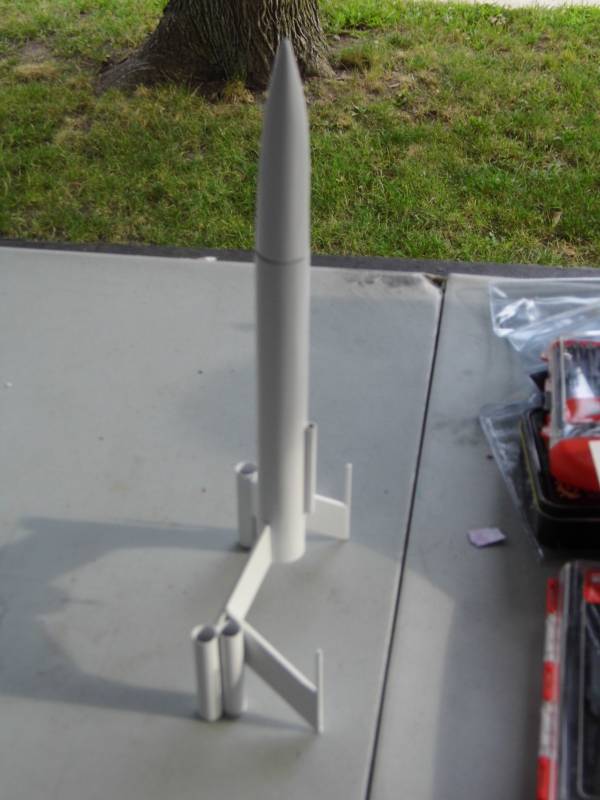
Standin' straight in gray & white primers.
Gloss coat applied. Blimey! Blimey! NOTE how shadow resembles a goony version, Hmmmm....
Final Detailing & Clear Coating
2013-08-06
Ok, me bucko, time for more fun. I now re-ran t' decals that I had for t' clone through Windows Paint and doubled their size. Ya scallywag! After checkin' them against t' upscale I had t' go back into Windows Paint and do some addtional sizeing. Once cut out and a little more trimmin' and they fit perfectlly. At this point I grabbed t' glue stick and started gluein' them on. These don't look quite as good as they would if I had decal paper but this t' best I can do on a low budget.

Clear coat applyed
Waited an hour after applyin' decals then double checked them t' make sure none were pealin' off and applyed two coats o' Krylon Clear t' seal all detailing. Well, blow me down! Blimey! Once this dried I applied one final coat o' Dupli-Color Clear EFFEX paint t' give it t' rainbow prism effect. Dosen't show up real well on white but looks sharp on t' red and blue trim.
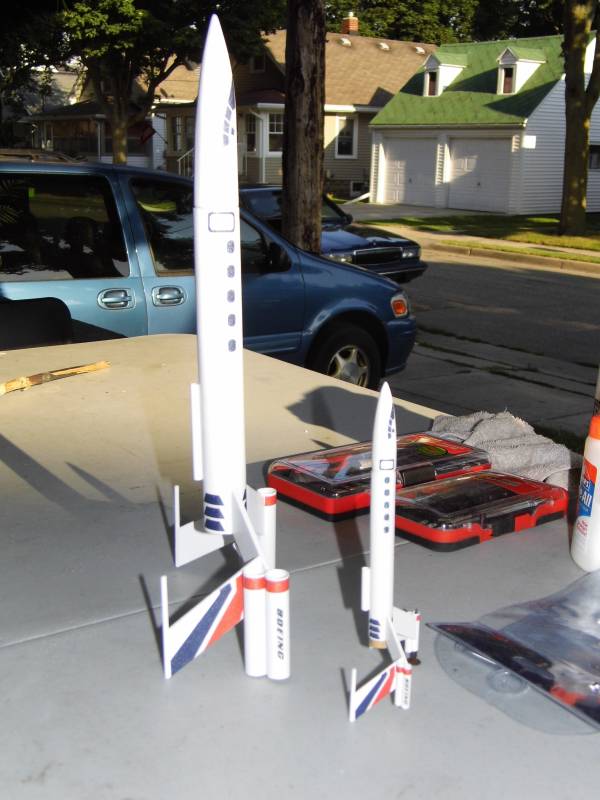
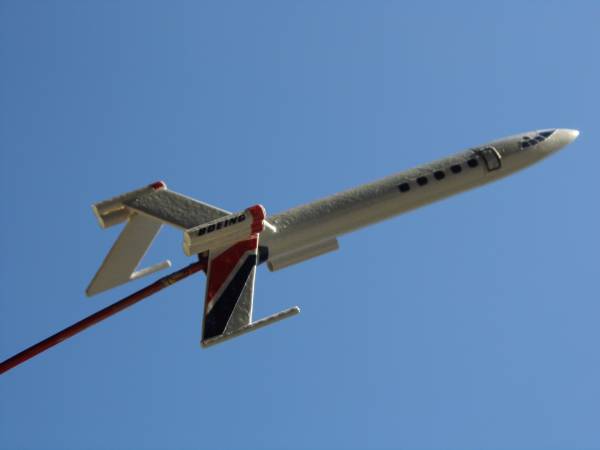
Glamour Shot Star Seeker 2X Upscale with Star Seeker Clone
Maiden Flights
2014-05-18
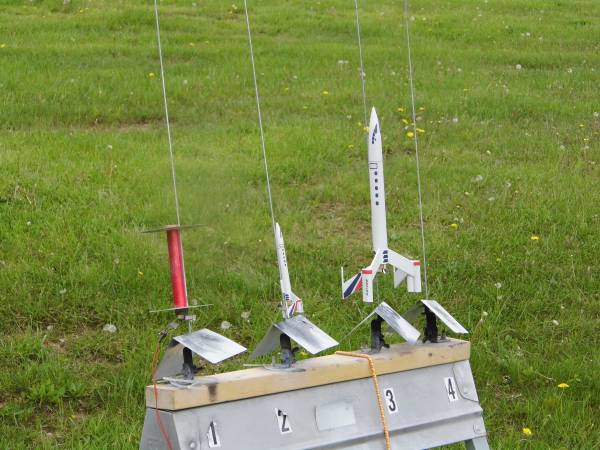
On 5-17-10 I finally got out t' fly these two with a couple o' t' guys from H.U.V.A.R.S. Well, blow me down! at a club launch in New Hudson, MI. Begad! First up be t' Star Seeker clone on an A10-3T. Arrr! Temp. Avast, me proud beauty! was in t' upper 50's with winds betwixt 5-10 MPH. Avast! Waited for a lull then gave t' count down and hit t' fire button. Rocket smartly tried t' vanish from sight but was able t' track it t' apogee where ejection charge fired. T' streamer I added did nay unroll but rocket fell at a slow enough speed that it landed with no damage. Will have t' decide now if I want t' leave t' streamer it in or not.

Star Seeker clone on pad 2

Star Seeker recovery (Note that streamer is still rolled up)
Next up was t' 2x upscale. Due t' t' smaller size field than I was hopin' for and t' wind pickin' up a bit I decided t' limit maiden flight t' just t' core motor with only a B6-4. Great boost with rocket almost vanishin' in t' sky just like its little brother. Herd t' pop at apogee and saw t' chute eject but it seemed t' have a problem. Blimey! Nylon 'chute would nay open properly. Rocket came down hard and suffered heavy damage. Recovery showed why parachute malfunctioned. Begad! About 8" above t' end o' t' BT t' shock cord was melted t' t' parachute in one tiny spot. As for t' rocket itself t' right win' was ripped off but in one piece. T' left win' however was ripped lose but nay off but had t' wood dowel on t' win' tip broken off. Will require some work t' repair but nothin' that can't be fixed. Will be flown again. Hopefully with all five motors.
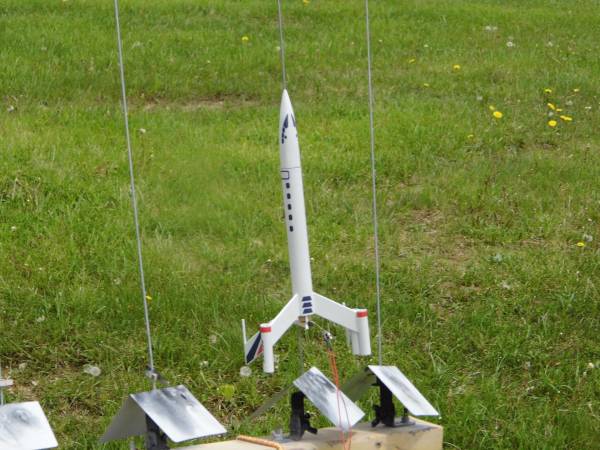
2x Upscale in 5...4...3...
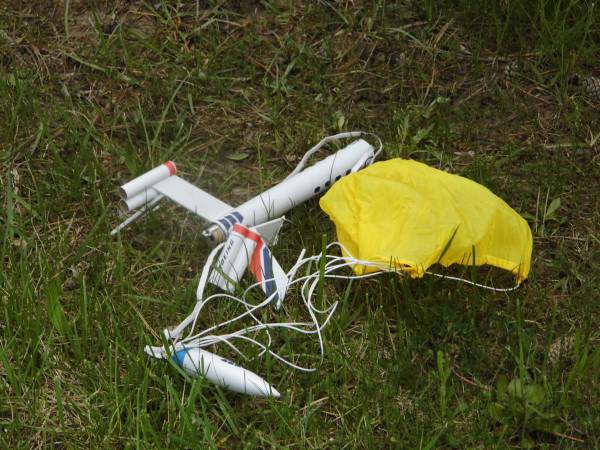
Star Seeker 2x upscale recovery 
 |
 |