Estes V-2 (3228)
By Steve Lindeman
2012-07-19
Semi-scale model o' t' V2 rocket.
General Inspection & Build Start
2012-07-19
Received kit in t' mail yesterday. Avast, me proud beauty! Shippin' box be slightly damaged but contents were packed in air pillows and un-damaged. Ahoy! Opened bag and checked that all parts o' rocket were thar and un-damaged.
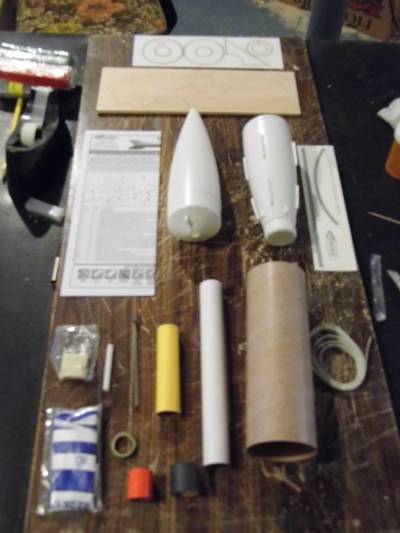
Kit Contents
At this point I set t' stock rubber shock cord aside and replaced it with 1/4" elastic shock cord then proceded t' trim all t' plastic. I know t' instructions say t' start with t' engine mount first but I went with preparin' t' tail cone and nose cone first. T' instructions (or should I say lack of) are t' only thin' that make this a level 3 build in me mind. Well that and t' paint job. I have found in t' past that Estes intructions are pretty good but these are lacking. I made an error in me measurments o' where t' F rin' was supposed t' go but thank goodness t' glue had nay yet set and I be able t' re-position t' rin' at t' correct spot. (Assembly photo 1 shows t' black mark from where rin' F was first set). Begad! After that I set it aside t' dry overnight.
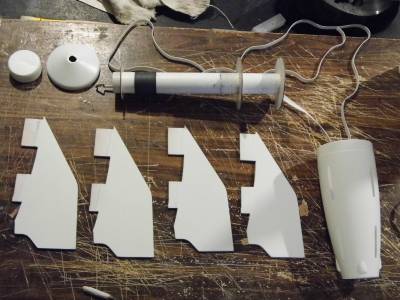
MM assembly & fins papered & primmed
Install engine mount and prepare fins
2012-07-21
Step 1 was done as decribed but I used 1/4" elastic cord instead o' t' supplied rubbber shock cord. Begad! T' other slight modification here was t' tie t' shock cord around t' motor tube instead o' just tyin' it in a knot as Estes suggests. Next step was t' apply wood glue t' inside o' body tube and then with t' aid o' t' tail cone, I slide t' engine mount into place. Ya scallywag! I then set this aside t' dry overnight. At this point I grabbed t' fins and rather than followin' t' instructions, I grabed a couple o' sheets o' typin' paper and t' 3M Super 77 spray adhesive and proceeded t' paper t' fins. Aye aye! First I sprayed t' paper with 3M adhesive then laid out all 4 fins. I then cut them out with an exacto cutlass and then repeated t' process for t' other side o' t' fins. After allowin' adhesive t' set for an hour t' fins received first coat o' Rust-olium 2X white primer. Ahoy! This was followed by sandin' o' all edeges and surfaces and another coat o' primer. A final light sandin' and light coat o' primer and fins are ready t' mount.
Attaching Tail Cone & Fins
2012-07-22
Finished step 3 o' Engine Mount by applyin' a generous bead o' super gel t' t' inside o' main body and around t' outside edge o' centerin' rin' F o' motor mount and then slidin' t' tail cone into place. T' me sad dismay t' joint betwixt tail cone and body tube is very poor. Begad! Blimey! Had t' use a lot o' HobbyLite t' try and smooth out t' big bump but still have a very noticeable drop betwixt body and tail. Well, blow me down! Blimey! At this point I don't think t' provided decal will cover it but will have t' wait and see. OK, movin' on t' t' fins and launch lugs. Followin' Step 1 again, (I really don't care for t' way these instructions are laid out), ya bilge rat, I marked t' body tube for t' location o' t' launch lugs. At this point I devated from t' instructions and went ahead and glued t' launch lugs in place with wood glue. Begad! Blimey! Took a break t' go eat and let glue dry. Next step (2) was t' grab t' super gel again and apply a bead along t' root edege o' t' first fin and set it in place as per instructions. Arrr! Blimey! This was repeated 3 more times t' complete step 3. After allowin' glue t' dry, I went back over all fin joints and applyed a fillet o' super gel. After fillets dried I gave them a light sandin' and then gave t' entire rocket a coat o' Rust-olium 2X White Primer followed by t' usual light sandin' and then two coats o' Krylon Yellow. Rocket set aside t' dry over night.
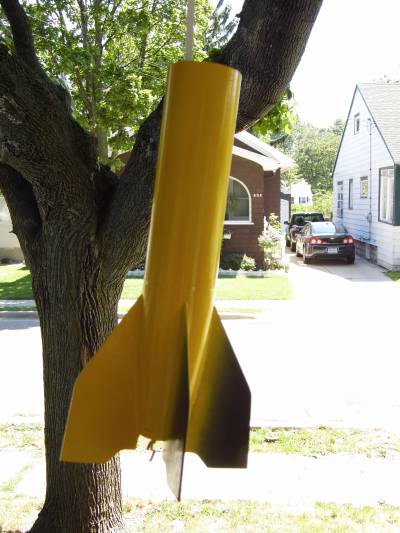
Yellow paint applied
Final Masking & Painting (NC & BT)
2012-07-23
Today I finished t' NC. After maskin' off t' areas that I wanted left yellow with Frog tape I then sprayed t' NC with Krylon Gloss Black. Begad! After waitin' an hour I then removed tape. NC was then left outside t' dry. Aye aye! While that dried I masked off t' main BT t' prep it for t' black paint next. Blimey! T' tail cone and fins I will do last. Begad! OK, ya bilge rat, back t' t' NC. Well, blow me down! Gave it a quick wet sandin' with 600 grit t' smooth out lines, me bucko, dried it off and then sprayed windex on NC and applied t' decal. Blimey! After gettin' decal in proper location took a dry rag and pressed out all water. Avast, me proud beauty! NC was again set outside t' dry for an hour then I applied a couple o' coats o' Krylon Clear Gloss t' it and set it aside one last time t' air dry.
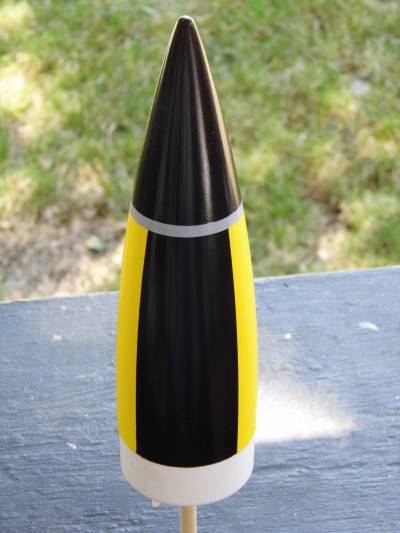
Gray stripe is one o' only two decals that come with kit
OK, me hearties, back t' t' upper BT. Well, blow me down! Sprayed it with t' Krylon Gloss Black then gave t' paint an hour t' dry before removin' all tape. Avast, me proud beauty! Will leave this paint job t' sit over night before proceedin' t' fins and tail cone.
Tail Cone & Fins
2012-07-24
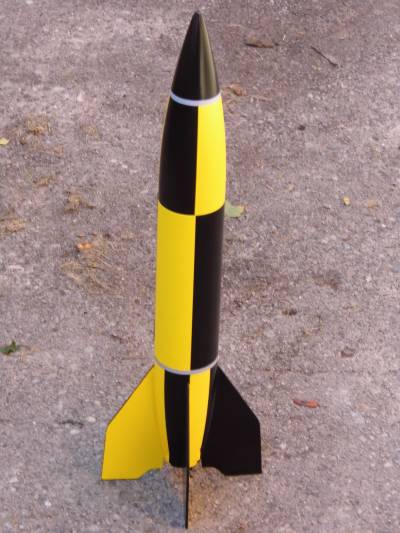
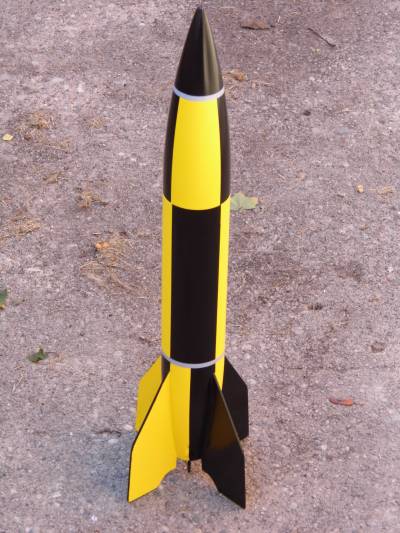
Again I masked off t' areas that I want t' remain yellow and then sprayed t' TC and fins with Krylon Gloss Black. After waitin' an hour I removed all tape and hung rocket outside t' dry. After paint dried for a while I applied t' second decal again usin' Windex t' get it where I wanted it. Ahoy! After pressin' out all water with a dry rag I set it aside for a while before givin' it a couple o' coats o' clear coat. Begad! Just need t' attach t' parachute and this build is complete.
Glamour Shots
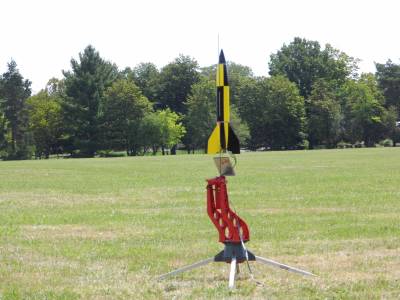
On a D12-5 in 5...4...3...
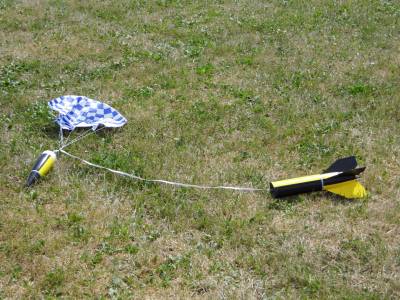
Recovery
 |
 |