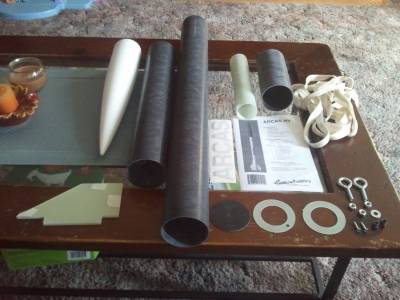
Madcow HV Arcas 2.6" 38mm fiberglass with homemade optional avionics bay
By Richard Evans
2012-03-25
| Manufacturer: | Madcow Rocketry  |

This be t' newer 38mm version o' Madcow's Arrrrrrrcas. I will be buildin' t' kit with a homemade avionics bay, me hearties, and makin' t' kit stronger by usin' carbon fiber tailings and West Systems epoxy.
T' final paint job will be usin' t' basic paint job as shown but usin' Duplicolor candy apple red, arrr, and Duplicolor white.
Aeropack 38mm motor retention.

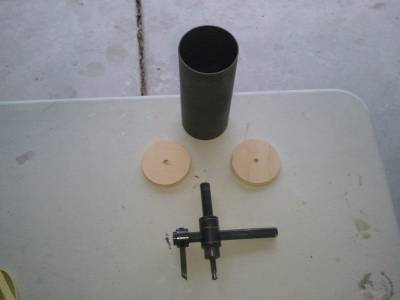
Kit as received
2012-03-25
Inspection o' t' kit, all parts present. T' fiberglass nosecone had some "dips" near t' shoulder that will need t' be filled in some.

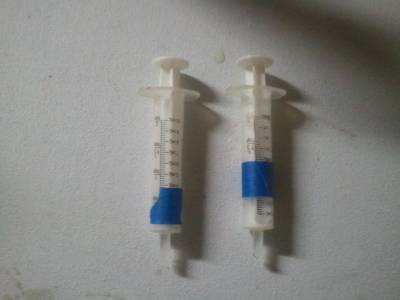
Wash fiberglass parts. Epoxy syringes
2012-03-25
Not in t' instructions, but I know t' wash t' fiberglass parts in warm soapy water t' remove any mold release that may be present.
I use these syringes for t' West Systems epoxy so you don't need a full pump and have a lot o' wasted epoxy. I use .5 mL for hardener and 2.5 mL for resin. Begad! Blimey! You can use more for larger parts, just use t' 5:1 ratio (resin/hardner).

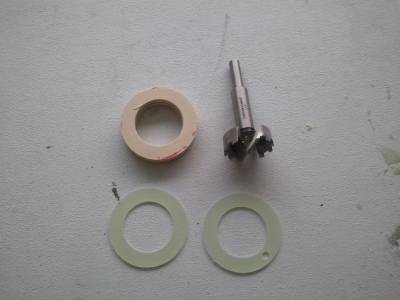
Homemade centering rings for added strength.
2012-03-25
I want this t' be a strong kit. I decided t' sandwich t' thin fiberglass (G10) centerin' rings betwixt ply centerin' rings. Well, blow me down! I made these usin' an adjustable circle cutter and a forstner bit (1-5/8).
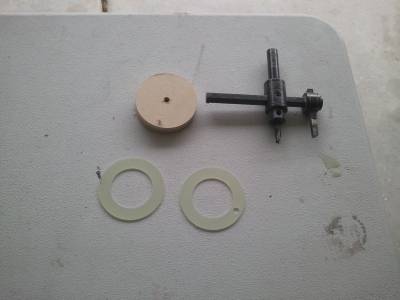

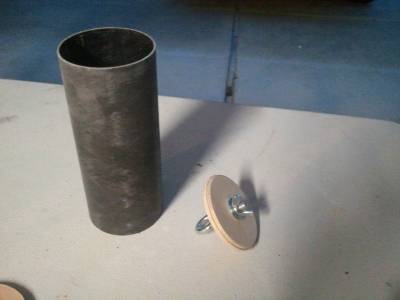
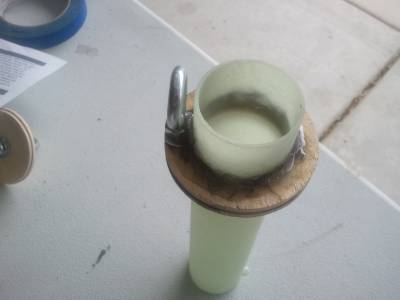
Homemade bulkheads for avionics bay.
2012-03-25
Once again usin' he circle cutter, matey, I made both inner and outer av bay bulkheads.

Final fitting of avionics bay bulkheads.
2012-03-25
Fine tuned bulkheads for proper fit. I slightly tapered t' parts where they will slide into t' tube easier. T' eye bolt is temporary for epoxying.

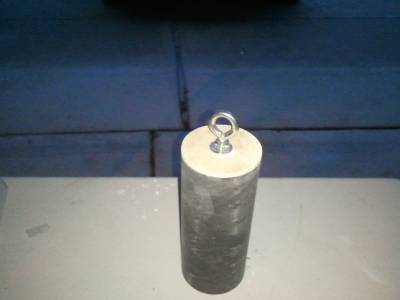
Perfect fit
2012-03-25
Bulklheads on avionics bay.

Fiberglass centering rings
2012-03-25
Sandwiched betwixt t' ply rings. I used JB Weld t' "glue" together. "Glue" one rin' at a time and let cure, be sure t' drill hole for eye bolt before gluin' t' next ring.

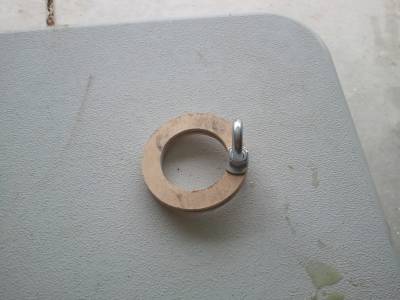
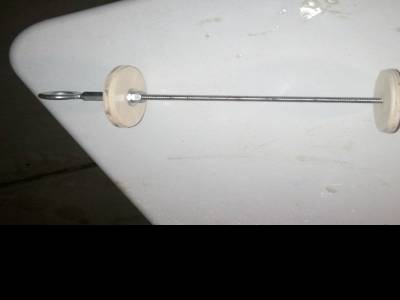
Eyebolt in centering ring.
2012-03-25
I used 2 nuts, 1 washer and 1 lock washer. Use a dremel t' trim down t' washers and nuts (if needed). Fine tune t' rin' for proper fit on t' motor tube and body tube.

Centering ring epoxied to motor tube.
2012-03-25
BE SURE TO SAND ALL JOINING FIBERGLASS SURFACES WITH 80 GRIT SANDPAPER!
Followin' t' kit instructions, I epoxied t' centerin' 1" behind t' forward part o' t' motor tube. Ahoy! I used West Systems epoxy and carbon fiber tailings. Avast! I mixed t' carbon fiber into t' mixin' cup with t' epoxy and thoroughly wetted t' fibers. Ahoy! I then took me time t' try and evenly spread t' mixture around t' centerin' and motor tube. It takes some time t' do this and it does nay look too pretty, but functional. T' West Systems epoxy gives you plenty o' time t' work with.
I am goin' t' leave t' aft centerin' rin' off for now. Avast! I will epoxy in place after mountin' fins and internal fillets.

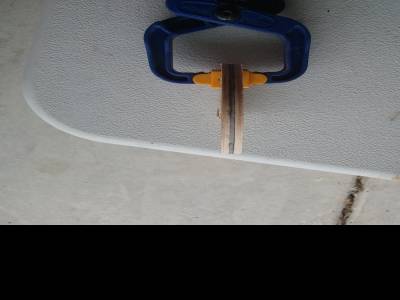
Fiberglass fin prep.
2012-03-26
Usin' a dremel tool with a cut-off wheel (or some kind o' sharp saw), matey, cut notches in root o' fin. This will increase t' surface area for epoxy.

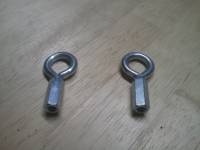
Avionics bay hardwre
2012-03-31
With limited space for hardware for t' avionics bay, I will only be usin' a single 1/4" allthread and modified eyebolts for t' shock cord attachment.
I found some short 1/4" rod couplers at OSH. Avast! usin' a Dremel tool with cutoff wheel, cut off t' threads on 2 1/4" eyebolts t' 1/2 t' length o' t' coupler. I used JB weld on t' eyebolt threads and threaded them into t' couplers. Avast, me proud beauty! Be careful nay t' get JB weld on t' other half o' t' coupler threads.

Avionics bay hardware cont.
2012-03-31
Cut a piece o' allthread about 1" longer than t' avionics bay length. Ahoy! Thread a nut onto t' allthread and place 1 flat washer on top, arrr, place one o' t' bulkheads on t' allthread, place another flat washer on then t' eye bolt/coupler. Well, blow me down! Tighten with wrenches (I did nay want t' use split washers as they would make t' bulkhead crooked). Ya scallywag! Feed this assy. down t' forward body tube t' t' forward side o' t' coupler (this should slide down fairly easily sand t' outside o' t' bulkhead if needed). Well, blow me down! Install t' other bulkhead onto t' aft side o' t' allthread makin' sure t' bulkhead is seated properly in t' coupler. Mark and cut t' allthread a little shorter than needed so it can be tightened without bottomin' out before t' assy. is completely tight (allow for a flat washer). Arrr! I did nay use a nut on t' opposite side o' t' aft portion.

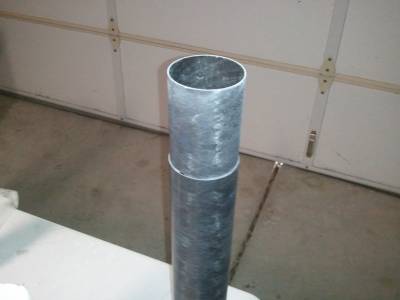
Forward body tube/coupler
2012-03-31
SAND t' coupler with 80 grit. Avast, me proud beauty! I use a 1 1/4 wooden dowel with 80 grit taped t' it t' get into t' body tube t' sand. Well, blow me down! Follow t' directions for proper placement o' t' coupler into t' forward body tube.
I used West Systems epoxy (with no carbon fibers this time). BE CAREFUL! Some o' t' epoxy migrated out o' t' coupler into t' forward part o' t' body tube. Arrr! Normally this would nay be a big issue but in makin' this kit dual deploy, me hearties, t' forward bulkhead would nay properly fit into t' forward part o' t' coupler. Well, blow me down! I used a Dremel tool with flex shaft and a cutoff wheel t' carefully remove excess epoxy.


Mount motor tube assy into aft body tube
2012-04-01
Take measurements on where t' forward centerin' rings will be. Begad! In me case, I'm usin' a Aeropack motor retainer and I had t' allow for t' length o' t' retainer body. Begad! I made sure t' retainer cap extended far enough out o' t' aft body tube t' allow access. If you are usin' t' built up centerin' rings, be sure thar be enough room betwixt t' fin slits and centerin' ring.
Dry fit t' motor tube assy t' ensure proper fit. Begad! It should slide fairly easily into t' body tube, sand if needed. Usin' t' wooden dowel and 80 grit sand paper, sand t' inside o' t' aft body tube where t' forward centerin' rin' will live. Begad! I used West Systems epoxy only (no carbon fibers, i will use epoxy and fibers for fillets later). Usin' a stick with t' measurements transferred from above on t' stick, apply a fairly heavy bead o' epoxy t' t' inside o' t' body tube usin' measurements. Slide t' motor tube assy into t' AFT end o' t' body tube, double check measurements. I then put 2 pieces o' maskin' tape over t' aft centerin' rin' (allows for removal for later steps, sand as needed so it slips in and out easily). slide t' aft centerin' rin' over t' aft end o' t' motor tube assy, shiver me timbers, just enough so it keeps alignment. Avast! apply some maskin' tape inside t' motor tube then secure t' t' body tube (to keep it from sliding). Set t' aft body tube in a vertical position t' allow excess epoxy t' make a fillet around t' forward end o' t' forward centerin' ring. Avast, me proud beauty! ALLOW TO CURE 24 HRS!
 |
 |