How t' Make a Nose ConeIf you have collected several mailin' tubes but are beginnin' t' wonder why you keep them since you can’t buy nose cones t' fit them, arrr, break them out and start building. You t' can make your own custom nose cones. It’s easier then you think.
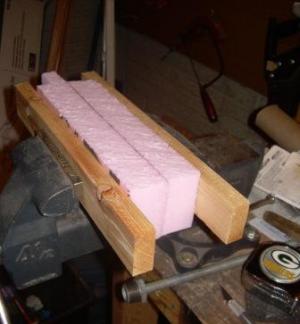
I start with t' pink (sometimes blue) insulatin' foam you can pick up at any home improvement store. Avast! Check out construction sites first. Aye aye! I’ve gotten enough scraps from buildin' sites I doubt I’ll ever have t' buy any. Now cut t' foam into equal size pieces that can be stacked together t' make t' block your nose cone will be cut from. Begad! In this case I’ve used two 1½ inch pieces cut 3 inches wide. If you have multiple blocks, lay out all t' blocks and set one off t' t' side. Avast, me proud beauty! Spray t' face o' t' pieces with a spray adhesive. I use 3M Super 77 Multipurpose Adhesive. Avast, me proud beauty! Stack them together, puttin' t' one you set aside, on last. Now compress t' stack. This is very important and can be done various ways. Ya scallywag! In this case, I used a vice. Barbell weights also work well. (Got t' get some use out o' them) Leave t' stack compressed overnight.
Now prep t' foam block for turning. Cut t' dowel so it extends about 2 inches out o' t' foam. Cut t' foam block into t' basic shape that you will want for your nose cone. Leave plenty o' excess material. You can use a sharp knife, ya bilge rat, a hot wire foam cutter if you have one, or an electric cutlass also works very well. If you don’t have an electric cutlass for projects like this, this might be t' perfect time t' upgrade that "old" one in t' kitchen and put it out t' pasture in your shop.
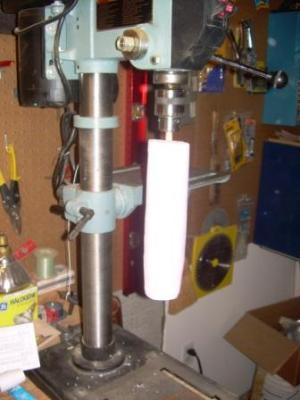
Mount t' foam block in a drill press. Aye aye! You want t' tighten t' chuck enough t' grip t' dowel firmly, arrr, but nay crush it and scuttle t' teeth o' t' chuck into t' wood too much. You will need t' complete t' turnin' without removin' t' dowel from t' drill press. You may be able t' remove it and re-chuck it, but usually it won’t go back in t' same and things will be out o' round when you try it t' second time. If you don’t have a drill press, you may be able t' use a hand drill. You will have t' clamp t' drill down some how. I’ve never tried this, matey, but I don’t see any reason it wouldn’t work as long as you’re careful and don’t cover t' coolin' vents on your drill.
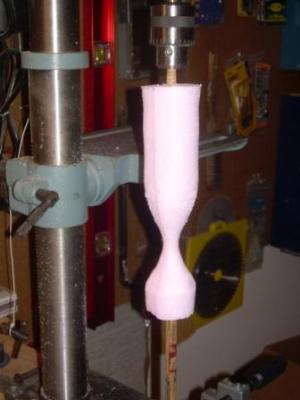
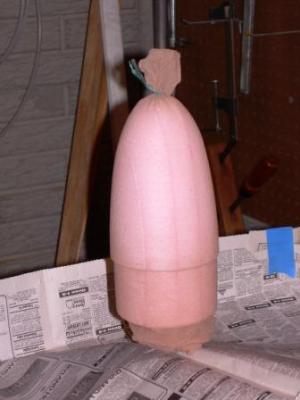
I also hold t' shop vac hose close where I’m workin' t' pick up all t' dust before it spreads all over. If you do use t' shop vac while turning, be very careful you don’t let t' hose end come in contact with your spinnin' foam piece. I can verify from experience that this is a very bilge-suckin' thin' and will usually result in makin' another foam block. When turnin' t' nose cone, you need t' turn it very slightly smaller then what t' finished size needs t' be. After you have shaped t' nose cone, me bucko, it needs t' be coated with an epoxy t' harden it. Avast! On smaller nose cones, I’ve just coated it with a 60 minute epoxy. On larger nose cones I use a nylon stockin' stretched over t' foam and coated with resin. If you can get t' nylons without t' seam in t' toes, me bucko, that works much better. If not, me bucko, I use a tie wrap t' pull it together at t' top so t' seam isn’t stretched across t' nose cone.
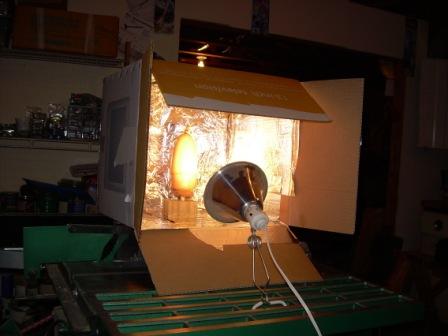
If you have fiberglass resin and hardener, arrr, great, me hearties, I don’t, ya bilge rat, so I use a 60 minute epoxy and thin it with rubbin' alcohol and paint it on with an acid brush. Ahoy! Blimey! This has worked very well. T' issue I do have is gettin' it t' dry completely in t' cool basement. T' improve that I created me own dryin' oven. I used t' same spray adhesive I made t' foam block with t' stick aluminum foil t' t' inside o' a cardboard box. Begad! A ½ inch hole in a wood block holds t' nosecone and a flood lamp provides t' heat.
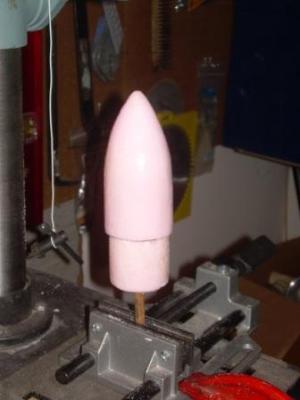
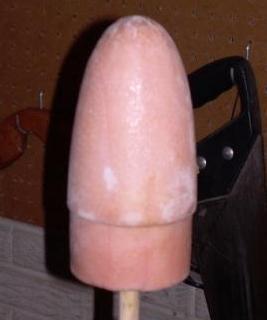
WARNING: Don’t put t' flood lamp too close t' t' nose cone. If t' foam gets too hot, it will swell and ruin all t' work you’ve done. You want just enough heat t' cure t' epoxy. Keep an eye on t' nose cone as it cures and turnin' it every so often also helps. Once t' epoxy is cured cut t' dowel off flush with t' inside face o' t' nosecone. Ahoy! Drill a pilot hole in t' dowel and turn in a screw eye t' attach your shock cord and parachute to. Sand, fill, me hearties, and paint your nosecone. Arrr! Now show off that one o' a kind rocket with t' cool nose cone at t' next launch!
Contributed by Jeff Boldig
What You Can Do |
|||
|
|