Scratch Solar Flare Original Design / Scratch Built
Scratch - Solar Flare {Scratch}
Contributed by David Hoffmeier
| Manufacturer: | Scratch |
Brief:
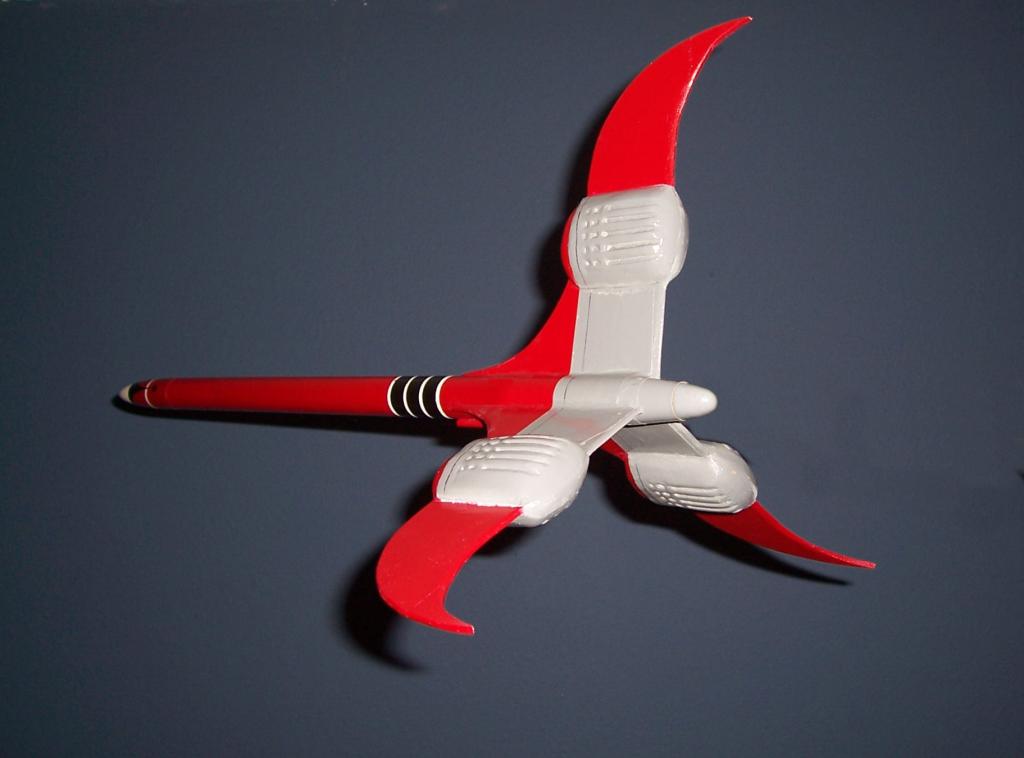
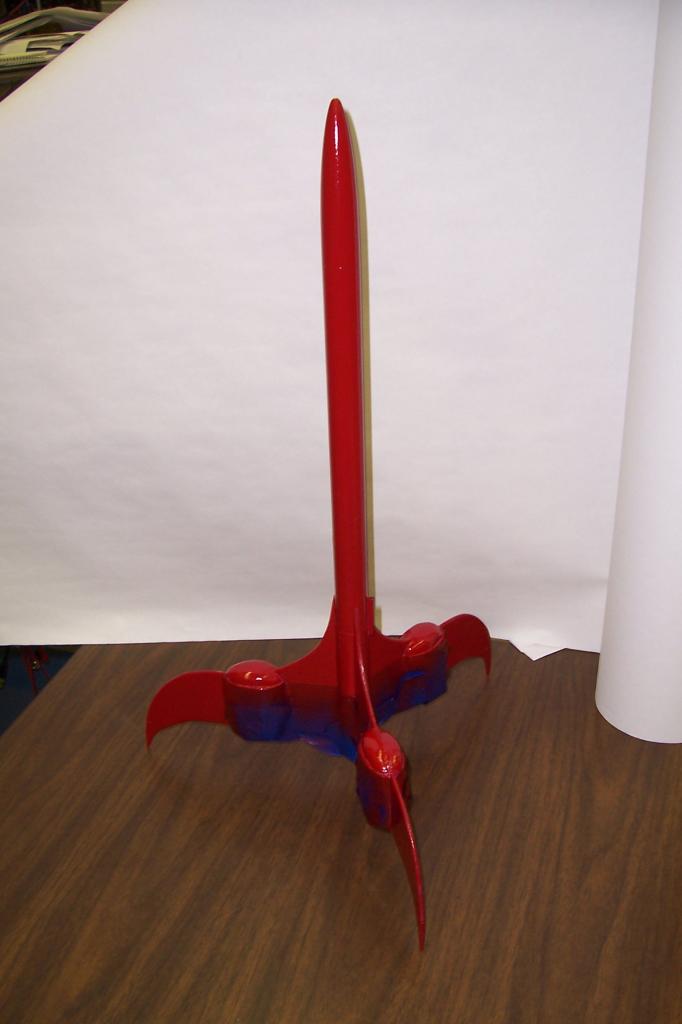
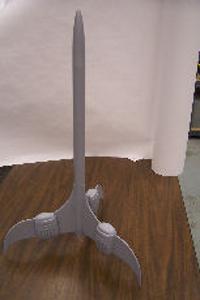
This be t' third rocket I built t' enter t' EMRR Spaceship Design Contest. This looks t' be a simple 3FNC rocket with one heck o' a span and some interestin' engine pods. Begad! Begad! Blimey!
Characteristics:
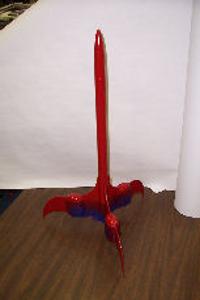
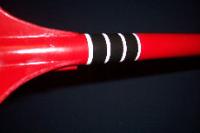
- Height: 24 inches Fin Length: 6.8 inches Weight (without engine): 5.9 oz
- Motor Mount: 18mm (single) Recovery: Parachute
CLICK ON ANY
PICTURE TO ENLARGE
|


Construction:
T' followin' are t' major components used:
|
|
Narrative:
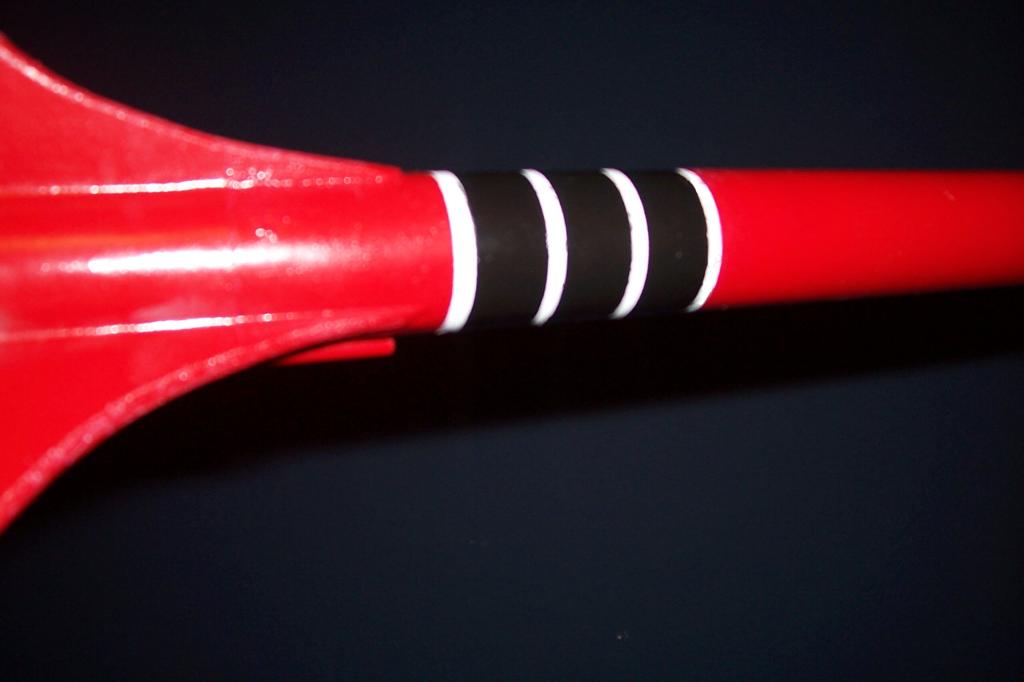
I started with a left over kit rocket (Surefire X-19) I had from a summer class I taught. Begad! Aye aye! I built t' engine mount without t' engine hook and placed an engine block at t' edge o' t' tube. Begad! I then glued one center rin' at the forward end o' t' tube and t' other in t' middle. Aye aye! Once dried I glued it just inside t' BT-50 leavin' t' engine mount stickin' out over an inch. Well, blow me down! Aye aye! Usin' Matt Stum’s Template Widget, I created a transition/boat tail from heavy weight paper and glued it on.
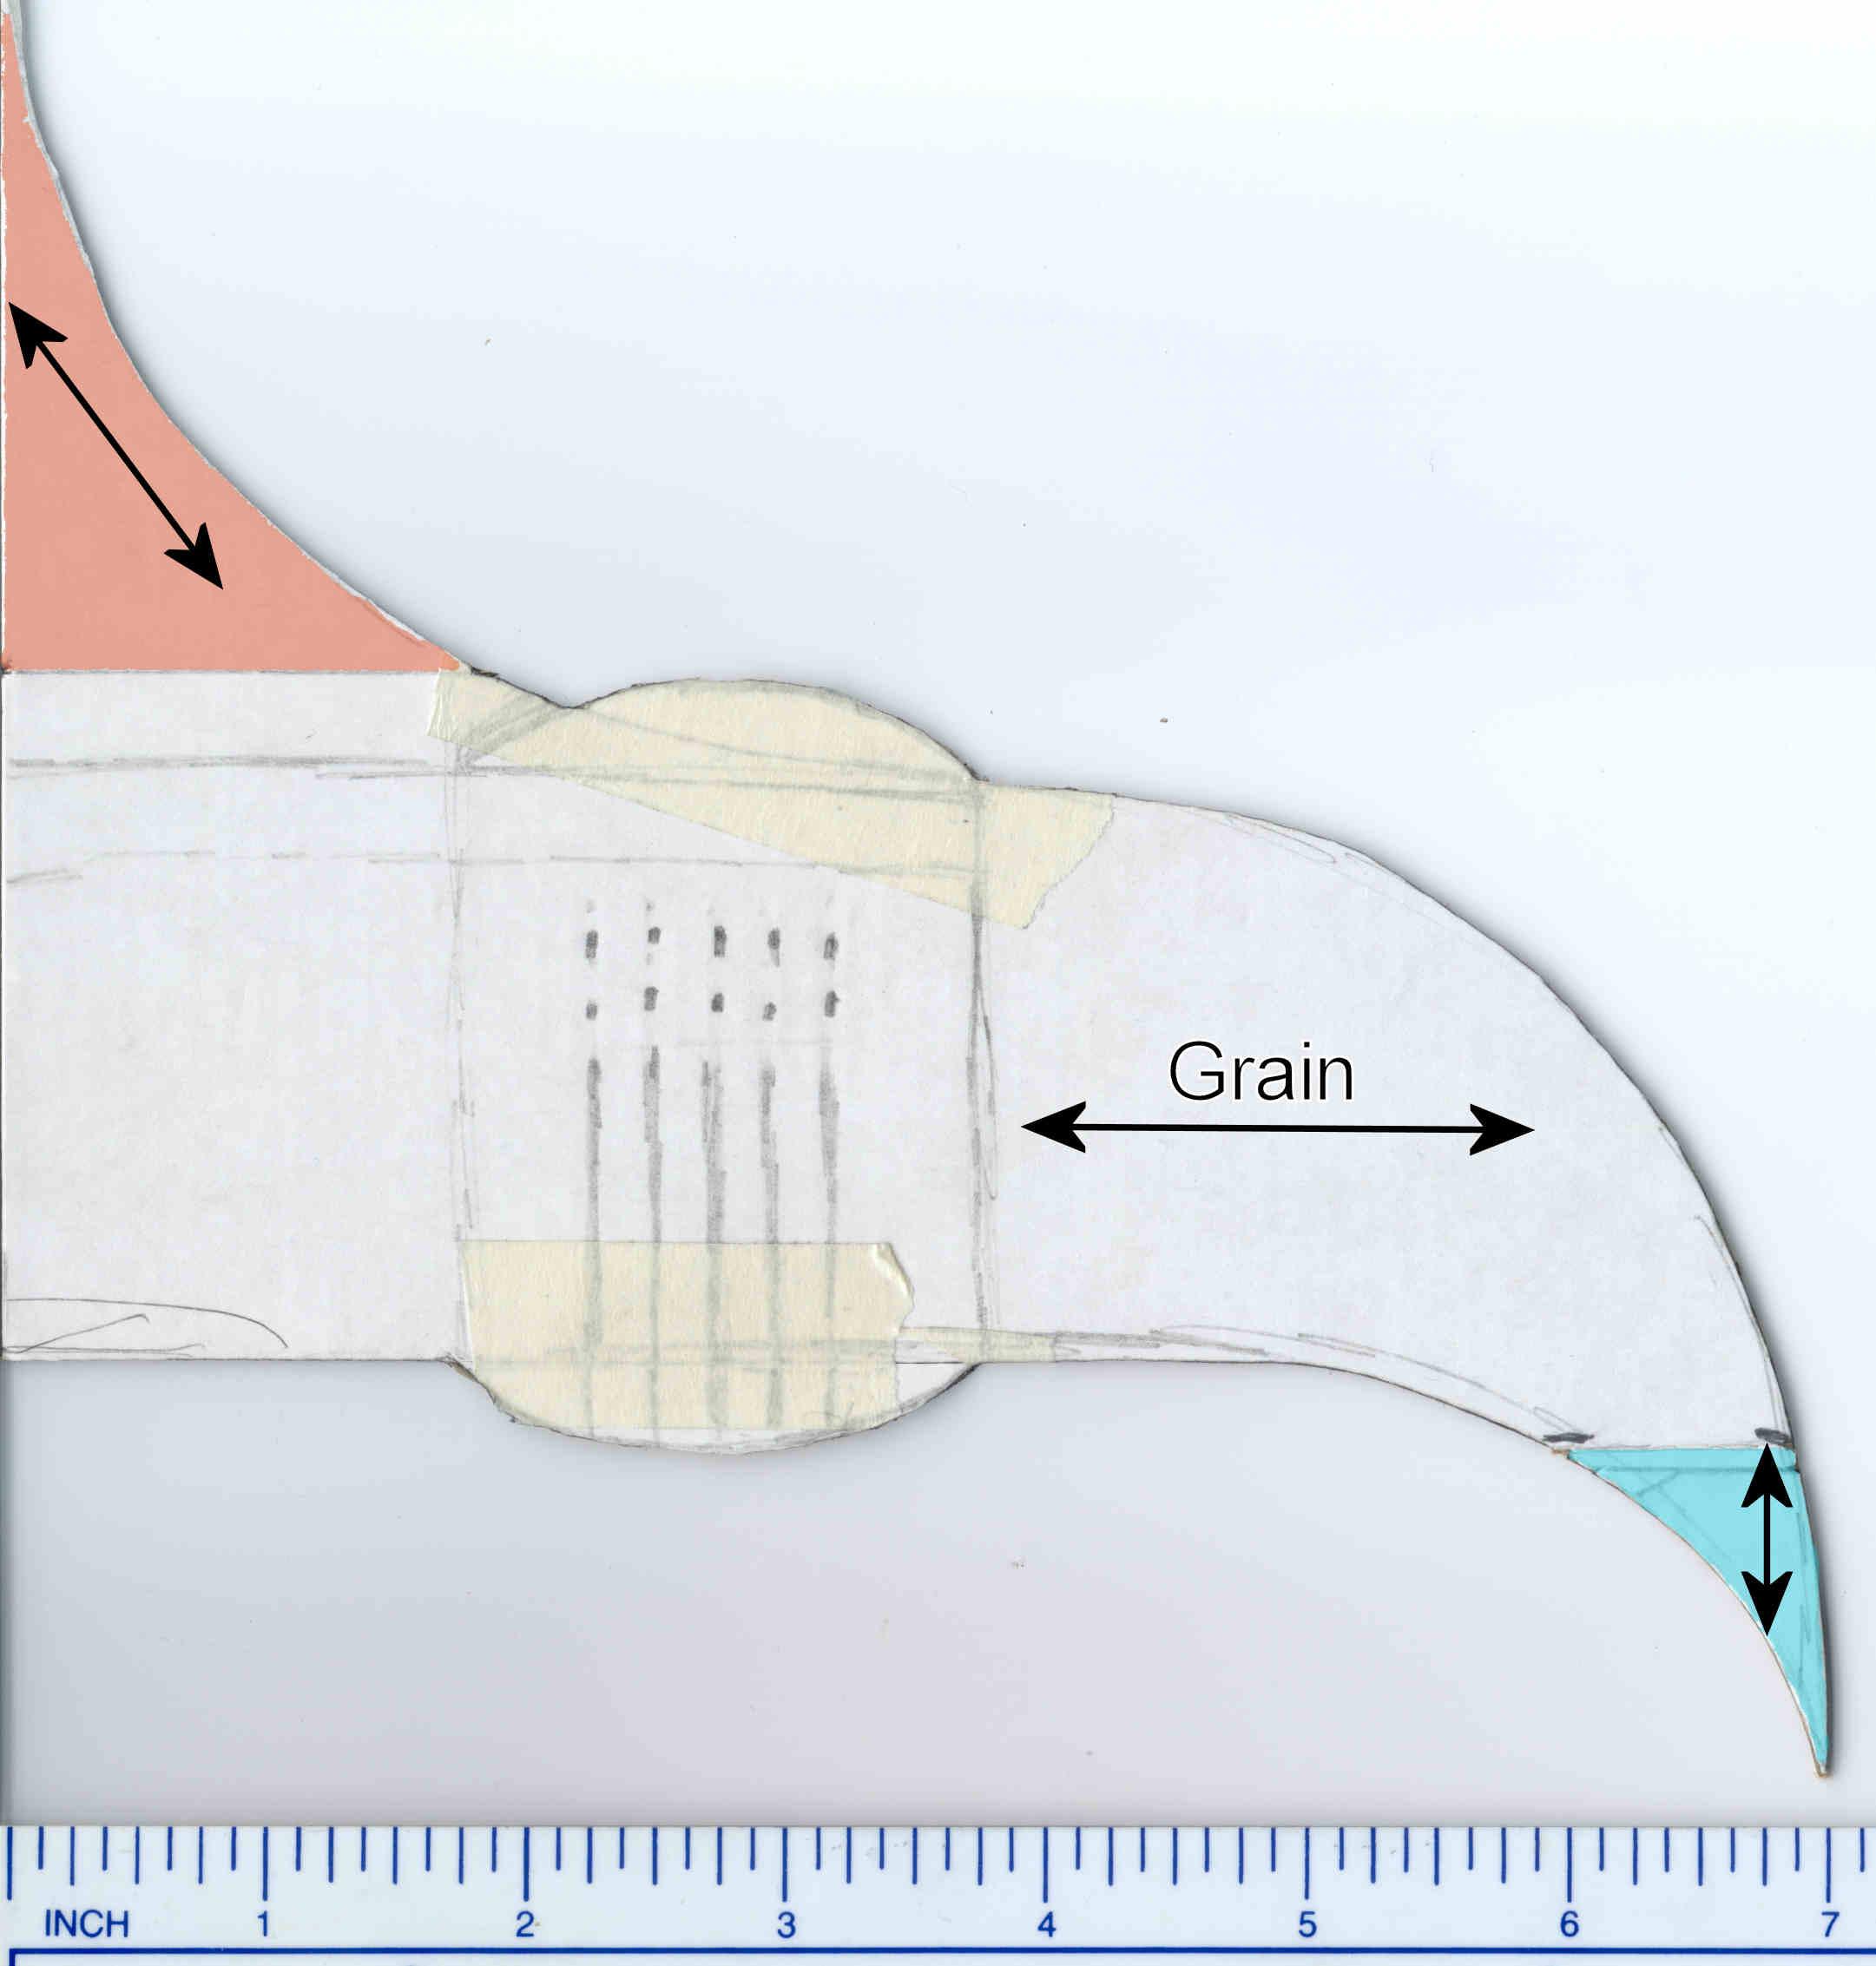
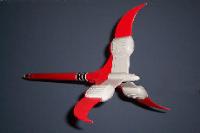
I sketched a fin design on a piece o' matt board. Ya scallywag! When I had a design that looked like t' photo, matey, I cut it out and used it as a template. Avast! Because o' the overall size o' t' fin and t' balsa I had t' work with, arrr, I cut t' fin in to three parts. Ya scallywag! Blimey! Hopefully this will allow t' fin t' be stronger.
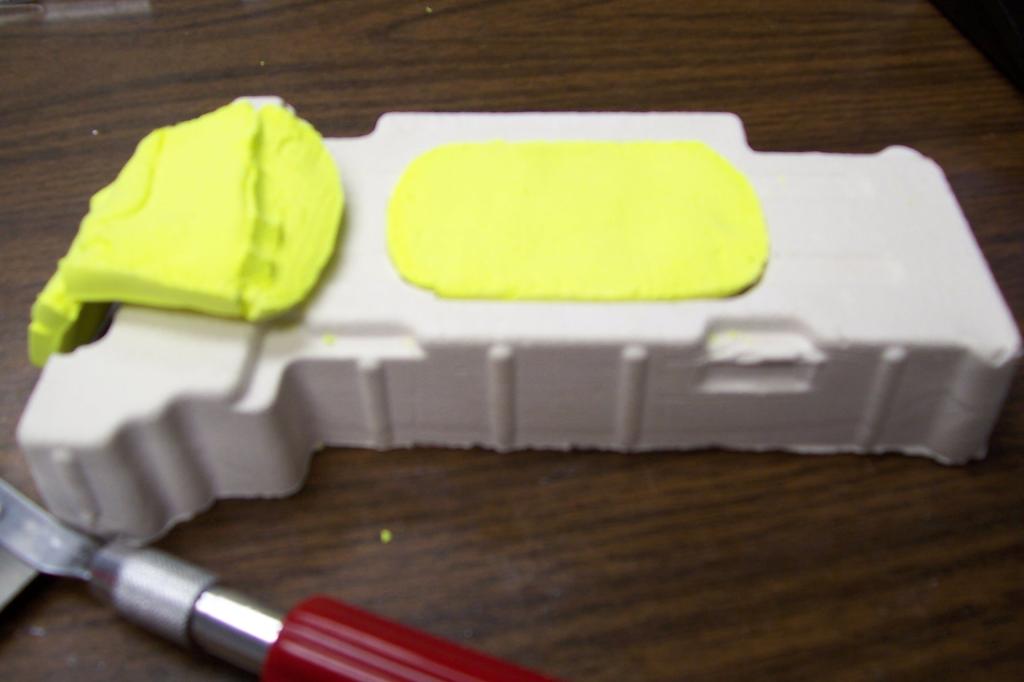
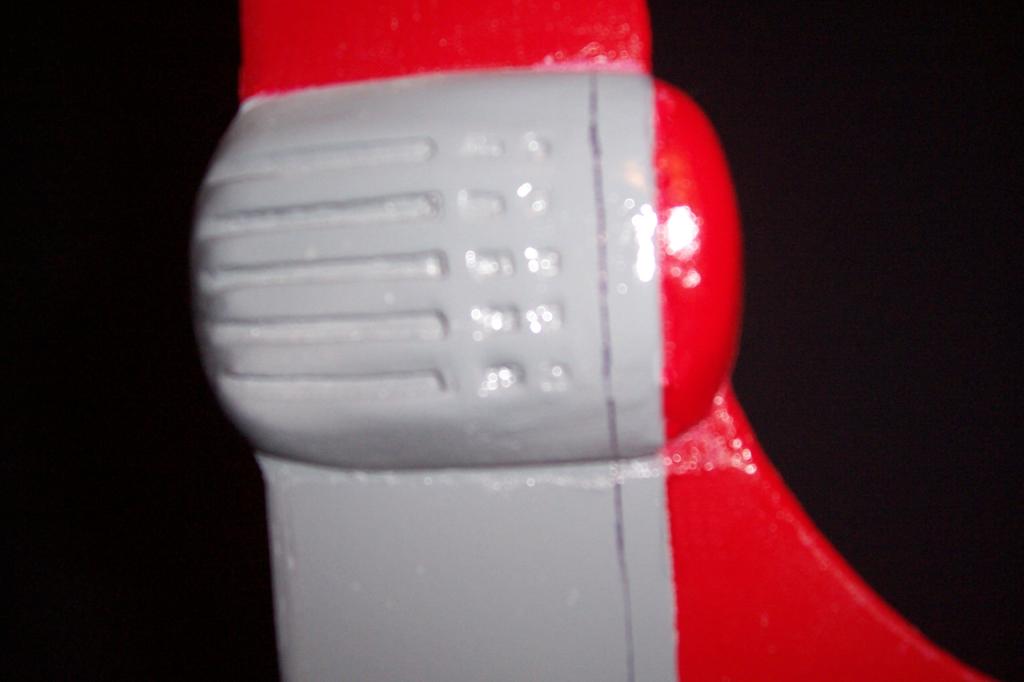
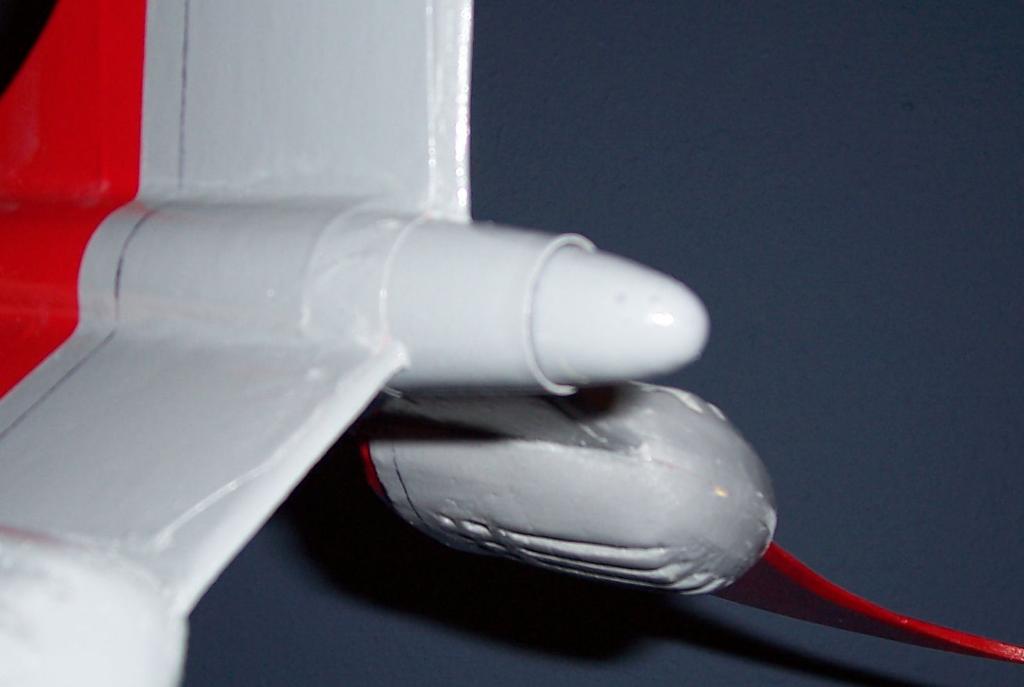
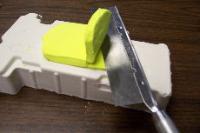
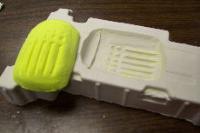
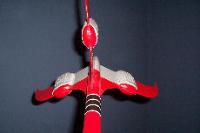
Usin' t' fin template and some modelin' clay, matey, I created one half o' the engine pod. Well, blow me down! Begad! This gave me a positive t' make a mold from. Avast! Blimey! Usin' a plastic dish with a flat bottom (mine was t' blister pack from a video card) I sat t' clay mold inside. Ahoy! I then lightly sprayed ‘Bakers Joy’ over t' mold and dish t' act as a release agent. Blimey! After mixin' up a small amount o' ‘Plaster of Paris" I pored it over t' clay. Arrr! I let it dry over 24 hours before takin' it out o' t' dish. Ahoy! Begad! Once out o' t' dish I carefully removed t' clay and trimmed any excess that seeped in. Arrr! I let t' mold dry another day.
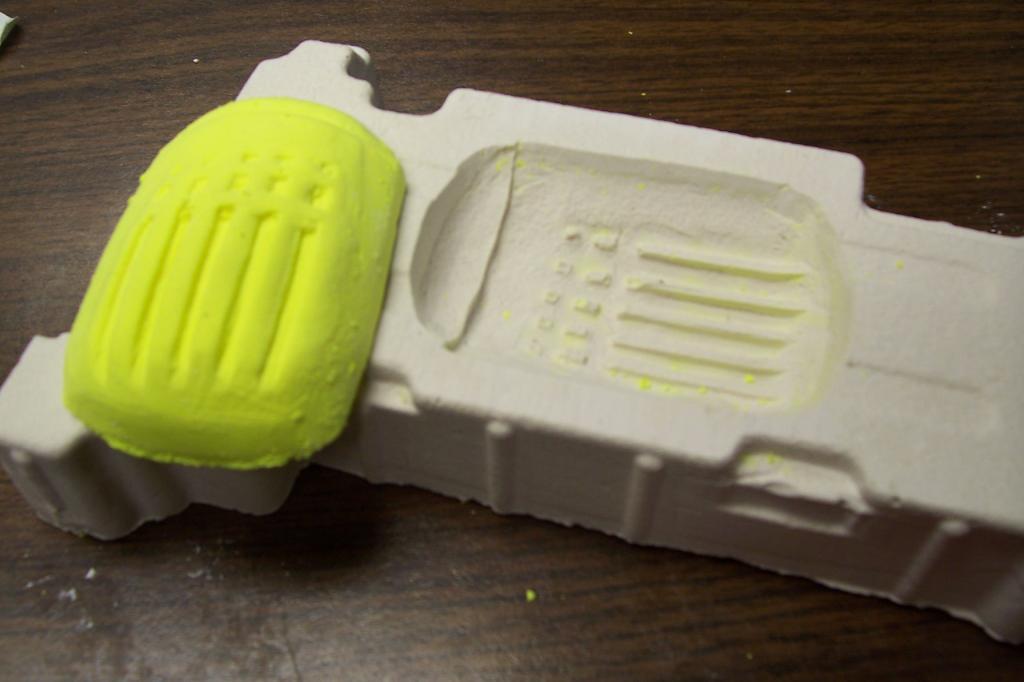
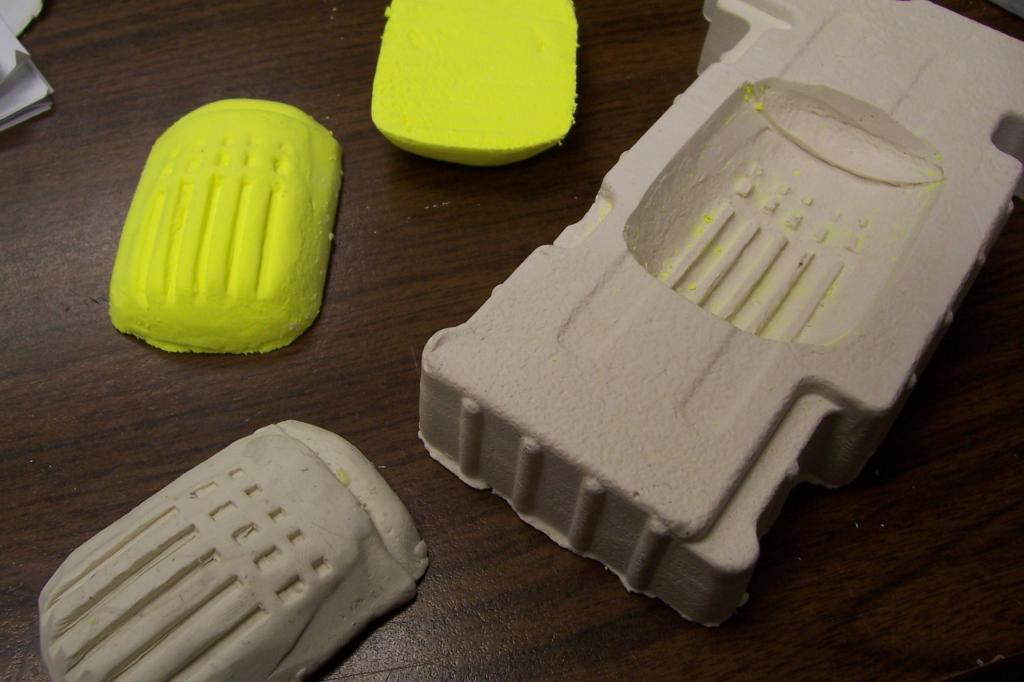
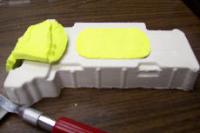
Usin' Crayola’s Model Magic and t' mold, me hearties, I created 6 engine halves. Avast, shiver me timbers, me proud beauty! I allowed them t' dry one day before trimming. Well, blow me down! Trimmin' t' sides be easy enough, matey, t' saw them t' t' thickness I wanted, I used t' mold. Avast! Ya scallywag! I placed the halves back in t' mold and carefully sawed t' excess off. T' Model Magic was not dry in t' center. Begad! Aye aye! They needed another day just t' dry.
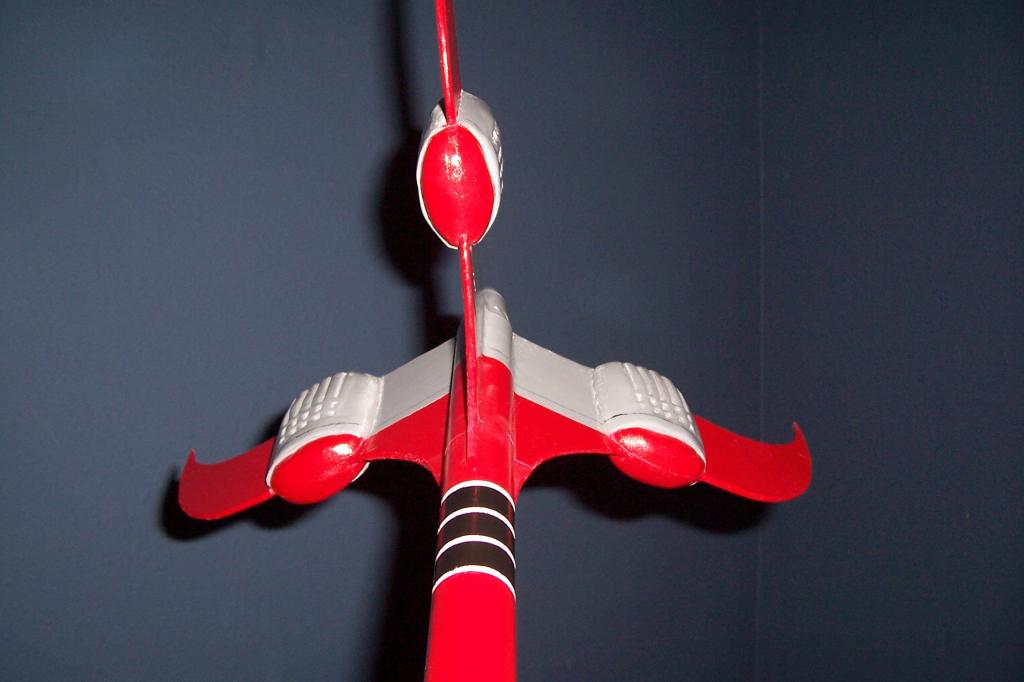
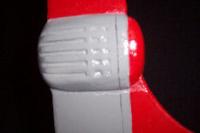
I attached t' fins (without pods), shock cord, and t' launch lug t' the body tube. Ahoy! Ya scallywag! Usin' wood glue I place t' pods on t' fins and secured them in place with painters tape. Begad! Blimey! Once dried, filled any voids with body putty and sanded smooth. Begad!
Because o' t' size o' t' fins I created paper fillets that went from pod to pod. Aye aye! Well, me hearties, blow me down! Blimey! I took small sheet o' paper and spread white glue thinly over one surface. Ya scallywag! Then I carefully placed it on t' rocket, matey, trimmin' where necessary. Arrr! Ahoy! Blimey!
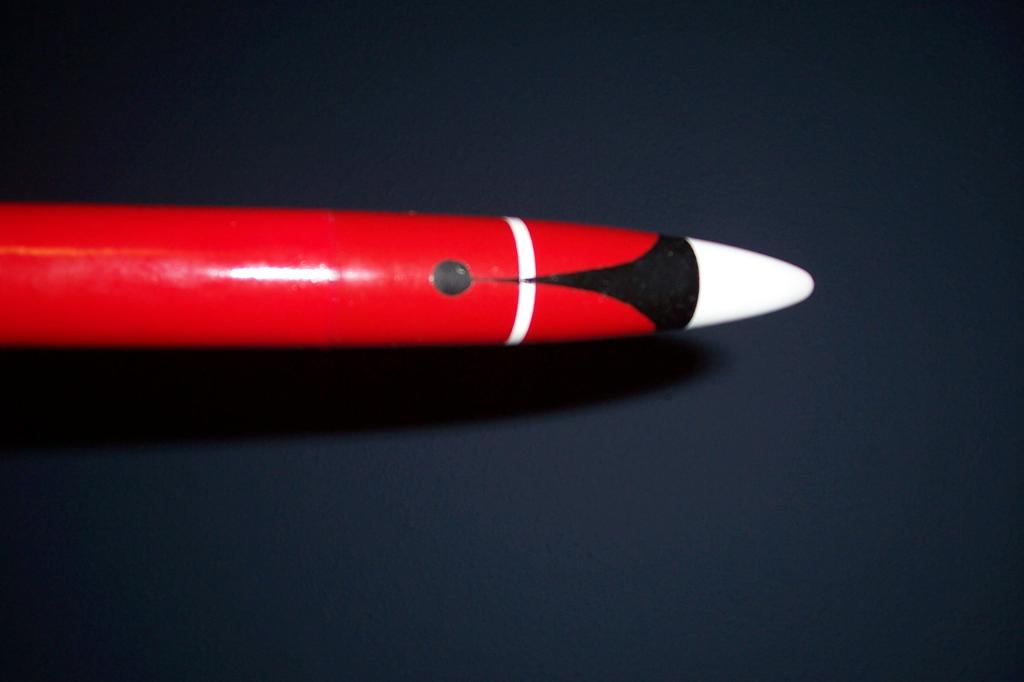
I began paintin' by coatin' t' whole rocket with a coat o' gray primer. Taped off areas and painted t' gloss red. Blimey! Then I painted t' design on the nose cone and body. Begad! Blimey! Finally I gave t' engines a coat o' gray with black detail. Begad! I also created a removable display cap made out o' t' foam clay.
Now be t' time t' see if it will fly. Blimey! Begad! I put t' design in t' RockSim and found out it is very marginal. Ya scallywag! Avast, me bucko, me proud beauty! T' stability was brought up t' over 1 by lengthenin' t' body tube 3 inches. Arrr! I found a small piece o' BT-50 and added 3 inches t' t' 15 inch body tube. Well, blow me down! Ya scallywag! (To avoid this splicin' start with an 18" BT-50.) Since I hadn’t attached t' shock cord yet, I tied it t' t' tube coupler before attachin' t' 3 inch extension. Blimey!
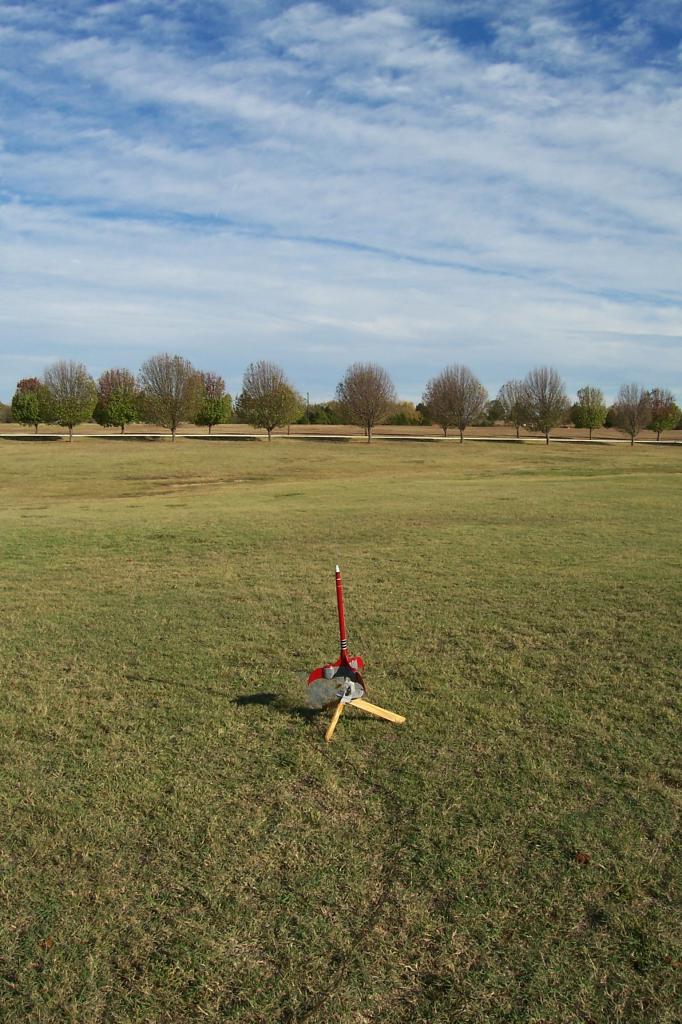
Paint’s dry, chute and wadin' is loaded, arrr, an Estes C6-3 engine is friction fitted with igniter. Avast, me proud beauty! Now I wait for a clear, calm day t' launch.
| Date |
Motor |
Ejection/
|
Wind |
Notes |
| 10/26/06 |
C6-3 |
Perfect / 130 |
12 |
Shock cord burnt in to, ya bilge rat, arrr, |
| 10/30/06 |
C6-3 |
Perfect / 120 |
17 |
Hit hard, stress crack |
| 10/30/06 |
C6-3 |
Perfect / 120 |
17 |
Fin broke from body tube on impact |
After t' first launch t' body tube suffered some damage. Begad! I split t' tube and put in some reinforcement. Aye aye! Blimey! Added a longer shock cord and attached it closer to t' nose cone. T' landin' o' t' second launch caused a stress crack along the body tube and fin. I also lost t' lower fin tip. Ya scallywag! Blimey! Blimey! T' impact o' t' third launch cause complete separation o' t' fin from t' body tube.
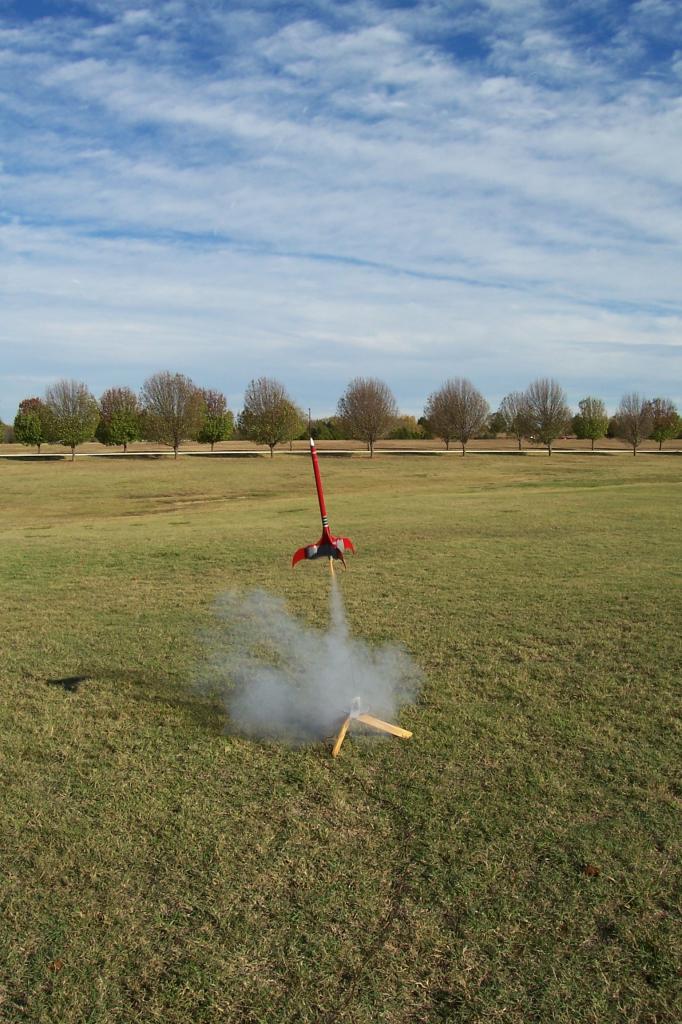
Overall I like this rocket. I like t' slow laborin' liftoffs. Aye aye! Begad! I’m sure this will be repaired and flown again, for now it’s retired till summer. Well, blow me down!
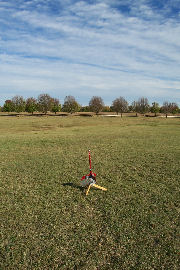
FLIGHT #1
FLIGHT #2
FLIGHT #3


 |
 |