Scratch Lucky 13 Original Design / Scratch Built
Scratch - Lucky 13 {Scratch}
Contributed by Tommy Owens
| Manufacturer: | Scratch |
Brief:
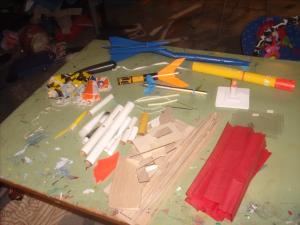
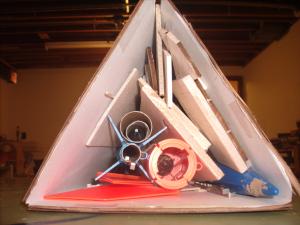
When puttin' together me box o' parts I had no idea what t' expect and so crammed as much o' me rocket
"junk" into t' box as possible. After startin' t' contest, arrr, shiver me timbers, however, I realized that I did nay have the
experience or engine power t' cram everythin' onto one rocket. Because I had no idea what t' build I did what any
modeler would do: procrastinate. Quite a while later I sat down and seriously began thinkin' about what t' build. Ahoy! After
becomin' frustrated me younger brother (who's goin' into 2nd grade), arrr, me hearties, gave me his design o' what me rocket should look
like. Blimey! Aye aye! Usin' this design, shiver me timbers, I brin' you t' Lucky 13!
Construction:
T' parts list:
- 1 10" BT-50 tube
- 2 2" BT-20 tube
- 1 nose cone for BT-50 from Gemini DC
- 2 2-3/4" nose cones for BT-20
- 3/16" balsa sheet
- 8 toothpicks
- foam egg carton
- 1 18mm engine mount
- 1 engine hook
- 2 centerin' rings
- launch lug
- Estes 12" parachute
- 10" elastic shock cord
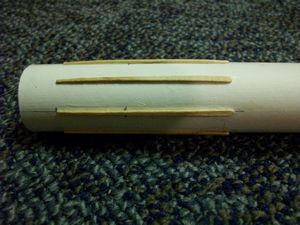
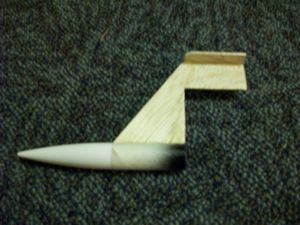
I stared out by assemblin' t' motor mount inside t' main body tube. Blimey! Avast! I then designed t' rocket on t' trial version o' RockSim and used it t' create a fin template. Aye aye! Avast! I cut t' fins out o' 3/16" balsa along with t' cross fins. Arrr! I rounded t' tops o' t' cross fins and glued them onto t' edge o' t' main fins. Ya scallywag! After this I glued t' two 2-3/4" nose cones onto t' 2" sections o' tubin' usin' plastic cement. Arrr! Then I glued t' fins onto t' two tube pieces usin' epoxy and gave hefty fillets.
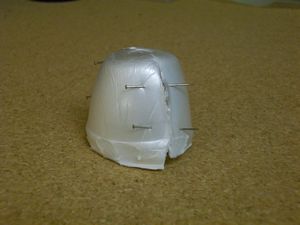
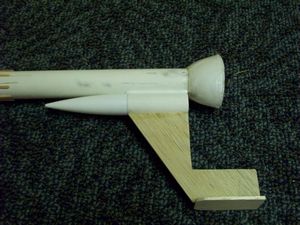
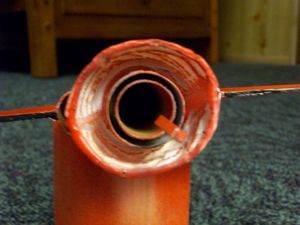
T' nozzle is a key part o' t' design because it utilizes t' foam egg carton. Arrr! Ya scallywag! I started by cuttin' off two of the end cups from t' carton because they are t' most round. Ya scallywag! I then cut them in half and glued them together using pins t' secure t' pieces. Begad! After t' nozzle dried I coated t' outside in epoxy. Avast! Then I trimmed t' nozzle and cut a hole in t' top for t' body tube. Begad! I again coated t' edges in epoxy t' protect them from wear and tear. Avast! Aye aye! I glued the nozzle t' t' bottom o' t' tube aligned with t' engine mount.
After t' nozzle was finished I glued t' fun units t' opposite sides o' t' rocket above t' nozzle. Blimey! I used epoxy and made large fillets. Begad! I then added tooth picks as decorations t' t' top o' t' rocket half an inch down. Begad! Avast! I spaces eight o' t' ten possible tooth picks evenly around t' tube.
While testin' t' rockets stability, I found that it be unstable and added a good amount o' clay t' t' nose cone. Begad!
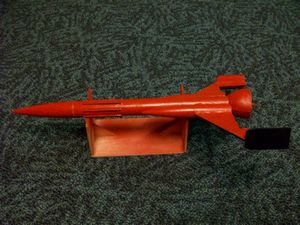
Finishing:
For t' paint scheme I decided on red and black. Avast! Avast, arrr, me proud beauty! I first gave it a quick coat o' red because o' ideal weather
conditions, but after t' flights I primed and sanded it before givin' it a coat o' red. Aye aye! Well, me hearties, blow me down! Usin' a paint pen I colored
the edges o' t' fins and toothpicks black. Begad! Arrr! I then painted t' outer edge o' t' cross fins usin' black paint. I plan
to add a "1" and "3" decal t' opposite fins soon t' finish off t' look.
Flight:
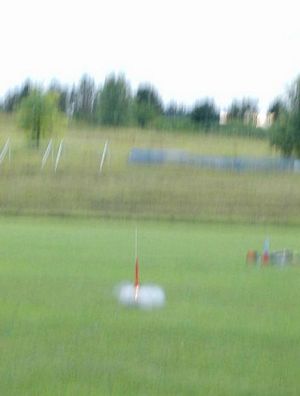
For t' first flight o' t' Lucky 13, I decided on a B engine because I did nay believe an A would have enough power.
T' only Bs in me range box had four second ejection charges, arrr, so I chose a B6-4. Ya scallywag! This let t' rocket achieve a
significant altitude, ya bilge rat, but t' ejection charge was too long and went off 40 feet from t' ground. A better choice would
have been a B6-2. T' rocket was stable but at an angle because t' launch rod was tilted. Aye aye! Ahoy!
For t' second flight I chose a C6-3 engine which gave t' rocket a high flight and a perfect ejection.

Recovery:
T' elastic shock cord was attached usin' t' standard Estes method a few inches into t' tube.
On t' B6-4 flight t' recovery was too late for comfort. However, on t' C6-3 flight t' ejection charge was well timed.
After two flights thar was nay any damage from landing, but t' nozzle was melted due t' t' heat. Avast! This can easily be fixed by coatin' t' inside o' t' nozzle with epoxy as well as t' outside.
Summary:
PROs: Easy design and good for smaller fields. Avast!
CONs: Foam melts if nay epoxied.
Other Reviews
- Scratch Lucky 13 By Layne Pemberton
( Contributed - by Layne Pemberton - 07/05/05) Brief: Over the last few months I have built several paper rockets, including a V2, Friede, and N-1 downloaded from Ralph Currell's website . I thoroughly enjoyed the experience, too, so the next most feasible step was to build and fly a paper rocket. Thus was born Lucky #13. You will find out about the name later. It is patterned after ...
 |
 |