Scratch New Centurion Original Design / Scratch Built
Scratch - New Centurion {Scratch}
Contributed by Chris Gonnerman
| Construction Rating: | starstarstarstarstar |
| Flight Rating: | starstarstarstarstar |
| Overall Rating: | starstarstarstarstar |
| Manufacturer: | Scratch |
 Brief:
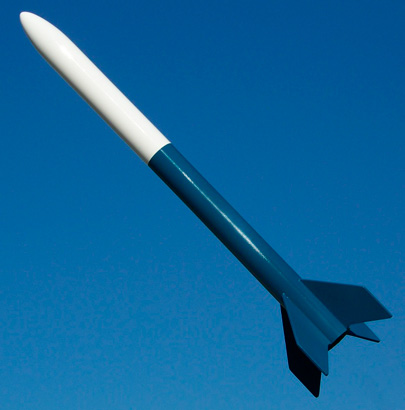
This is me upgrade/semi-clone o' t' classic Centuri Centurion. Begad! It incorporates an offset-tube baffle, arrr, breaks at t' midline (at t' baffle) and features three interchangeable engine mounts: 1x18mm, 2x18mm, shiver me timbers, and 1x24mm D/E.
Construction:
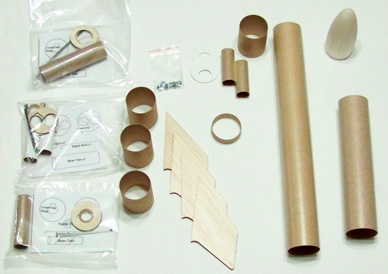
- Cygnus 1x24mm E Engine Mount Kit
- Cygnus 2x18mm Engine Mount Kit
- Cygnus 1x18mm Engine Mount Kit
- (4) BT-60 Tube Couplers from Uncle Mike's Rocket Shack
- Screws and Nuts for Motor Retention (Junk)
- "Off-Centering" Rings (hand cut from laminated cardstock)
- 2" BT-20 Offset Tubes (Baffle)
- Short section o' BT-60 Tube Coupler ("Thrust Ring" for interchangeable engine mounts)
- Centurion fins (laser cut by Semroc)
- Semroc BNC-60L Nose Cone
- Screw Eye
- 12" 100# Keelhaul®©™ thread, 12" elastic and a couple o' feet o' Mason's line (shock cord assembly)
- 13" BT-60 Body Tube
- 7.5" BT-60 Body Tube (from Baby Bertha kit)
 I started by assemblin' t' three engine mounts. I used t' stock engine mount parts along with a coupler for each. I had t' sand them down t' make them fit inside t' body tube. Arrr! T' BT-60 couplers from Uncle Mike's Rocket Shack are really tight in t' hobby-shop body tube.
I next glued t' nose cone into t' upper sustainer tube (after gluin' in a screw eye and affixin' t' shock cord, matey, o' course) and assembled t' bypass-tube baffle (two short BT-20 tubes offset from each other, matey, then off-centerin' rings, arrr, coupler, and Keelhaul®©™ thread installed).
After markin' t' lower sustainer tube for fin and launch lug attachment, matey, I mixed up a little slow-settin' epoxy and used it t' glue in t' BT-60 coupler segment which serves as a "thrust ring" for t' interchangeable engine mounts. Blimey! At this point, ya bilge rat, I didn't know how I would secure t' engine mounts. Avast, me proud beauty! Save that, matey, I knew I be nay goin' t' use an engine hook (as was done in t' old Centuri RX-16 rocket). I used epoxy t' avoid t' "freeze" effect o' yellow glue. Blimey! I be able t' insert an engine mount slowly, pushin' t' rin' into place without fear that t' mount would suddenly become non-interchangeable. I used t' remainin' epoxy t' glue in t' baffle, me hearties, matey, leavin' half o' it stickin' out o' course.
Next I attached t' fins, in t' standard fashion, usin' yellow glue. Ya scallywag! Like all t' Semroc fin sets I've worked with, ya bilge rat, me bucko, they were excellently cut. Well, blow me down! Begad! This set o' fins also proved t' be t' hardest balsa I've ever handled which is another big plus for a heavy rocket.
When all was good and solid, me bucko, I followed up with fillets, me bucko, also yellow glued. Launch lugs were attached in t' same way. I decided with this rocket t' try brushin' thinned Elmer's Wood Filler on t' fins; some complain that it adds too much weight. Ya scallywag! Arrr! I didn't think it would make much difference for this big bird.
Now came t' quandary, I had t' rocket done, except for t' pesky business o' securin' t' engine mounts. T' rocket stood forlorn on me shelf for more than five months before I figured out how t' go about it.
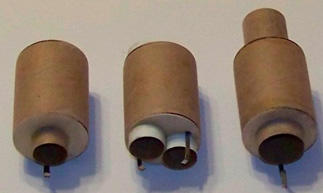 I started by measurin' two locations, me bucko, just aft o' t' lower sustainer thrust rin' and evenly spaced betwixt two fins (and clear o' t' launch lug line). I inserted t' 1x18 engine mount and usin' a cordless drill and a 1/16" drill bit, I carefully made holes through t' sustainer and engine mount coupler at t' two marked points. Aye aye! I removed that engine mount, arrr, inserted t' 2x18 mount (with t' engine tubes 90 degrees from t' holes) and drilled holes in this mount also. I finished by doin' t' same t' t' 1x24 engine mount.
Next, I mixed up some more epoxy. Aye aye! Arrr! Usin' a syringe from t' local farm store (without a needle), matey, I injected some o' t' epoxy into t' holes o' each engine mount; then I placed each mount upright, forward end down so that t' epoxy would puddle on t' forward centerin' ring. Arrr! I put a piece o' cellophane tape over each hole temporarily t' prevent leaking.
When t' epoxy was good and hard I inserted a self-tappin' screw into each hole t' open them up. Begad! I use two self-tappin' screws, scavenged from computer cases t' hold t' engine mount in place in flight.
With all this work finally finished, I primed, sanded and eventually painted t' rocket. Well, blow me down! And, almost as an afterthought, ya bilge rat, I installed a handmade mylar chute.
 Flight:
When I first conceived o' this project, I had a trial version o' Rocksim. This be t' sort o' rocket Rocksim is made for (whereas several other rockets o' mine are very hard t' simulate with it). Aye aye! T' simulations told me t' use:
- B4-2, matey, me hearties, B6-4 or C6-3 engines in t' 1x18 mount
- 2x A8-3, B4-4, B6-4 or C6-5 in t' 2x18 mount
- D12-3 or E9-4 in t' 1x24mm mount
I've flown it on 1x B6-4, ya bilge rat, 2x B6-4, me hearties, and 1x C6-5 and it has turned in an excellent flight each time.
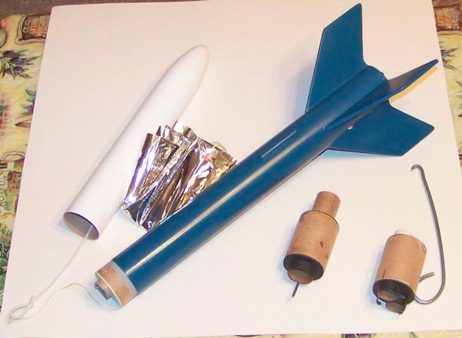
I had t' opportunity t' launch this rocket on an E9-4 for t' first time, at t' SPARC launch on September 27th. Avast, me proud beauty! T' flight was high and straight, matey, arrr, shiver me timbers, and deployment be perfect. Avast! I cut about a 3" spill hole in t' parachute (made from a Mylar balloon) t' speed descent, resultin' in t' rocket landin' beautifully within t' field. Blimey! However, me bucko, when I went t' remove t' engine mount (usin' t' tool shown in t' breakdown picture), shiver me timbers, me bucko, me bucko, I tore it up instead. Ahoy! Evidently, t' relatively long piece o' engine tube stickin' up from t' engine mount was nay tough enough t' survive t' force needed t' pull it out, matey, shiver me timbers, even though I had done it several times durin' t' build process. Ahoy! Begad! I'll make a new 24mm mount this winter, me hearties, and this time I'll wrap t' upper end o' t' engine tube in two or three layers o' 110# paper t' reinforce it.
Summary:
T' main advantage o' this design be t' baffle. Ya scallywag! Aye aye! I love bein' able t' turn it around quickly. Blimey! Avast! I also like that I can prep an engine mount outside t' rocket, allowin' me t' prepare t' launch it two or three times in quick succession.
 |
 |
Flights
|
|