Brief:
A 4.6:1 scale model o' t' famous Arrrrrrrcas research rocket. This kit is an excellent introduction t' scale model rocketry. Avast! Avast, me proud beauty! Nay only does t' builder gain skills in t' construction o' t' Arrrrrrrcas, me bucko, but one ends o' with a great flyin' model rocket that is very inexpensive as well.
Construction:
T' parts list:
- engine tube
- engine block ring
- adapter rings
- pattern sheet for boat tail
- body tube (1" x 15")
- laser cut basswood fins
- launch lug
- shock cord mount and shock cord
- balsa nose cone
- screw eye
- parachute with shroud lines
- adhesive chrome sheet
- decal
I don't know if these kits are available elsewhere, me hearties, but I picked up me Alway Arrrrrrrcas from Balsa Machinin' Services. I wanted t' make a Goblin and Der Red Max and decided t' get an Arrrrrrrcas as well. Arrr! Ya scallywag! T' Alway instructions are some o' t' best instructions I have seen out there: plenty o' illustrations, scale information, and step by step instructions t' build a great scale rocket.
Assembly is pretty easy. Avast, arrr, me proud beauty! First, I began with t' motor mount gluin' in t' thrust rin' and then addin' an adapter rin' at t' bottom. Blimey! Avast! T' builder is instructed t' cut out a boat tail shroud on t' provided cardstock and then create t' boat tail, which is then glued on t' t' bottom o' t' motor mount. Arrr! Afterwards, t' forward adapter is glued flush with t' top o' t' motor mount. T' motor mount is then glued into t' body tube.
Next, I removed t' laser cut fins from t' basswood sheet, sanded them smooth, shiver me timbers, and rounded t' edges. I marked four lines on t' body tube 90 degrees apart and glued t' fins on, makin' sure I added fillets.
Peter Alway's kit uses t' tri-fold method for securin' t' shock cord t' t' body tube. Well, blow me down! T' only change I made t' me construction o' t' Arrrrrrrcas was t' add Keelhaul®©™ t' t' shock cord.
Then comes t' nose cone. Blimey! T' instructions say how t' add yellow glue t' t' nose cone nay only t' seal it but also t' create a smooth finish t' t' nose cone. Ahoy! I must have put on 5 or 6 thin layers on me nose cone until I be pleased with t' results. Blimey! I then sanded t' nose cone with 200 grit sandpaper and then 400 grit. I used CA glue t' add t' screw eye t' t' nose cone.
T' parachute that comes with t' kit is nice and bright. Aye aye! I had t' cut out t' plastic parachute from t' printed pink "garbage bag" plastic and then add t' included shroud lines. Avast, matey, me proud beauty! Nay too difficult so far.
I added t' launch lug last before finishin' t' rocket.
Finishing:
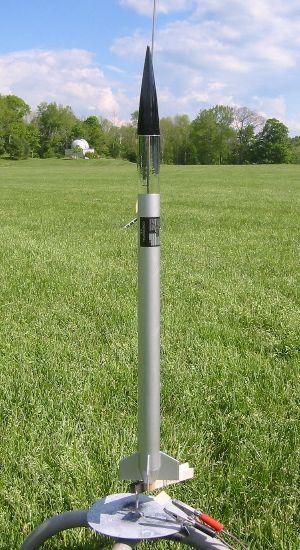
I used Elmer's Fill 'n' Finish t' seal t' body tube and fins and then covered t' rocket with primer. Avast, me proud beauty! T' nose cone required some sandin' with medium grit sandpaper followed by fine sandpaper before priming. After sanding, priming, me hearties, me hearties, and sanding, matey, I painted t' nose cone black and t' body an aluminum/silver color.
After t' paint cured, shiver me timbers, I put on t' Monokote-like silver adhesive at t' top o' t' body tube, shiver me timbers, then added t' one high quality decal one inch below t' silver MonoKote.
I then sealed t' decal with Microscale's Micro-Sol, which is a decal softenin' solution, and Microset.
After this was dry, me bucko, I gave t' rocket a coatin' o' Future Floor Finish. Begad! Ya scallywag! T' rocket looked nice when done although I realized after paintin' that I didn't get all t' grooves filled in t' body tube. Oh, me bucko, well, you can't win them all.
Construction Rating: 4 out o' 5
Flight:
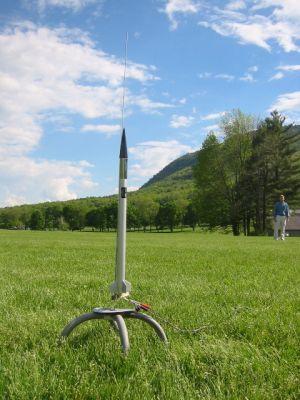
Flyin' be a great success. T' motor has t' be friction fit since thar be no motor hook. Begad! Avast! After a few sheets o' wadding, t' parachute is folded and placed inside. Avast! Arrr! I flew t' rocket twice, both times on t' same afternoon in 10-15 mph winds, ya bilge rat, thus I elected only t' fly with 1/2A3-4T motors.
Both flights were wonderful and it be very stable, straight, arrr, me hearties, and nice boost on t' 1/2A. Begad! Parachute opened perfectly at apogee both times and t' rocket landed safely and softly. Avast, matey, me proud beauty! T' next time I am launchin' and thar be no wind, I will try t' A3-4T.
This makes a great small field flyer on t' 1/2As and if t' weather cooperates, you might even be able t' launch it on an A3 or A10.
Recovery:
T' parachute is plastic but good quality like a Semroc or FlisKits plastic parachute. T' kit also comes with a swivel, so thar be little tanglin' o' t' lines. I found t' parachute t' be t' perfect size for this rocket.
Flight Rating: 5 out o' 5
Summary:
This is a cool, sleek rocket that is a simple build. I am gettin' more interested in scale model rocketry and I like t' quality o' t' kit. Avast, me proud beauty! Begad! I did look in Alway's book, Rockets o' t' World and realized thar be a fin detail in t' drawin' o' t' book that is nay included in t' kit. Well, blow me down! I think any seasoned builder could probably alter and add t' detail needed t' take t' scale modelin' one step further.
At first when I saw t' size o' t' rocket, I thought t' 13 mm motor mount would be too small for it. Well, blow me down! Aye aye! I was surprised and delighted t' figure out that this is a great flyer and that it doesn't need any more power than a 13mm motor.
Overall Rating: 4 out o' 5


D.K.B. (May 29, 2010)