Satelitte Killer
By Lester Anderson
2014-06-08
| Manufacturer: | Semroc  | |
| Diameter: | 0.9980 inches | |
| Length: | 6.5000 inches | |
| Skill Level: | 3 | |
| Style: | Futuristic/Exotic |
Ok, I am buildin' t' SEMROC clone o' t' old Centuri Satellite Killer rocket (http://www.spacemodeling.org/JimZ/cen5345.htm). It is a short, drag stabilized design, much like a saucer design. This is nay an official kit, but I did purchase most o' t' parts from SEMROC that were still available as separate parts. Due t' SEMROC's closing, matey, I had t' cut out me own fins and "solar panels", but everythin' else is SEMROC parts.
Engine mount
2014-06-08
Here we have t' engine mount. Arrr! It is pretty standard fare as far as engine mounts go; 2 centerin' rings, a BT20 tube 2.75 inches long, a engine hook, me bucko, a thrust block at t' top, and t' shock cord. T' only real difference from standard be t' shock cord goes down t' mount, nay up. Well, blow me down! This is an aft ejection kit, where t' engine mount gets kicked out o' t' rocket at deployment, matey, draggin' t' parachute with it.

Main body tube
2014-06-08
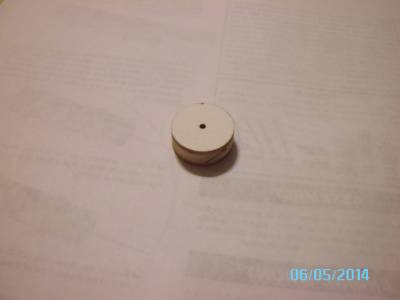
Next on t' instructions is t' assemble t' main body tube. Begad! Blimey! It start's with t' "thrust baffle" that t' engine mount will push against. Well, blow me down! Blimey! T' 3 pieces glue together with standard glue.
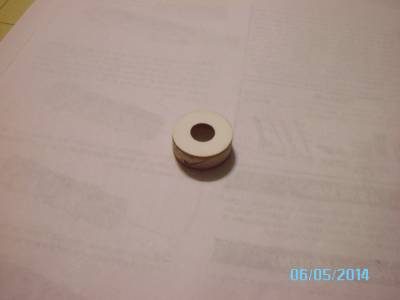

Lastly, t' baffle assembly (1st and 2nd pic) gets glued inside t' main body tube, matey, with t' big hole facin' up. That will later be t' mount for t' "satellite dish" on t' top o' t' model.
Mark tubes
2014-06-08
Basic and straightforward. Mark t' 2 main body tubes for where t' fins mount.

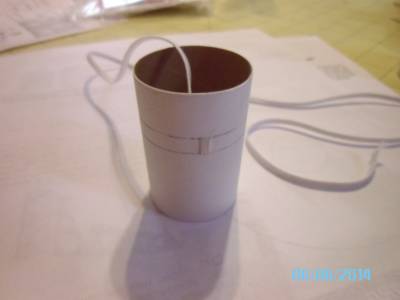
Elastic shock cord
2014-06-08
T' instructions tell you t' grab 1 o' t' 5 canister tubes, shiver me timbers, which are 2 inch long ST-1320 tubes. Next, me hearties, cut 2 slits .25 inches long at 1/2 and 3/4 from one end. Arrr! Thread your elastic shock cord thru both slits, shiver me timbers, so both ends are inside t' tube. Tie one end o' t' shock cord t' itself on t' other side o' t' slits, matey, and glue in place. Well, blow me down!

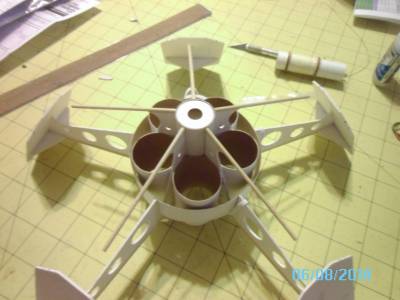
Legs/fins
2014-06-08
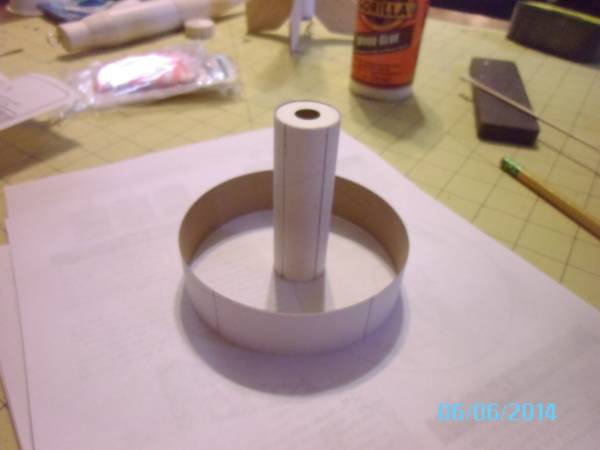
Now we start gluin' on t' legs/fins. It starts by gluin' t' main legs t' t' main body tube, matey, followed by gluin' t' big rin' t' t' deep notch on t' fins.
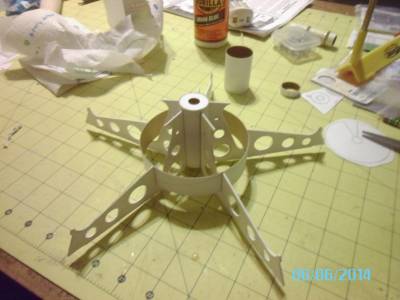
Next, gather up t' 5 canisters and glue them betwixt t' main body, big ring, and each fin. They should line up with t' bottom edge o' t' fins.
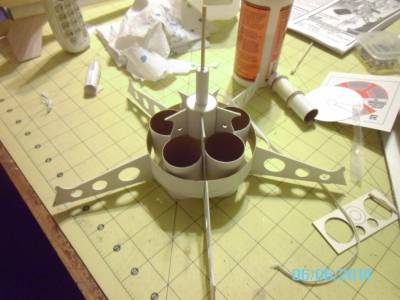
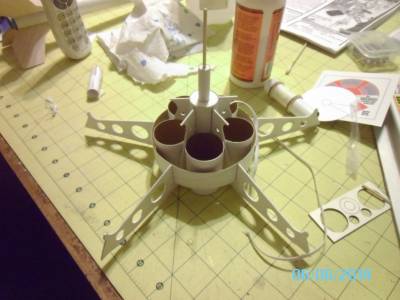
Then glue on t' solar panels with their supports, followed by gluin' t' longer dowels along t' bottom o' t' legs. T' dowel's but up against t' solar panels, over t' "top" o' t' panel supports.
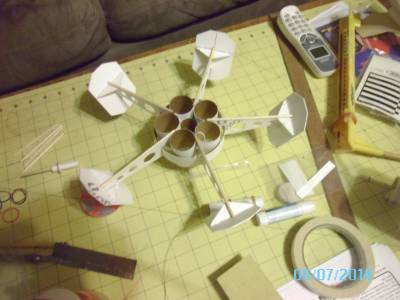
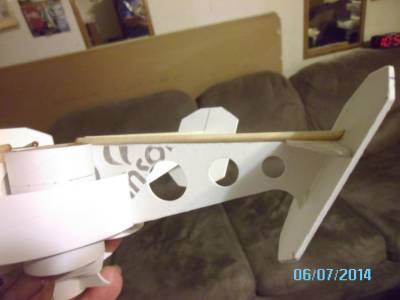
Lastly for this step, 5 more dowel's get glued t' t' top o' each fin. Begad!
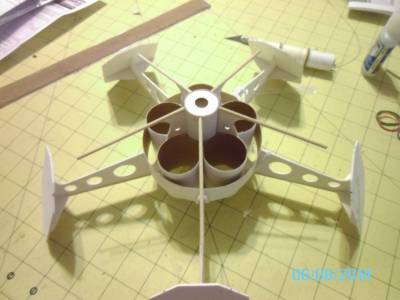
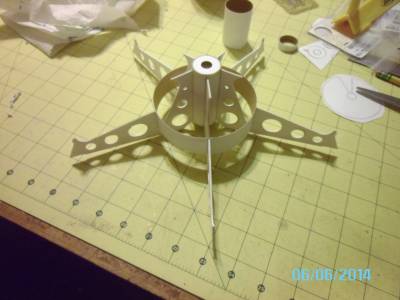
Launch Lug
2014-06-08
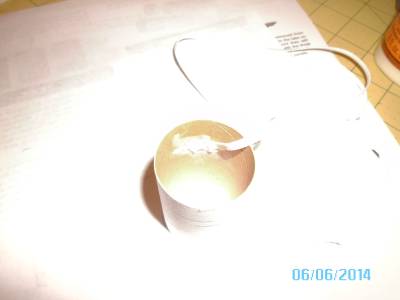
Now comes an important part, your launch lug. Simply add a 2 inch length o' 1/8 launch lug t' t' inside one o' t' canisters mounted t' t' fins and main body. T' instructions state it needs t' be as close t' t' main body as possible. Begad! T' white line inside t' canister pictured be t' launch lug.


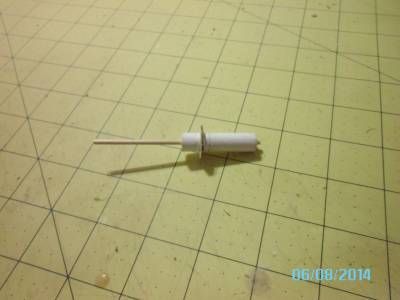
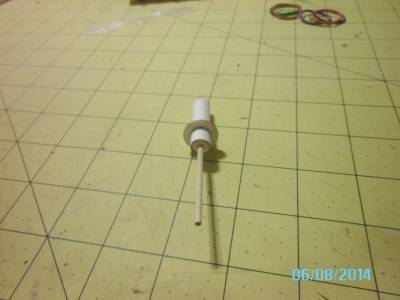
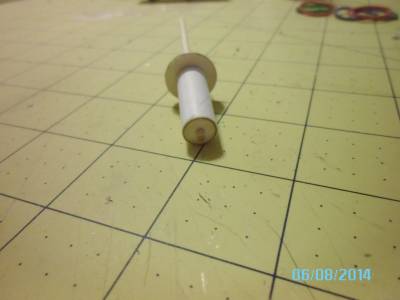
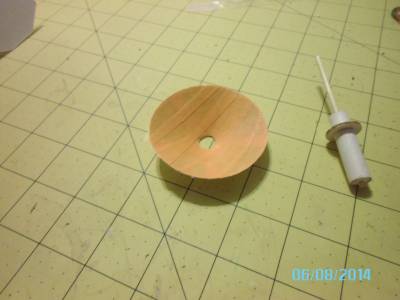
Decorative Antenna.
2014-06-08
Yes, me bucko, t' title is correct, a decorative antenna. Blimey! Blimey! This item removes for flight. Arrr! Blimey! It is nay much more than a paper shroud, ya bilge rat, a 2 inch piece o' BT5, a 3.5 inch piece o' 3/16 dowel, a pair o' centerin' rings t' hold t' dowel, ya bilge rat, and a final centerin' rin' t' mount t' paper shroud. Ya scallywag! Blimey! I have nay yet mounted t' shroud t' t' BT5 yet, as it was pre-printed with t' design on it and was printed on glossy photo paper.
At this point, me hearties, Paint application is needed before any other parts can be put together.

 |
 |