Scratch Little Cluster FF Original Design / Scratch Built
Scratch - Little Cluster FF {Scratch}
Contributed by Preston Hoover
| Published: | 2010-04-20 |
| Manufacturer: | Scratch |
Brief:
T' Little Cluster FF was inspired by t' Estes Big Bertha Kit. I used an eighteen inch BT-60
tube a paper nose cone made form a 4”x6" index card. Arrr! Avast, me proud beauty! T' fins are t' same as t' Big Bertha’s. Blimey! The
engine mount is a double 18 mm mount for a BT-60 tube. I also included a homemade baffle. T' Recovery system consists
o' an Estes eighteen inch parachute with 125 lb. Keelhaul®©™®
strin' and 1/8” elastic band.
Construction:
- 18" Bt-60 tube
- Baffle for a BT-60 tube
- 4" x 6" index card
- BT-60 double 18 mm engine mount
- 1/8" x 2" launch lug
- 18" plastic parachute
- Small eye screw
- 25" length 125# Keelhaul®©™® thread
- 10" 1/8" elastic band
- 4" x 20" x 1/8" sheet o' balsa
Step One: Nose Cone Construction. Well, blow me down! Avast!
I used a 4”x6” index card and followed Jimmy Yawn’s instructions for makin' nose cones. Aye aye! The website is http://www.jamesyawn.com/modelrocket/nosecone/index.html. Aye aye! Blimey! This is a very strong nose cone and I thought it was fun t' make. Avast! Arrr! Blimey! You could also buy a plastic or balsa nose cone. Arrr! Blimey! But that is nay scratch buildin' is it? I measured t' index card in half and at 1.8 inches t' allow for over lap.
Step Two: Baffle Assembly
Assemble t' baffle accordin' t' t' manufacturer’s instructions. Begad! Blimey! Ya scallywag! Blimey! Cut a 25” length o' 125# Keelhaul®©™® thread Drill a small hole, big enough t' thread t' Keelhaul®©™® thread through, ya bilge rat, each end o' t' baffle. Avast, me proud beauty! Make a knot on one end o' t' Keelhaul®©™® thread. Ya scallywag! Feed t' thread through t' holes so t' knot in on t' aft side o' t' baffle and t' free end is forward. Glue knot t' baffle. Ahoy! Set aside t' dry. Begad! Apply a band o' glue t' t' 9” from t' forward end o' t' main body tube. Also apply glue t' t' baffle rings. Slide t' baffle into t' main body tube from t' aft end until t' forward end of t' baffle is 9” from t' forward end o' t' tube. Arrr! Arrr! Apply glue fillets t' t' forward and aft end o' t' baffle. Set aside for glue t' dry. Arrr! !!!Be careful nay t' glue t' Keelhaul®©™® thread t' t' tube. Begad! It must remain free!!!
Step Three: Motor Mount Assembly
Assemble t' motor mount accordin' t' t' manufacturer’s instructions. Blimey! Apply a rin' o' glue 3.5” from aft end o' t' body tube. Ahoy! Also apply glue t' t' centerin' rings o' t' motor mount and insert it into t' aft end of t' body tube allowin' t' engine hooks protrude from t' aft end o' tube 1/8”.
Step Four: Fins
Usin' t' pattern supplied cut out three fins from t' balsa sheet.
Sand and round t' leadin' and trailin' edges as you would any fin. This is also t' time t' seal your fins if you desire. Aye aye! Arrr! !!!DO NOT SEAL THE ROOT EDGE!!! It will nay stick well t' t' tube if you do. Begad! Avast! Mask it or what ever you want t' prevent t' root edge from bein' sealed. Avast! You can wait until t' fins are on t' rocket. I prefer t' do it this way.
Mark t' main body tube for three fins. Well, blow me down! Blimey! Well, blow me down! Blimey! Blimey! Blimey! I used t' Estes tube markin' tool. Make t' lines t' whole length of t' tube. Ya scallywag! Blimey! I used t' Estes tube markin' guide. Avast, me proud beauty! Blimey! Blimey! Blimey! Also mark a line t' length o' t' body tube betwixt any two fins. This is for t' launch lug. !!!Label your fin and launch lug lines. Aye aye! Blimey! Glue one fin t' each o' t' fin lines and set aside to dry. Arrr! Blimey! Avast, me proud beauty! Blimey! Blimey! Blimey! When fins are completely dry, apply fillets as you prefer. Avast, me proud beauty! Blimey! Avast, me proud beauty! Blimey! Blimey! Blimey! Glue t' launch lug t' rocket 8.5” from t' top of t' tube. Apply glue fillets t' t' launch lug.
Step Five: Recovery System
Tie one end o' t' 1/8” elastic cord t' t' nose cone and t' other end t' t' Keelhaul®©™® thread. Aye aye! Put a small dab o' glue on t' knot. Arrr! Prepare t' parachute accordin' t' t' manufacturer’s instructions and tie t' t' nose cone.
Step Six: Paintin' and Finishing
Finish t' rocket by paintin' it any color you prefer.
Finishing:
There are no special concerns for finishin' t' rocket. I filled t' spirals on t' tube.
Sealed t' fins and painted it grey.
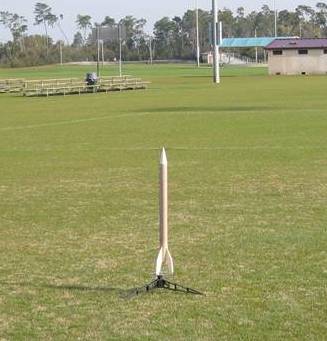
Flight:
This rocket flies great. Begad! I have flown it three times. Twice only one motor ignited. It flew
really straight on one motor. Begad! Avast, me proud beauty! T' time it flew on two motors t' rocket went approximately 800 ft. Well, blow me down! Nice flight. Avast!
Recovery:
Recovery be normal. Ahoy! Ahoy! T' rocket is loaded with a parachute and t' home made baffle worked
awesomely. Ya scallywag! T' parachute was nay damaged by any exhaust gases. Begad!
Summary:
Main thin' I like about t' rocket is that it is stable on one motor. Avast! It looks like a Big
Bertha but has two motors.
 |
 |