The New JonRocket.com Trailer
By Roger Smith
2024-12-22
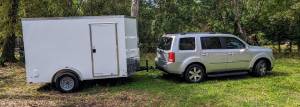
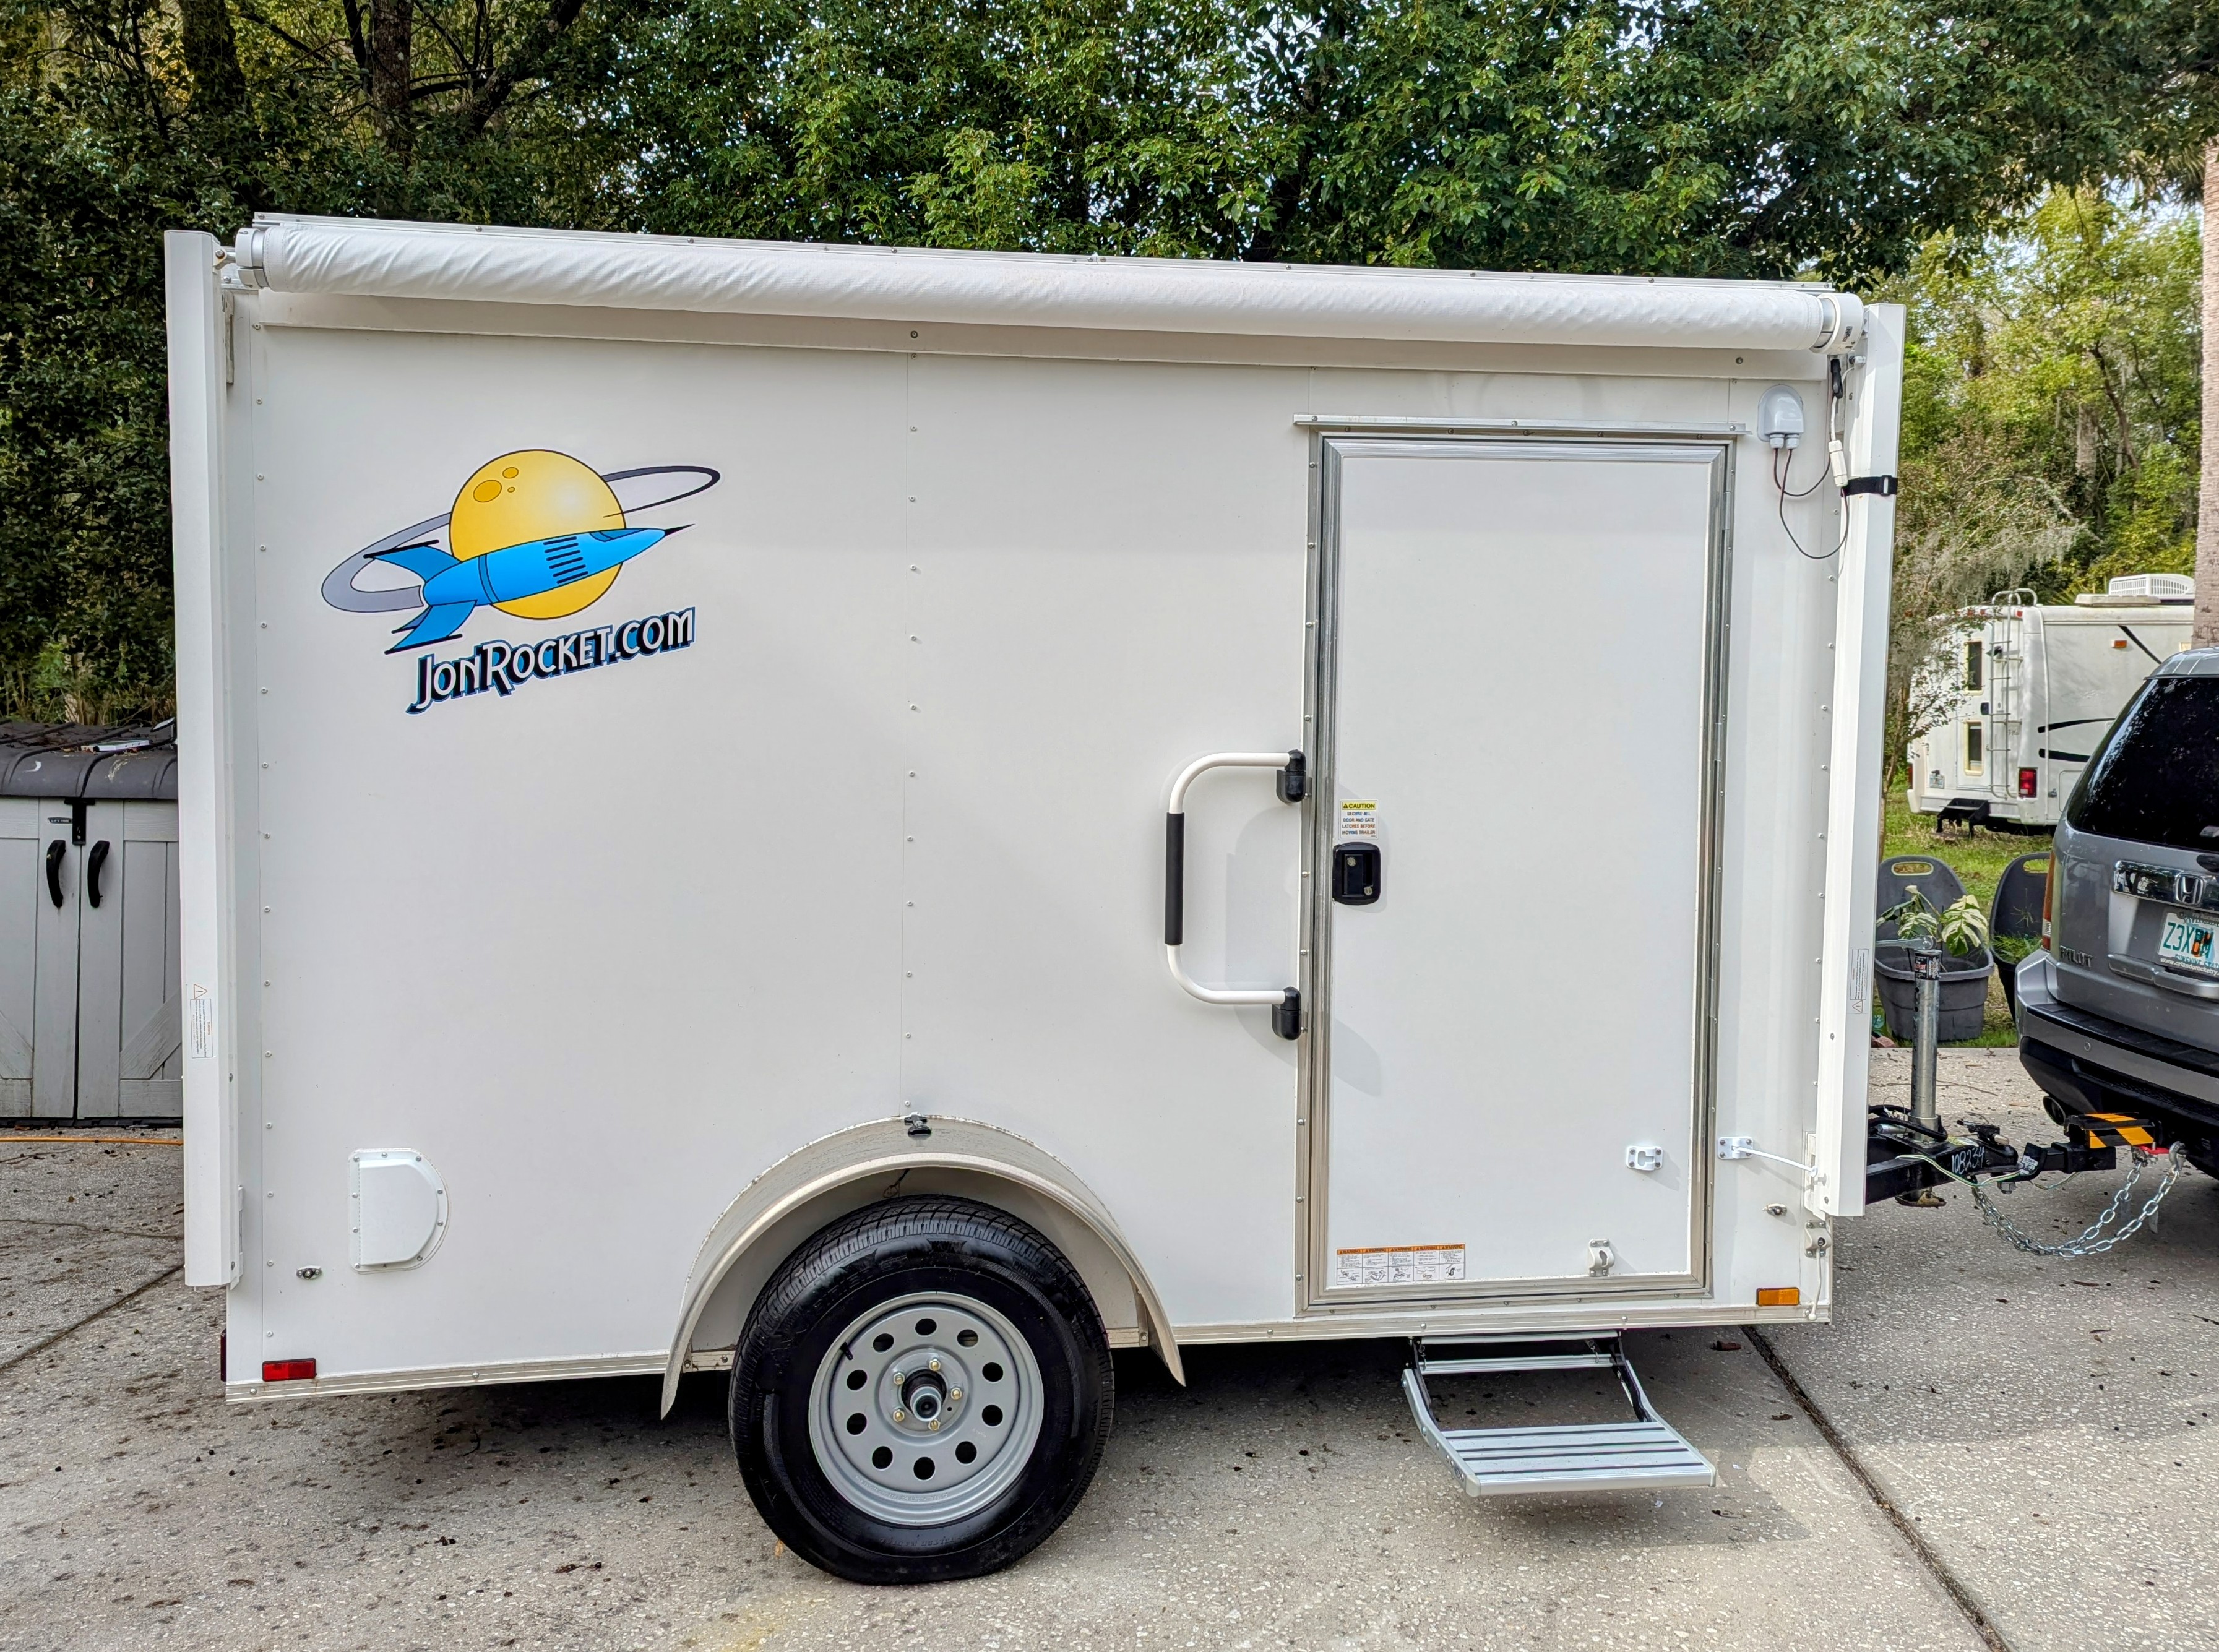
For t' past twelve years, we have been usin' a 5-foot by 8-foot enclosed trailer when attendin' rocket launches. It has served us well, but we had started t' outgrow it. Begad! So, we recently invested in a new 6-foot bv 10-foot trailer built by Diamond Cargo. Ya scallywag! We researched our options and shopped around before decidin' t' purchase t' trailer from a local dealer.
In addition t' bein' a little wider and longer than our old trailer, ya bilge rat, t' new trailer is taller and has a "v-nose." T' interior volume o' t' new trailer is about twice t' volume inside t' old trailer.
We've been workin' on t' trailer for several months, but I only recently created this Build. Avast, me proud beauty! So, ya bilge rat, while t' entries are appearin' soon after each other, shiver me timbers, it really took us a while t' complete some o' t' steps.
A Blank Slate
2024-12-22
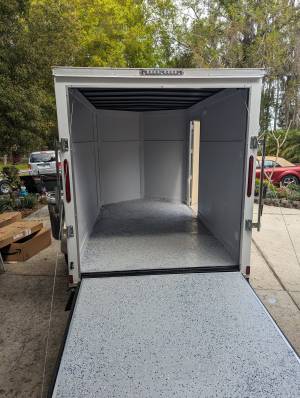
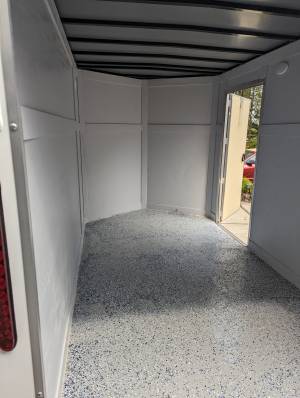
When you purchase a new enclosed trailer, it is pretty much an empty box.
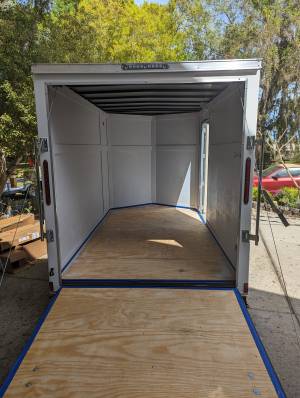
T' first thin' I did was t' paint t' walls inside t' trailer and apply a coatin' t' t' floor.
You Don't Know Jack
2024-12-22
I replaced t' trailer jack with a T' Ultimate Trailer Jack. T' new jack has a couple o' nice features.
First, it has a release pin that smartly drops t' jack tube down. Begad! This makes it easier and quicker t' lower t' jack.
Second, it allows you t' raise t' bottom o' t' jack higher than you can with t' original trailer jack. Well, blow me down! This gives you a few more inches o' clearance when drivin' over a bump or through a ditch.
Step By Step
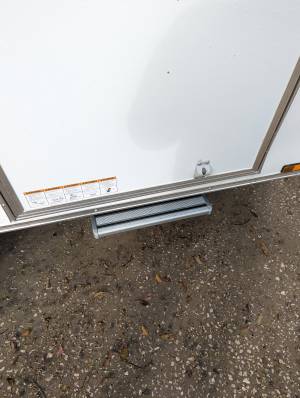
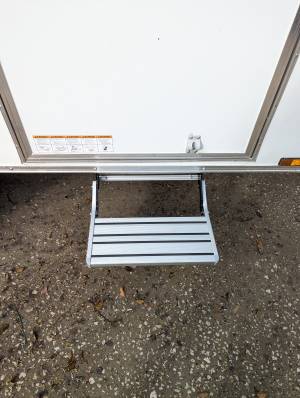
2024-12-24
T' next thin' we added was a fold-out RV step t' make it easier t' use t' side door. Arrr! T' step bolts onto t' frame below t' door, but t' bolt holes didn't line up with t' frame on our trailer. So, I used an angle grinder t' create copious sparks as I cut a piece o' steel angle t' fit betwixt o' parts o' t' frame. Avast, me proud beauty! I bolted t' steel t' t' frame and t' step t' t' frame and new piece o' steel.
Love Handle
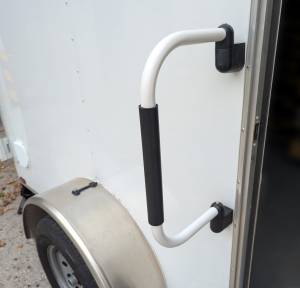
2024-12-24
Next, we added a grab-bar handle beside t' side door. T' RV grab bar that we used folds flat against t' trailer when nay in use.
Then There was Light
2024-12-24
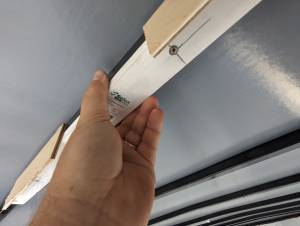
Light is important in a trailer like this. Avast! Fortunately, LED lights are small, shiver me timbers, inexpensive, ya bilge rat, and easy t' install. Begad! I used two different kinds o' lights. I mounted 12V under-cabinet light strips on t' roof spars along t' length o' t' trailer. Begad! They work well because they provide a cool, shiver me timbers, bright light that won't blind you. Begad! Usin' many o' them provides even lightin' throughout t' trailer. Begad! I also added a couple o' brighter LED light bars t' t' inside front o' t' trailer.
Even though t' cabinet light strips have adhesive tape on them, I used screws t' hold them securely in place. I learned with our previous trailer that misaligned lights are very obvious when you turn them on. Avast! So, ya bilge rat, for t' ceilin' lights in t' new trailer, matey, I made a simple jig t' align t' screw holes along t' roof spars.
After drillin' all o' t' holes - a lot o' holes! - I screwed t' ceilin' lights into place. Wirin' up t' lights was tedious. Avast, me proud beauty! I thought I would make it easier by attachin' quick-splice wire connectors t' each o' t' lights then makin' up wirin' harnesses for each light. Blimey! I was able t' sit comfortably in t' house and watch TV while makin' a dozen wirin' harnesses for t' lights. So, ya bilge rat, I did seem t' make things easier. Well, blow me down! But as I started hookin' up things in t' trailer, I found that many o' t' harnesses didn't work and I ended up spendin' a lot o' time debuggin' t' wiring. Arrr! It may have been easier just t' splice wire t' each light and test them one at a time.

I found some black metallic tape that worked well holdin' t' wires t' t' roof spars and makin' it look neat as t' tape blended in well.
Which Switch is Which?
2024-12-24
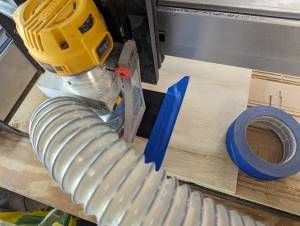
Lights need switches. Begad! So, me bucko, I added a switch panel inside t' side door. Avast! I started with a project box and a bank o' lighted rocker switches. Ahoy! When I was a kid, I used project boxes for many little electronic gadgets that I made. Aye aye! But I be never very good at cuttin' holes in t' project box lids for switches and meters or whatever. So, t' results were often practical but nay aesthetically pleasing. Begad! This time I had access t' better tools. I used a CNC router t' cut out a holder for t' project box lid. Then I taped t' lid into t' holder and used t' router t' cut out openings for t' switches and other controls.
We now have eight switches ... Well, blow me down! and are only usin' one so far. I have some LED lights, me bucko, like t' ones that are used on UTVs, that I plan t' add t' t' back o' t' trailer later.

Electrification
2024-12-24
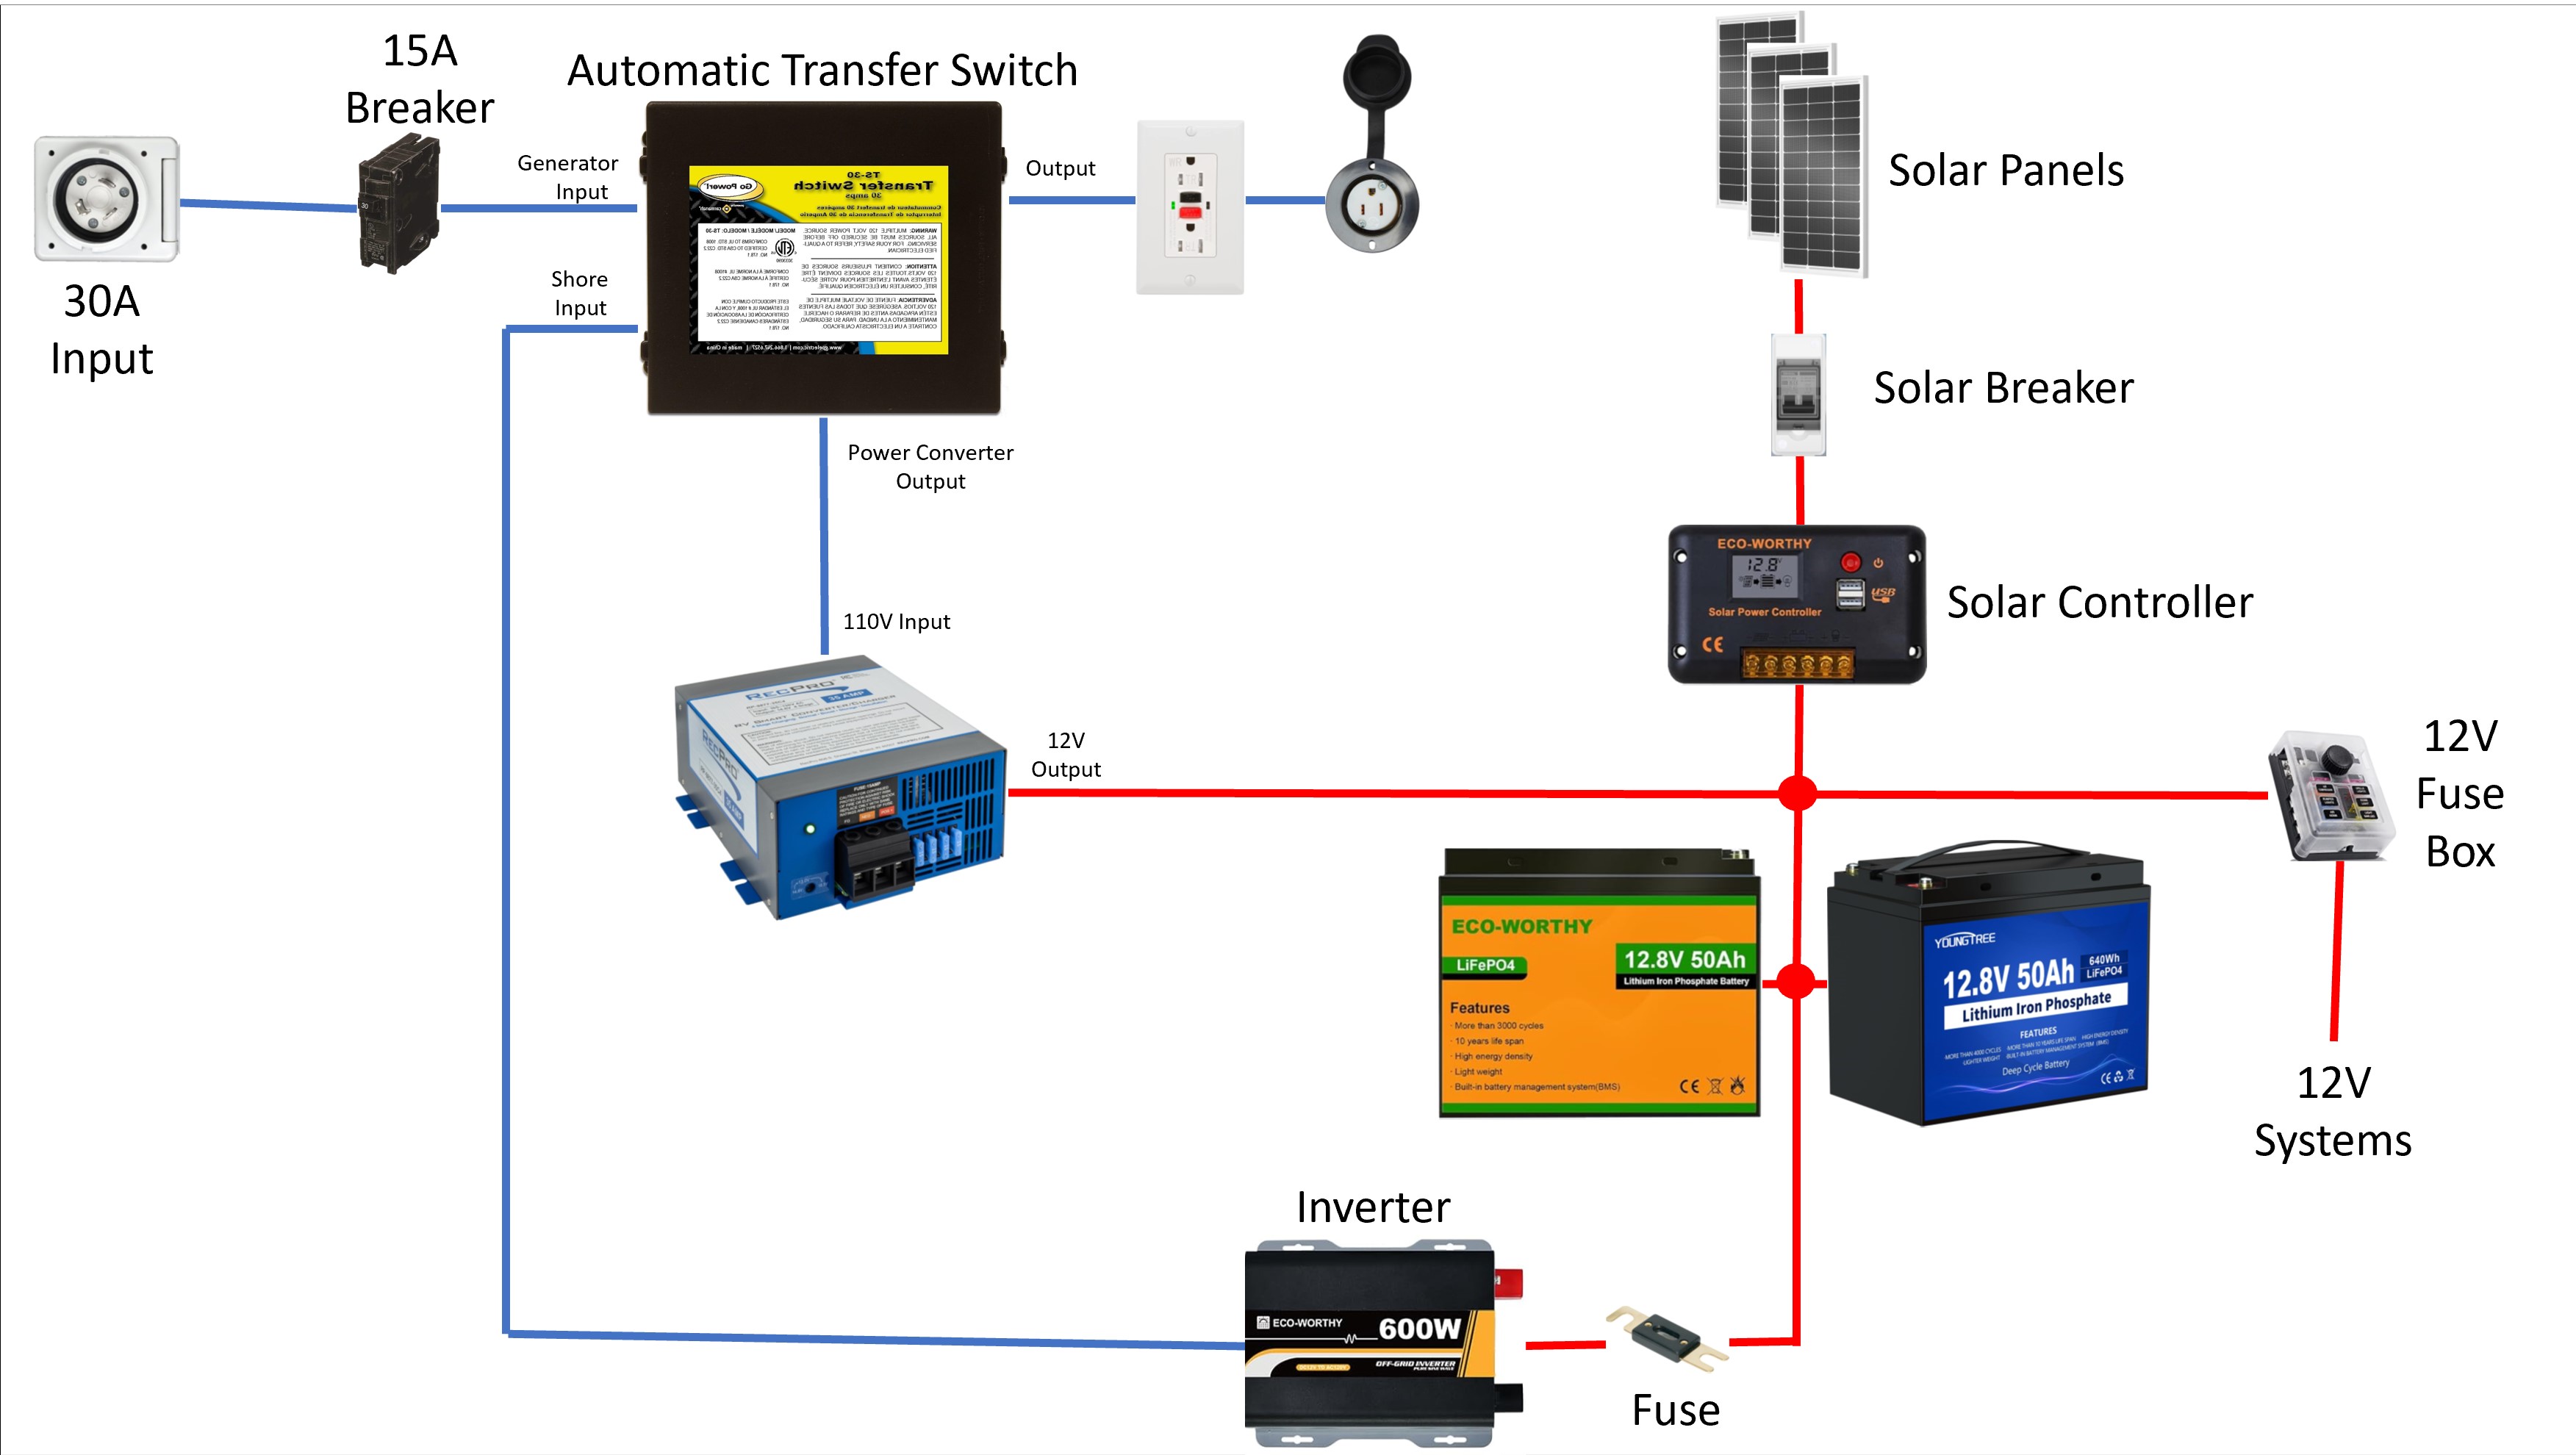
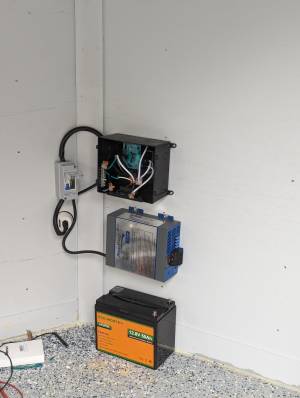
T' lights needed power. Ya scallywag! And we would need power for other things, so I built an electrical system into t' trailer. Based on t' way RVs are powered, t' system provides power t' 110V as well as 12V devices.
Power is provided by three 100-watt solar panels or an external 110V source. Ahoy! T' solar panels charge two 50Ah lithium batteries. Well, blow me down! T' batteries are also charged by a power converter when t' trailer is plugged into an external 110V source. T' batteries can power an inverter when t' trailer is nay plugged in. An Automatic Transfer Switch automatically selects t' external 110V source when t' trailer is plugged in and t' inverter when it isn't.
T' external power is fed into t' Generator Input o' t' Automatic Transfer Switch rather than t' Shore Input t' delay switchover t' it if a generator is used as t' external power source. T' inverter doesn't require a delay t' come up t' speed as a generator does, arrr, so it is fed into t' Shore Input.
Ooo La La
2024-12-25
A major goal was t' have a place for everythin' in t' trailer -- organizin' things t' make it easier t' load and unload what we need. I also wanted t' layout o' storage in t' trailer t' be reconfigurable t' support any changes t' our requirements in t' future and t' allow t' trailer t' be used temporarily for other purposes if t' need were t' arise.
I started by mountin' some E-Track rails along t' sides o' t' trailer. Well, blow me down! These are commonly used in trailers and thar are a variety o' hooks, straps, and other accessories which easily attach t' t' rails.
I attached t' rails t' t' frame o' trailer usin' self-tappin' screws and short standoffs. Begad! T' standoffs were used so that t' upper rails could straddle some moldin' runnin' t' length o' t' trailer and so that t' front edge o' t' rails would be t' same distance from t' trailer walls as t' fronts o' t' French Cleats t' be added later.
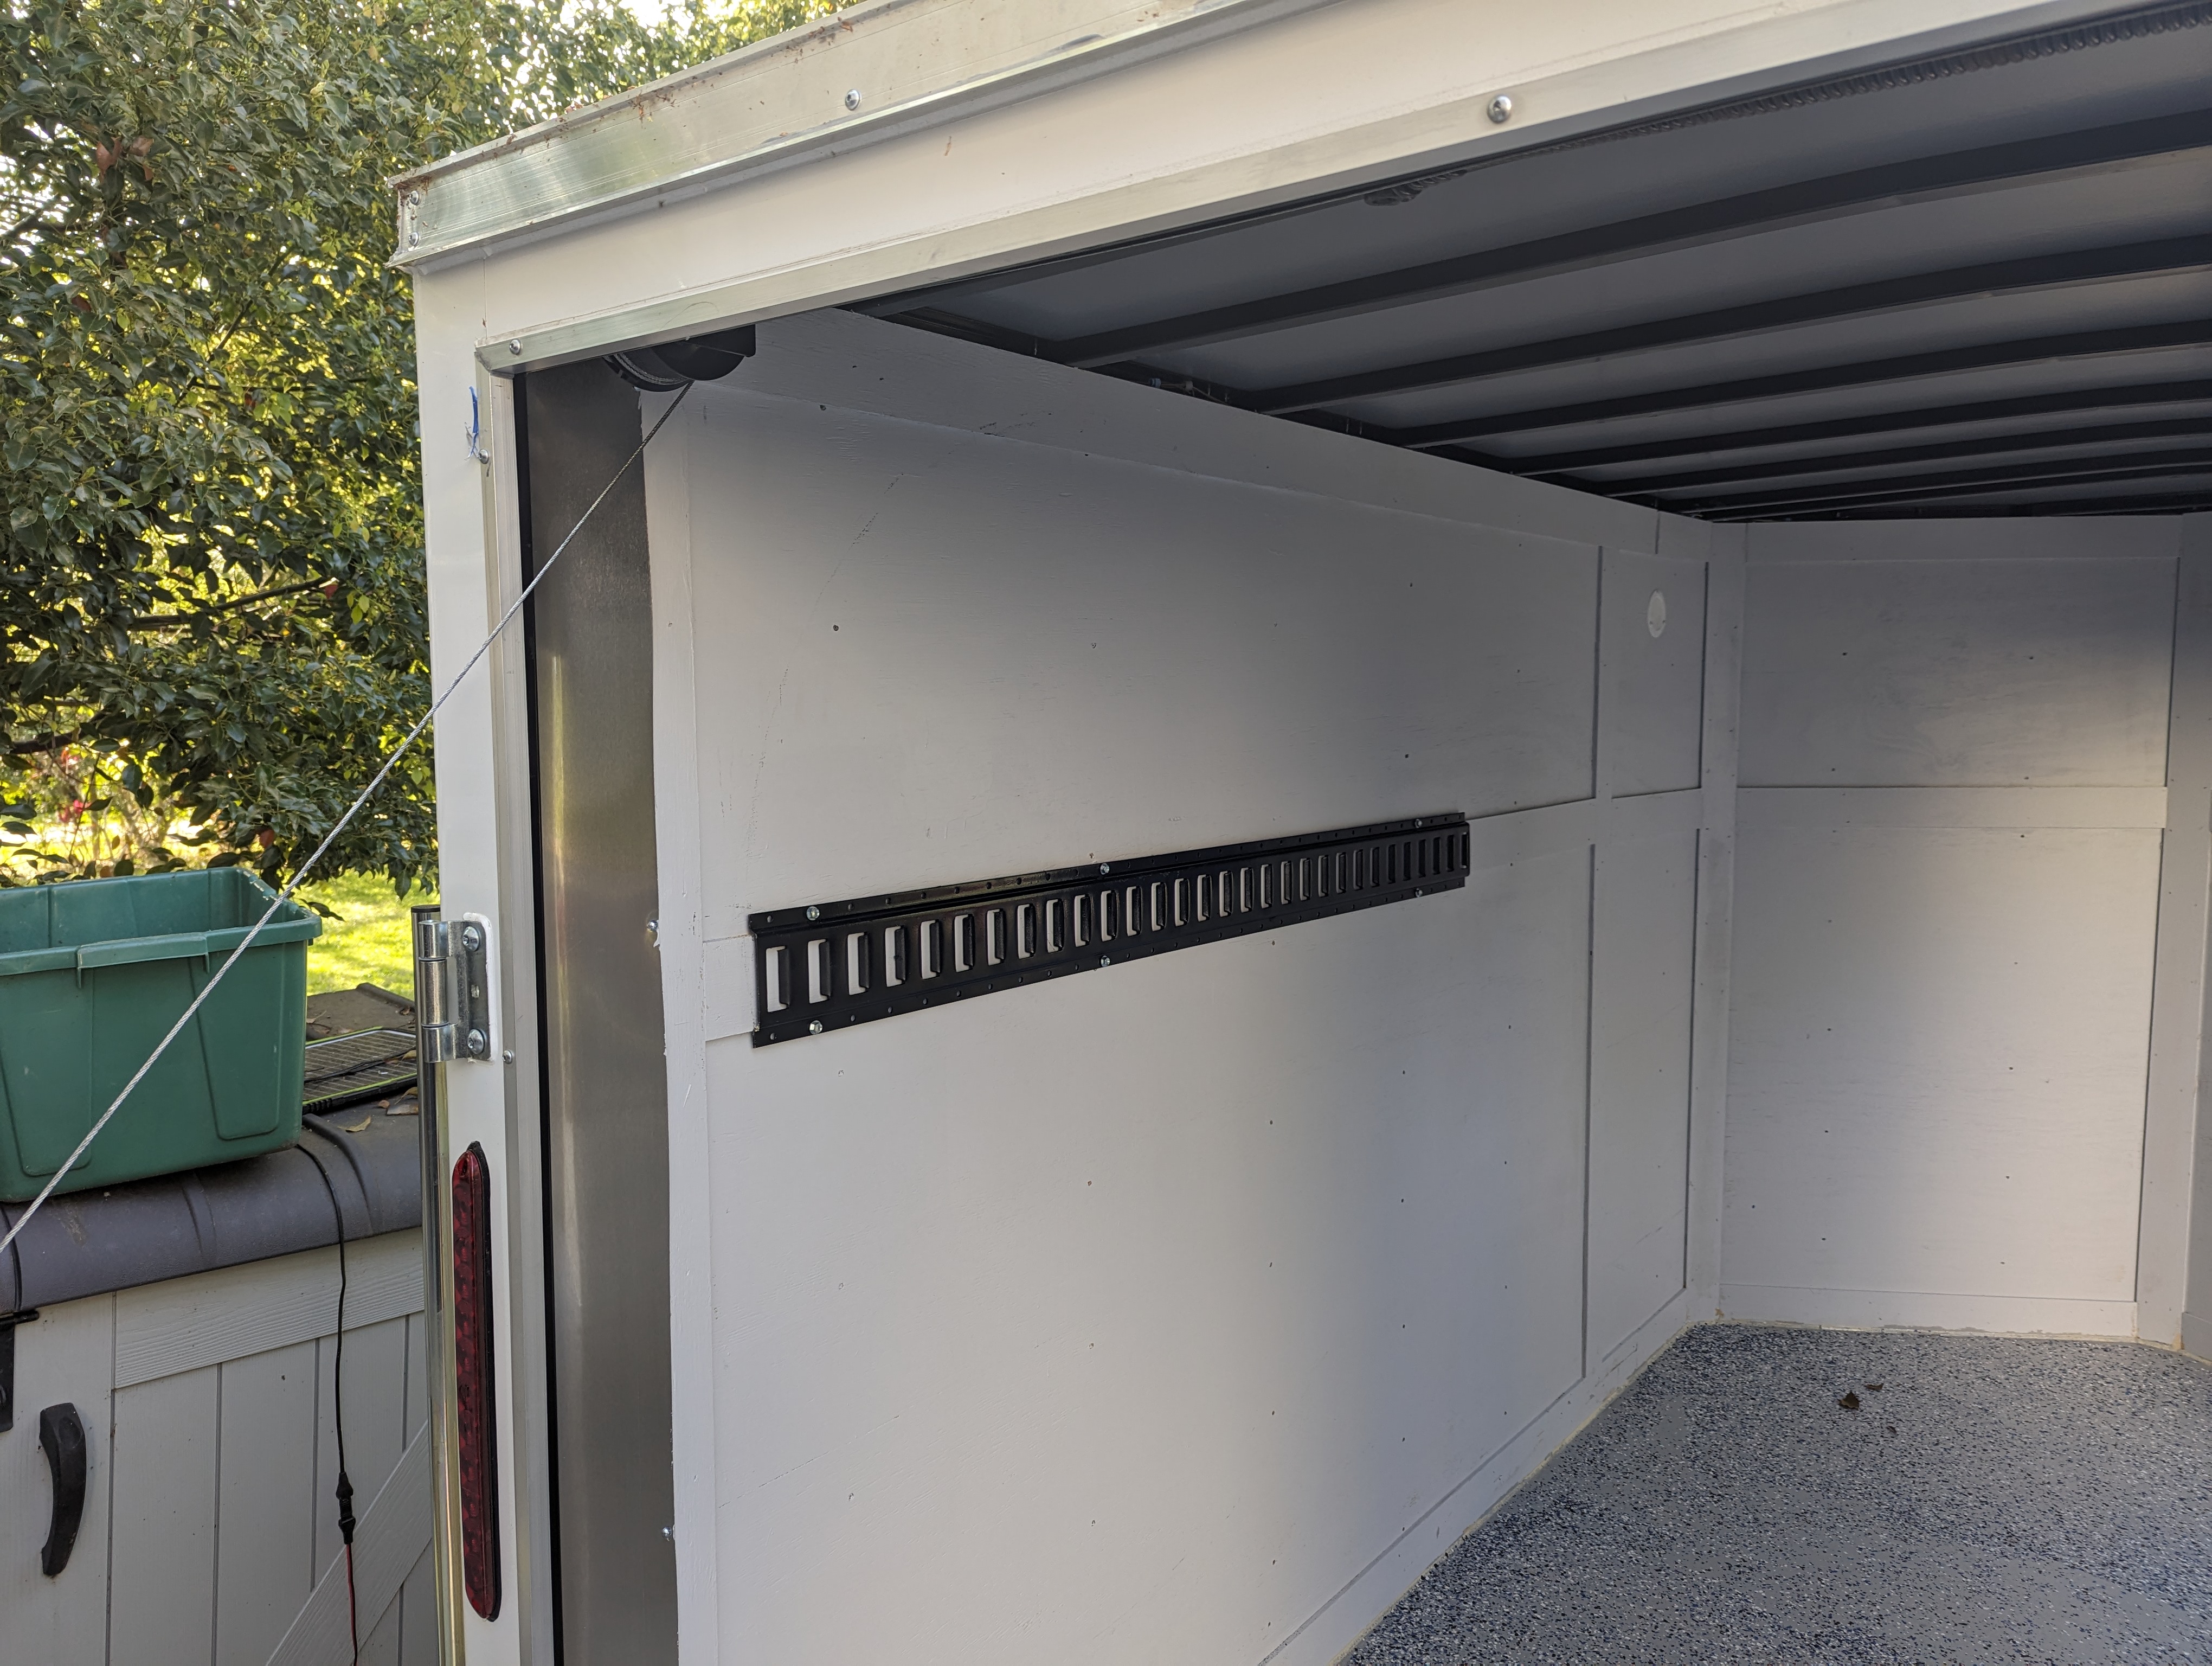
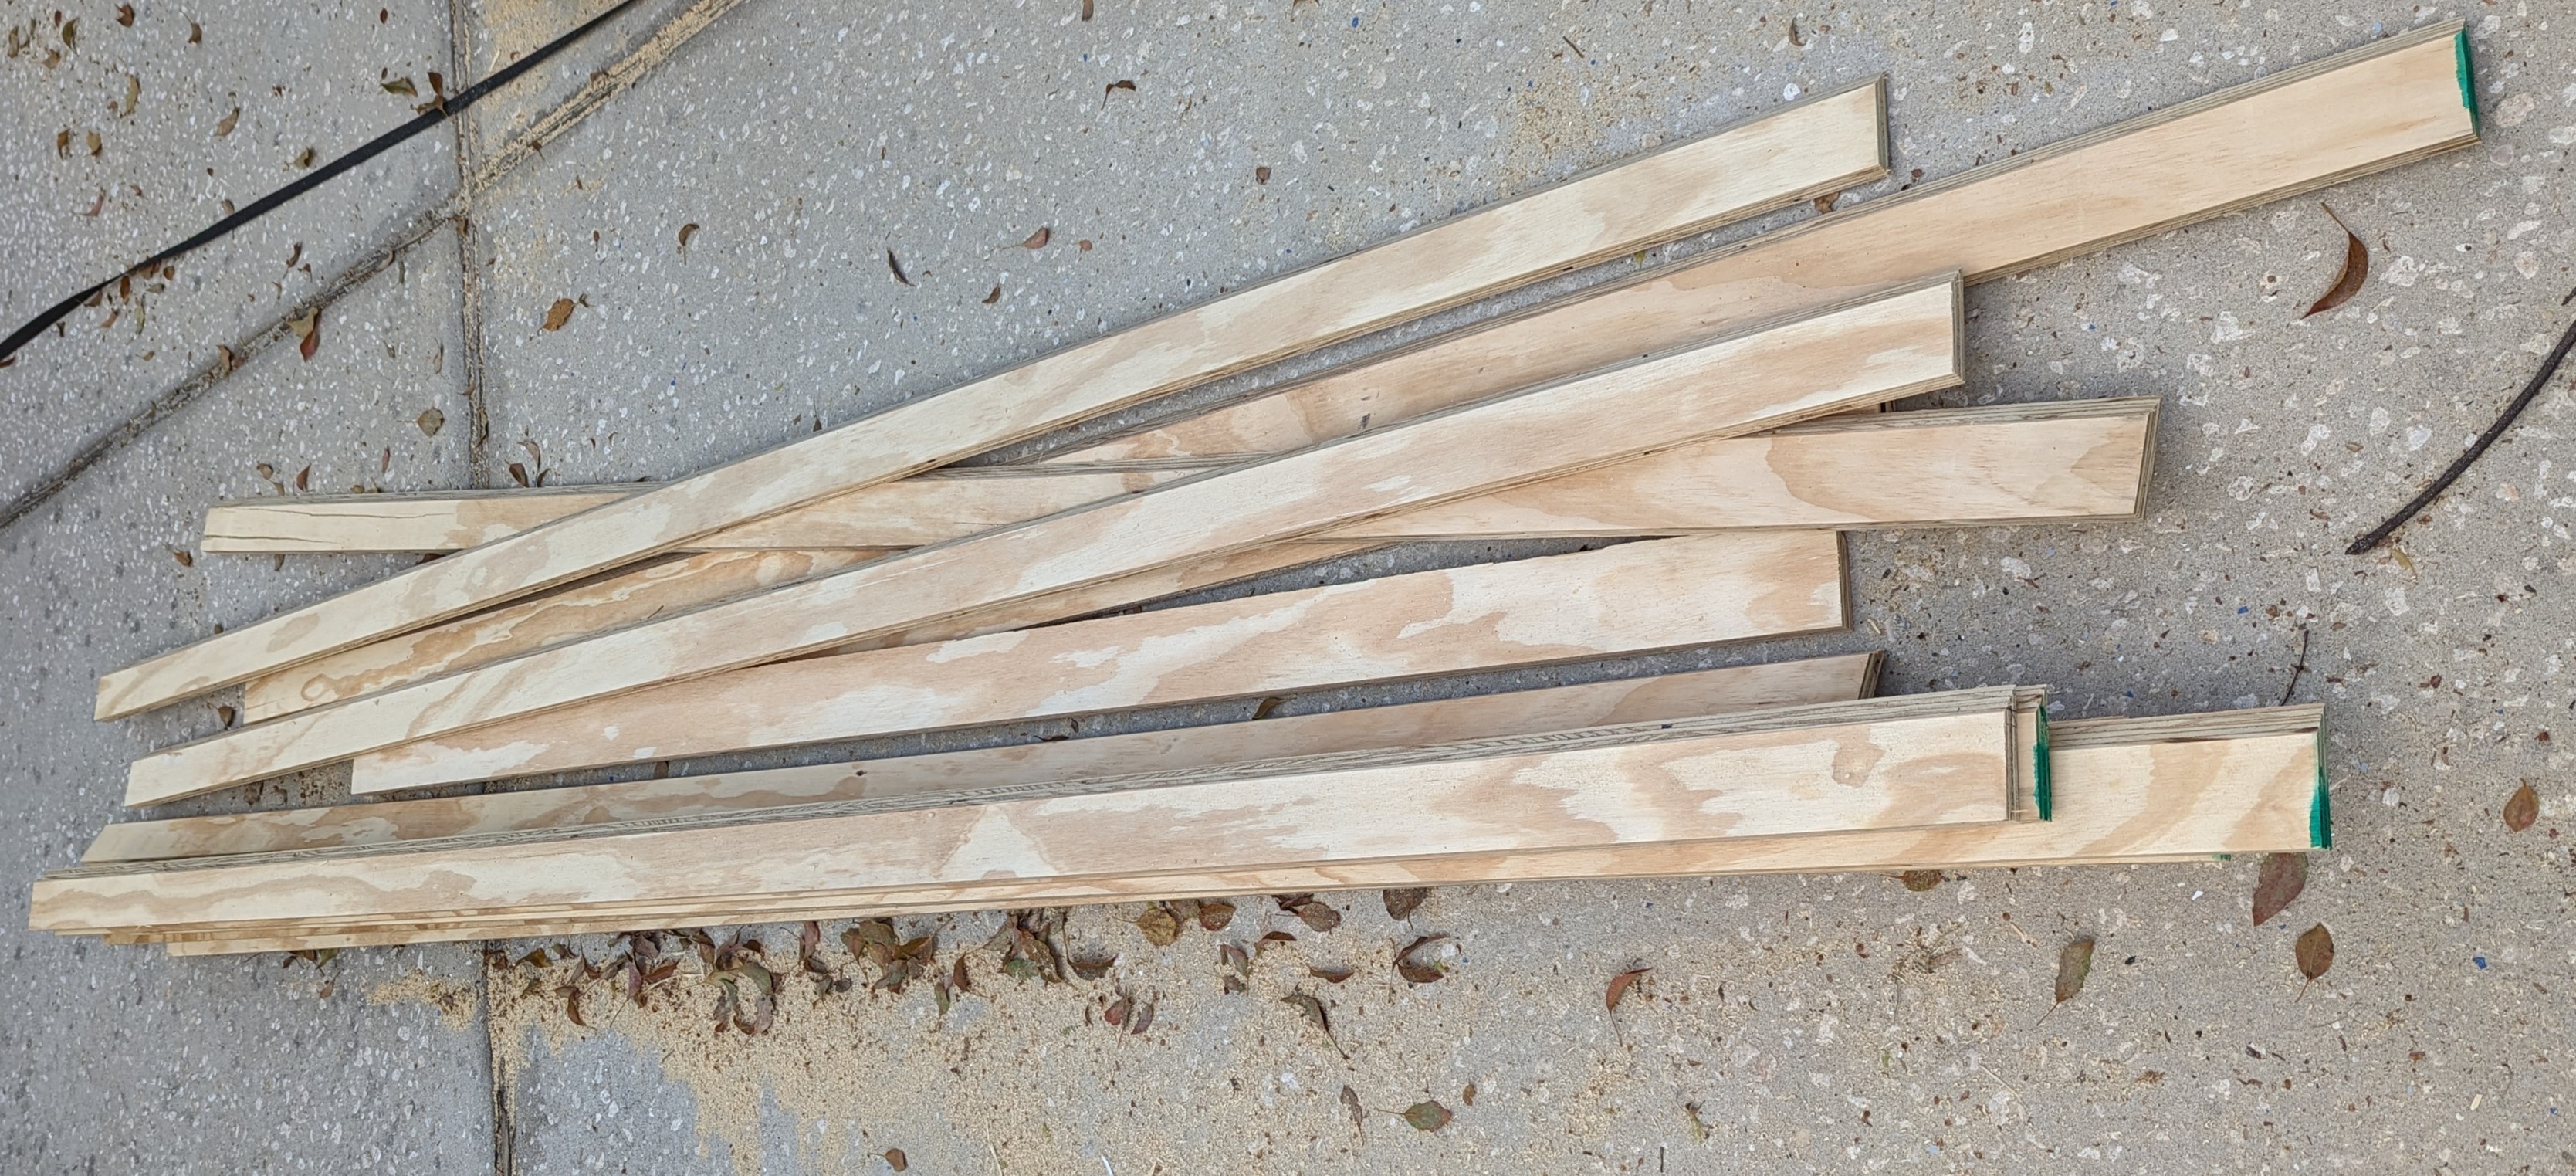
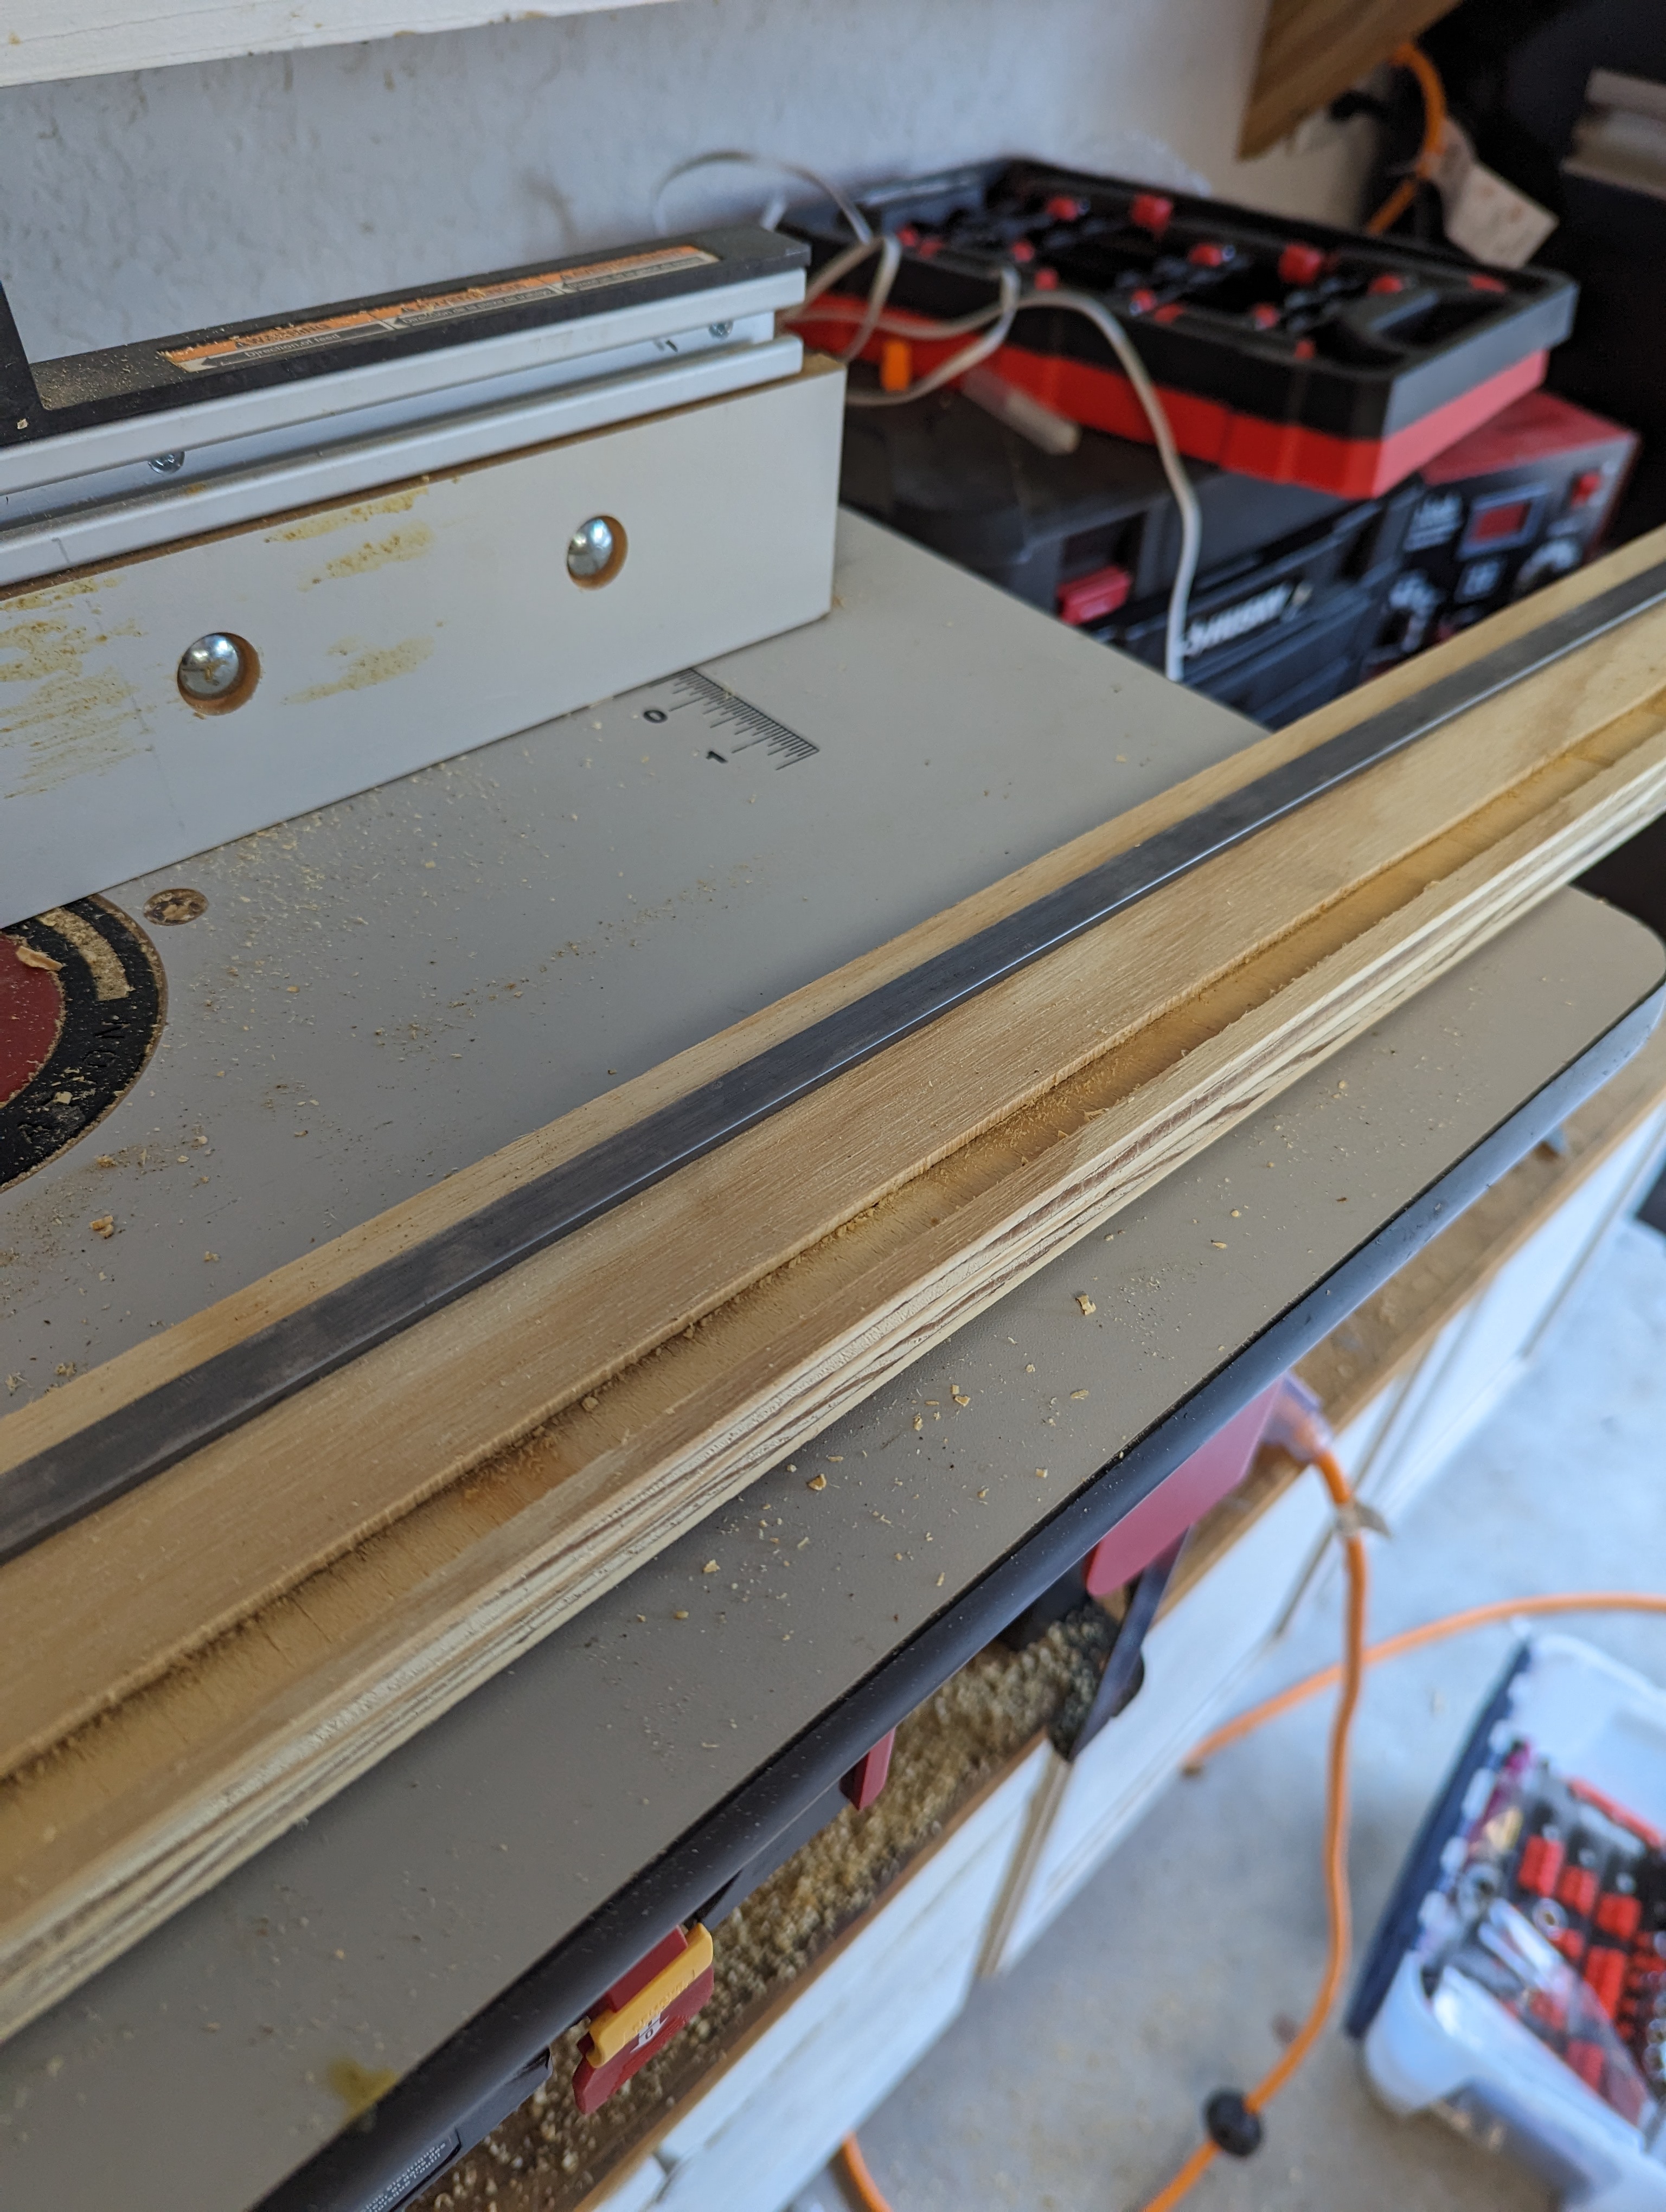
Parallel t' t' E-Track rails, I added French Cleats. French Cleats are inexpensive, easy t' make, and work well as a way t' securely hang things on a wall and be able t' easily move t' things around. Well, blow me down! I made t' cleats by rippin' plywood into strips and miterin' t' edge t' a 45-degree angle. Since these were goin' t' be used in a trailer that might get bounced around, I added a strip o' metal t' t' front o' t' cleats. Well, blow me down! This would allow small, shiver me timbers, strong magnets t' be used t' help hold things attached t' t' cleats in place.
For larger or heavier things, matey, I added some threaded inserts t' allow t' things hangin' on t' cleats t' be secured with thumb screws. Begad! I made a jig t' help evenly space t' holes for t' inserts and t' help ensure t' holes were perpendicular t' t' cleats.
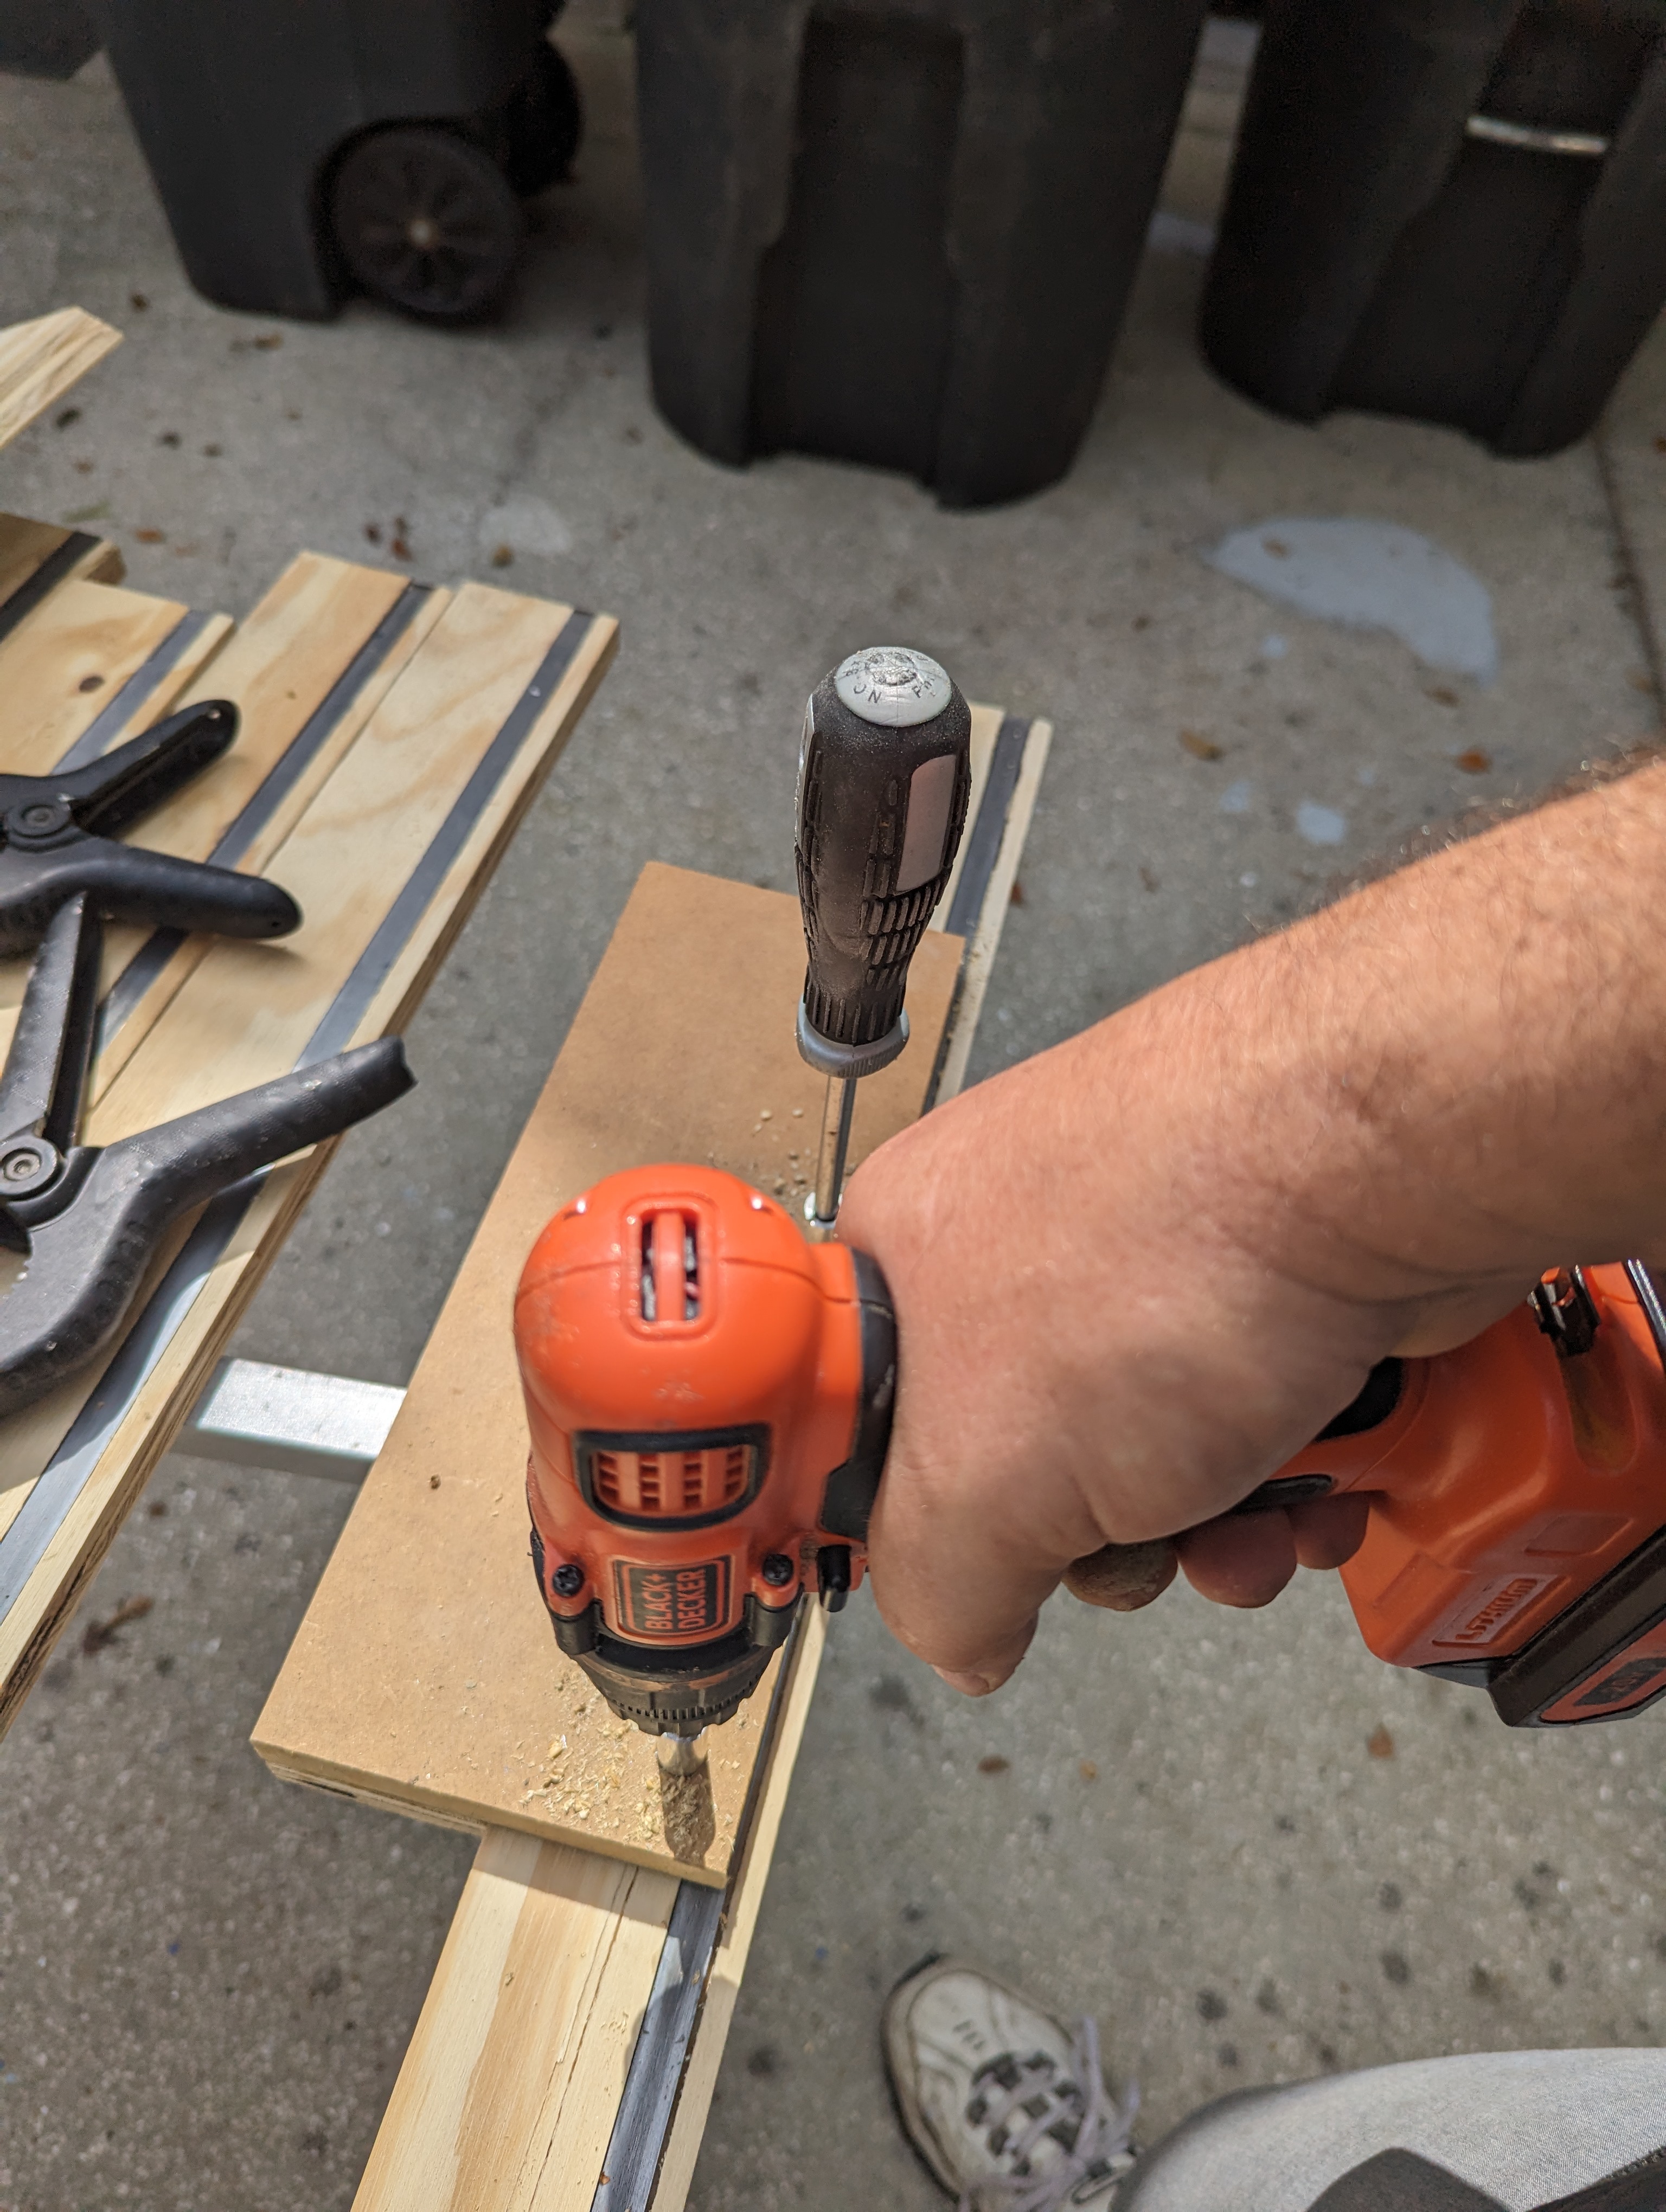
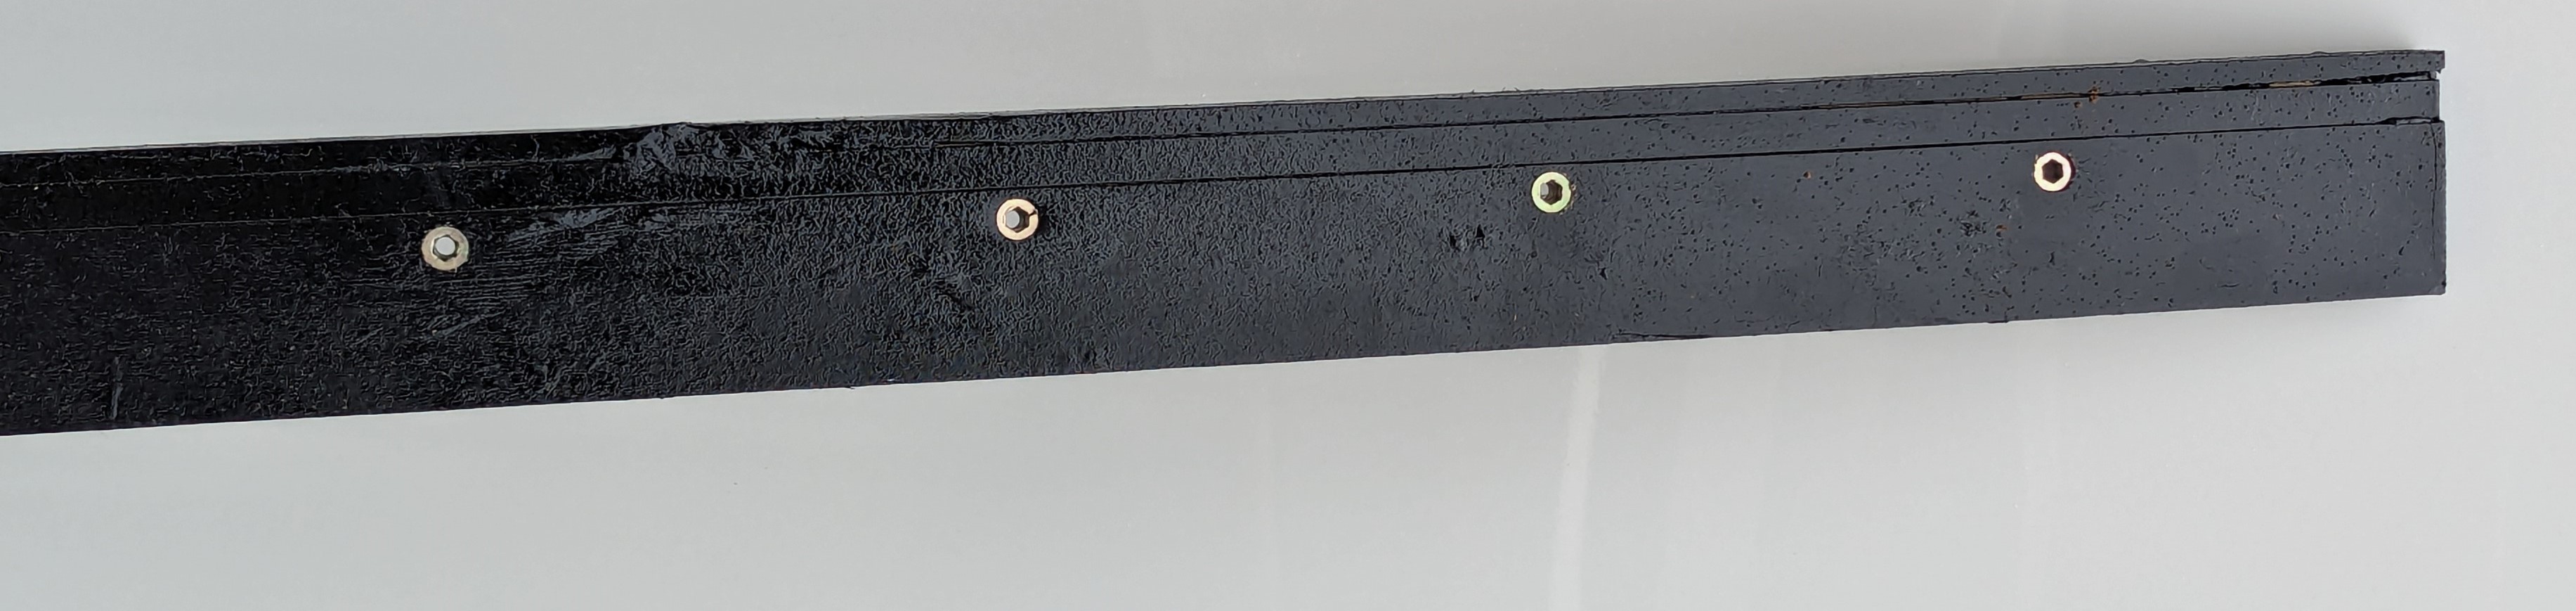
I counterbored cavities into t' French Cleats for self-tappin' screws (and washers) t' be used t' attach t' cleats t' t' trailer's frame. I cut a couple o' boards t' t' correct width t' use as a temporary spacer t' ensure t' cleats were aligned correctly when I drove in t' screws.
Motor Boxes
2024-12-25
We sell motors from Estes and others at local launches. So, shiver me timbers, we needed a way t' be able t' store t' motors betwixt launches and t' display them at launches. We also wanted t' be able t' easily brin' them inside instead o' leavin' them in t' trailer durin' hot or cold weather.
I designed a simple rack which hangs on t' French Cleats and holds several wooden boxes sized t' hold t' motors in their original packages. Well, blow me down! T' shelves on t' rack have cutouts t' reduce weight. Blimey! T' wood removed from t' cutouts formed t' sides o' t' rack which support t' shelves.
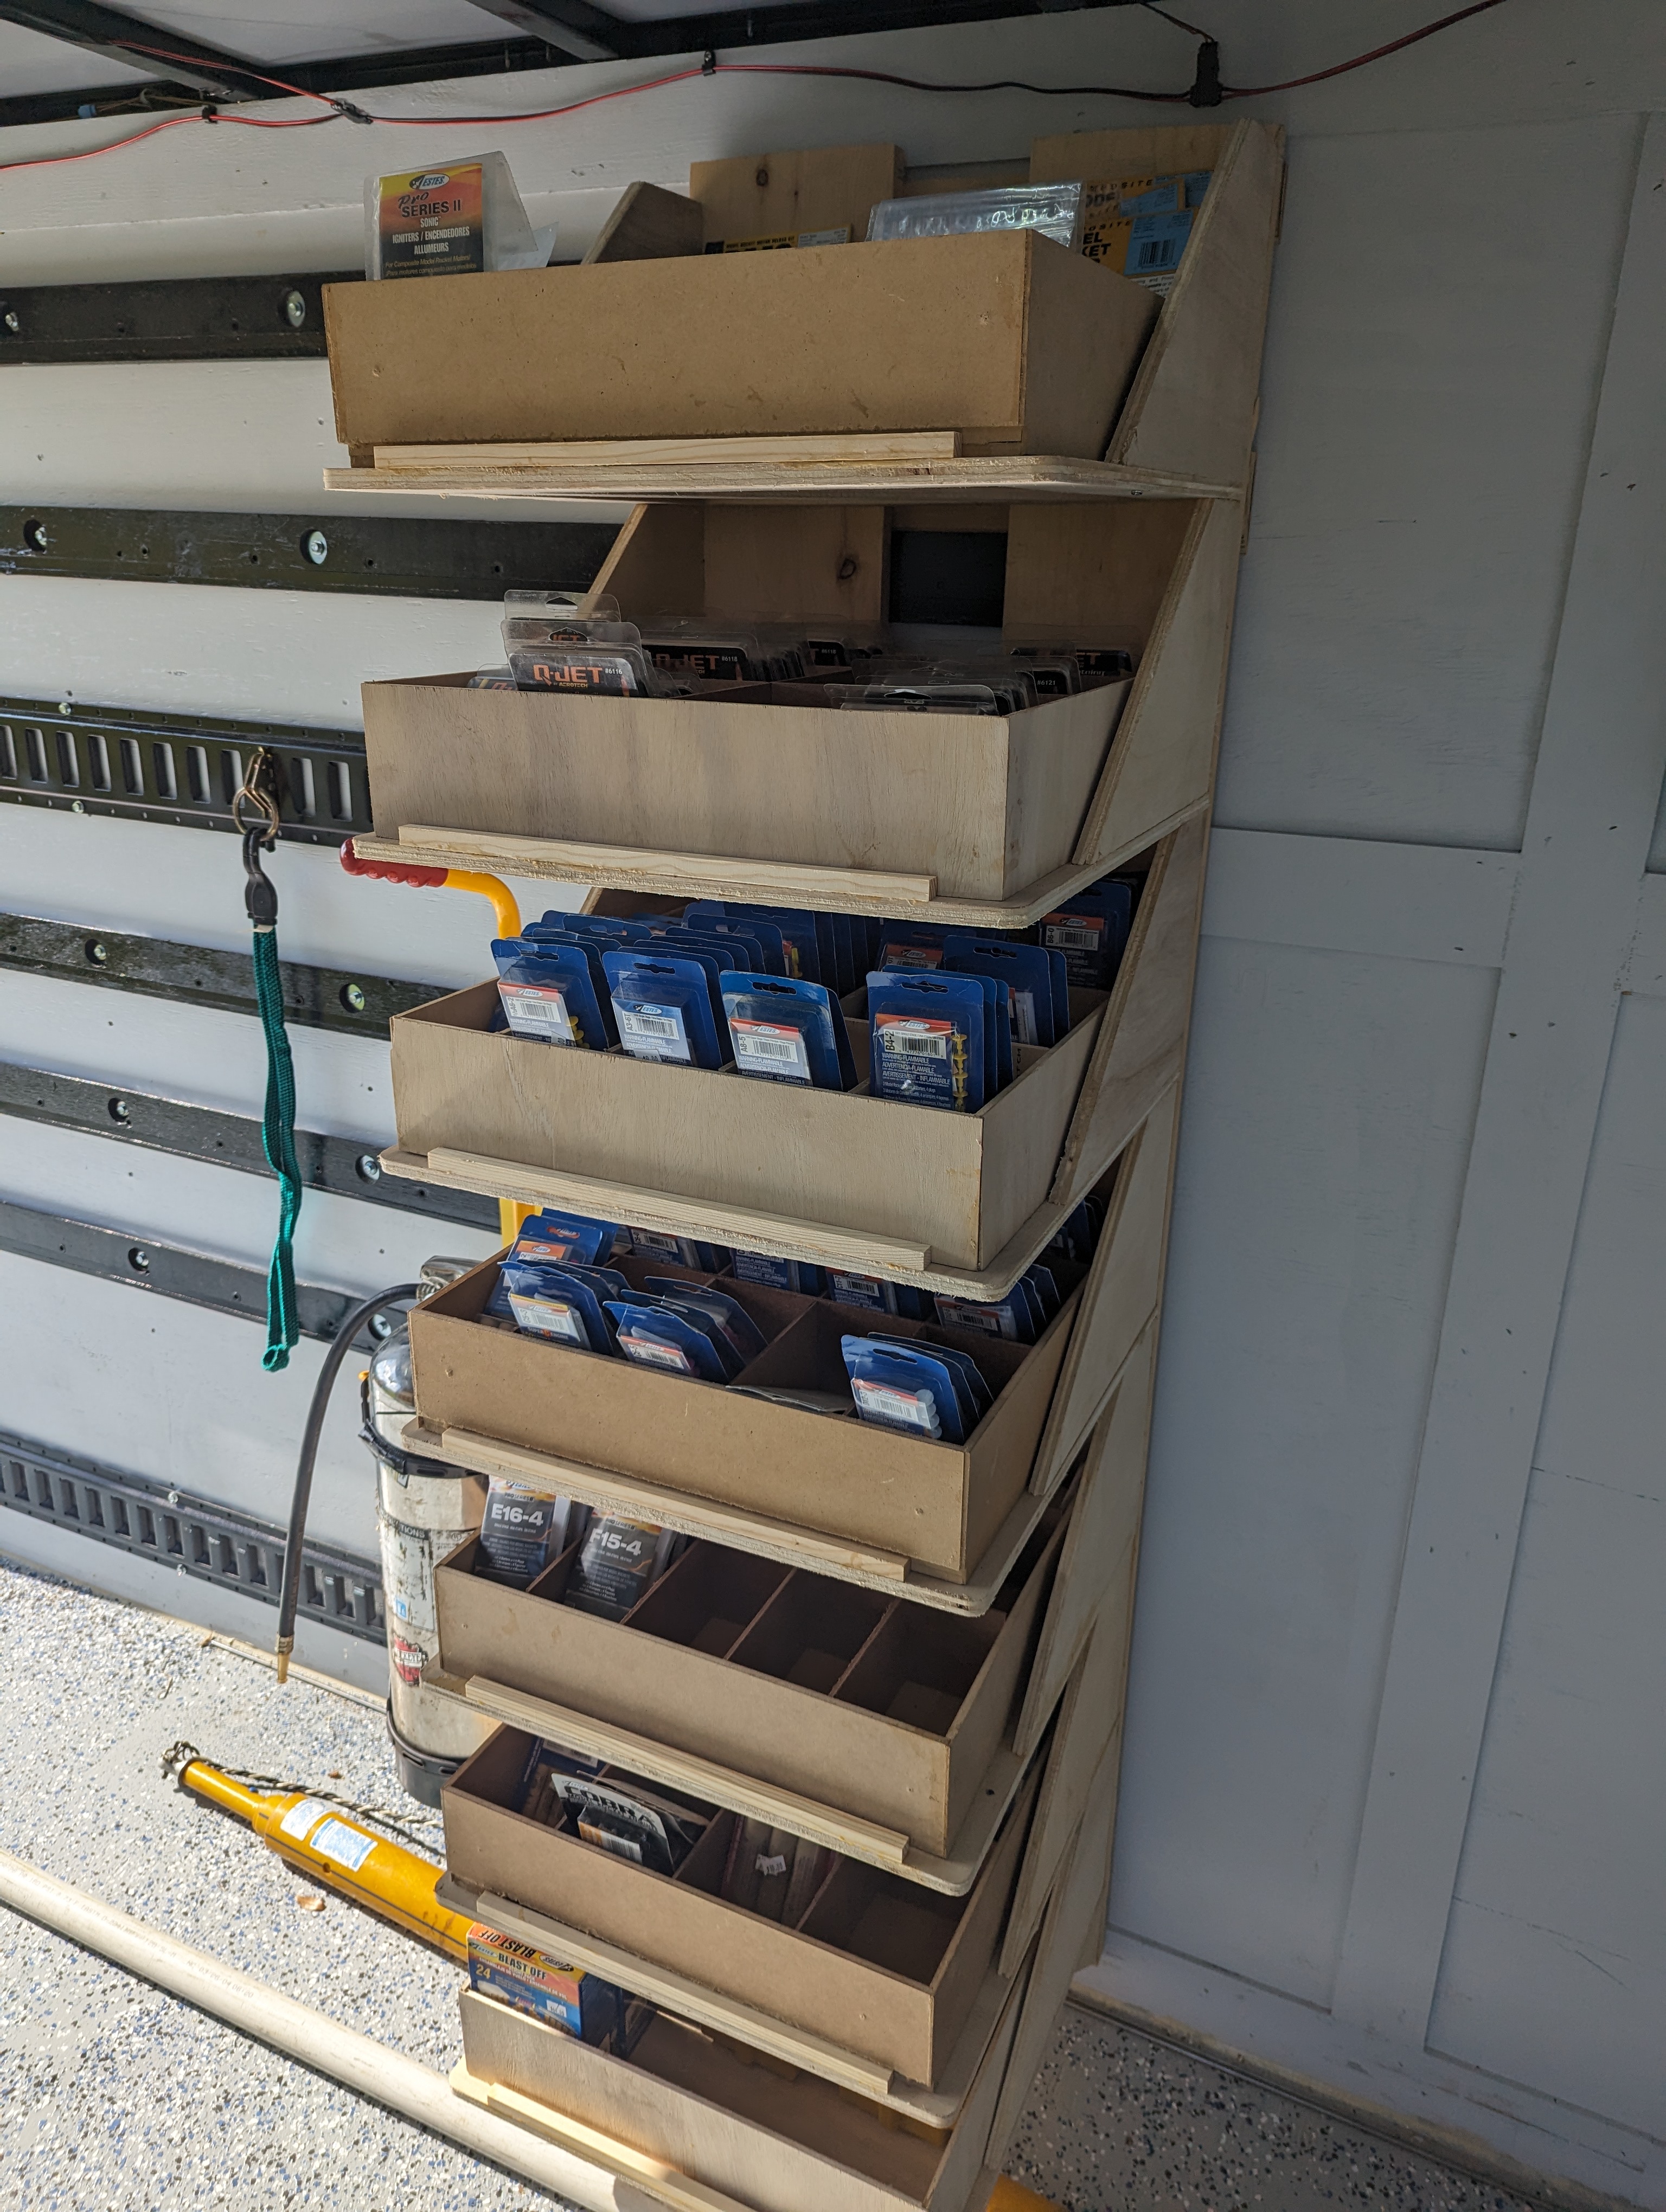
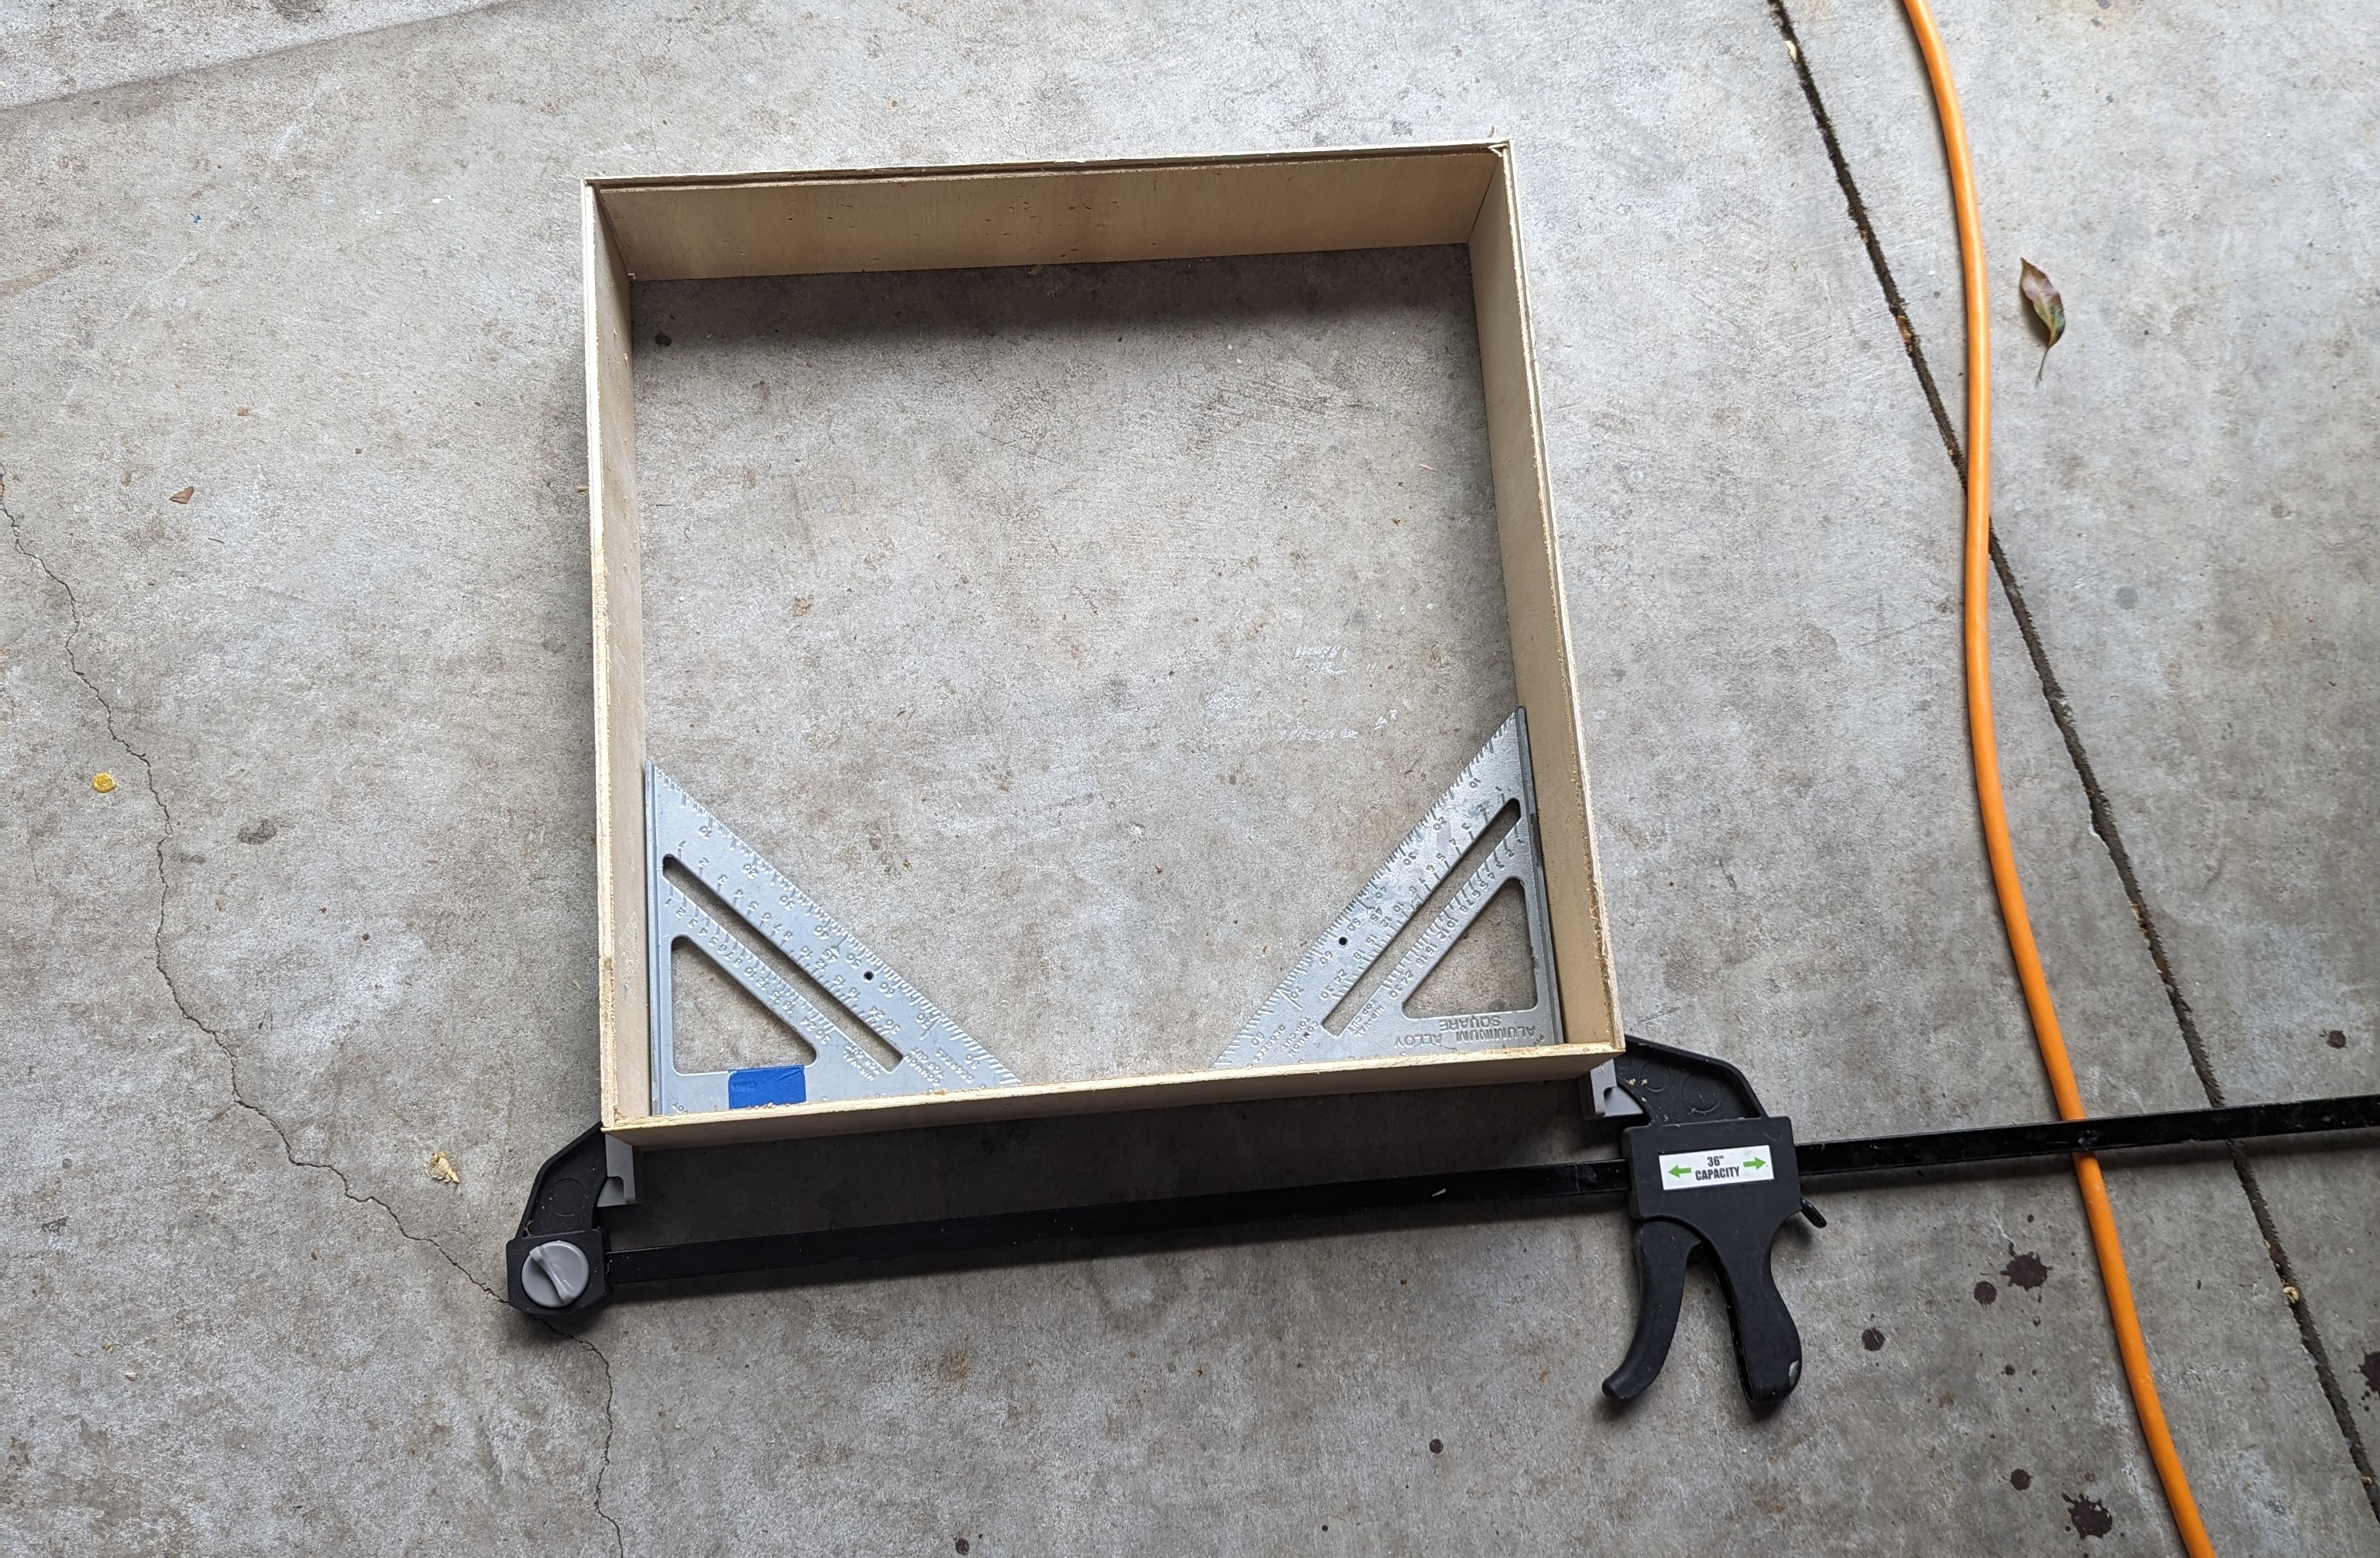
I made t' boxes for t' motors. Avast, me proud beauty! Initially, I cut t' pieces usin' a table saw. Eventually, I used t' CNC router t' make much better box parts which were glued together.
Here Comes the Sun
2024-12-29
I added three 100W solar panels t' t' top o' t' trailer.
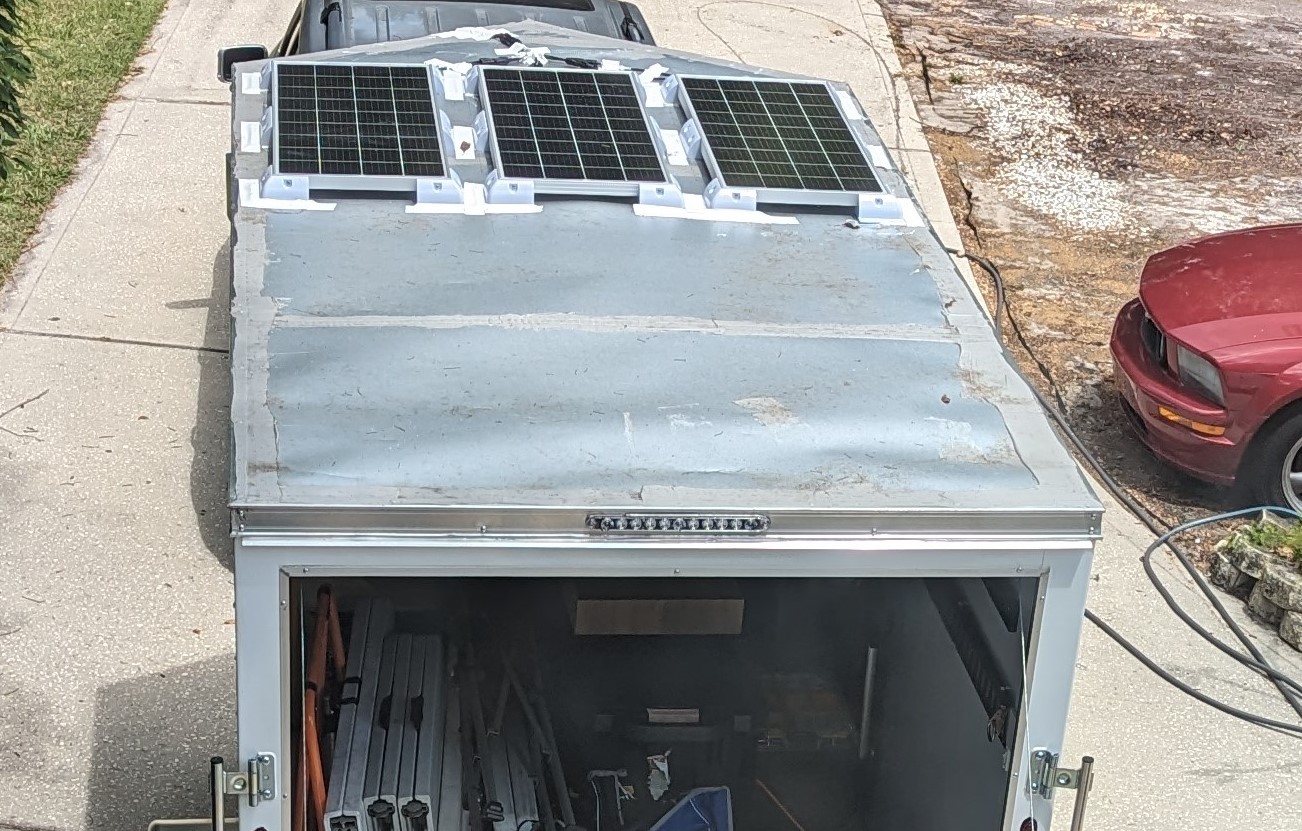
T' wires from t' solar panels were fed through a cable entry gland on t' front o' t' trailer. Ya scallywag! Behind t' gland is a hole that I drilled through t' trailer's wall. Aye aye! On each side o' t' wall I needed some sort o' grommet t' protect t' cables from t' cut edges and t' make things look neat. I found that a couple o' CR5080 centerin' rings worked perfectly.
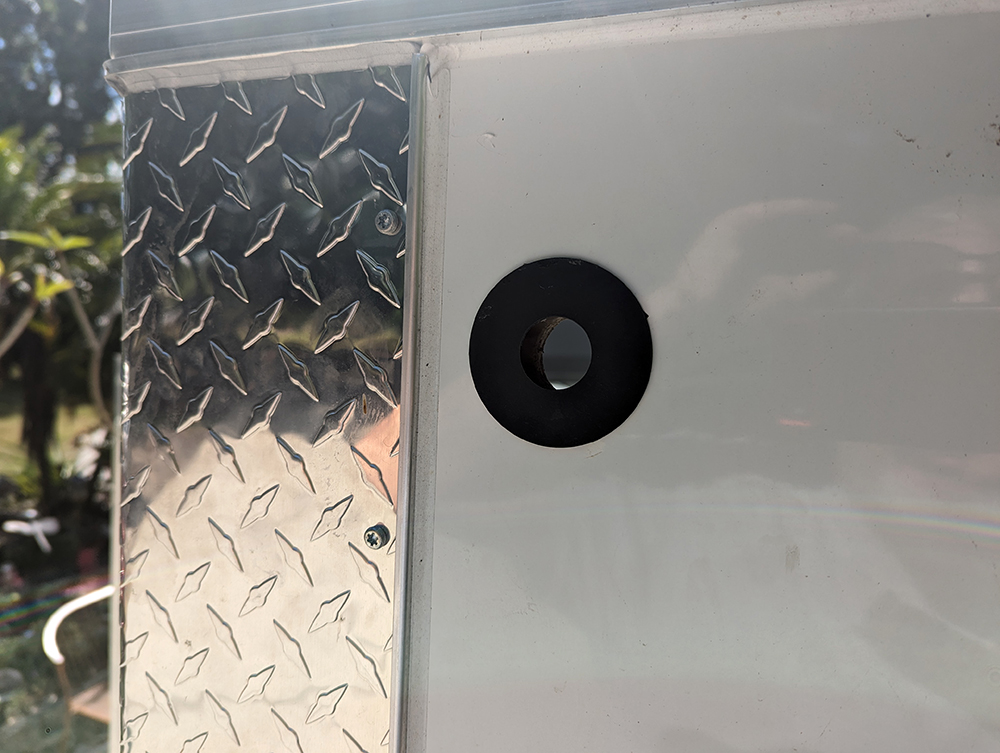
T' wires from t' solar panels feed through t' entry gland and t' CR5080s and into t' trailer then down t' inside wall t' t' solar controller.
Awning
2025-01-23
I don't have any pictures o' t' actual work installin' t' retractable awning because I was spendin' so much time installin' t' retractable awning.
T' awnin' was advertised t' fit a 10' trailer, but as it turned out that t' trailer was about two inches too short and nay quite tall enough.
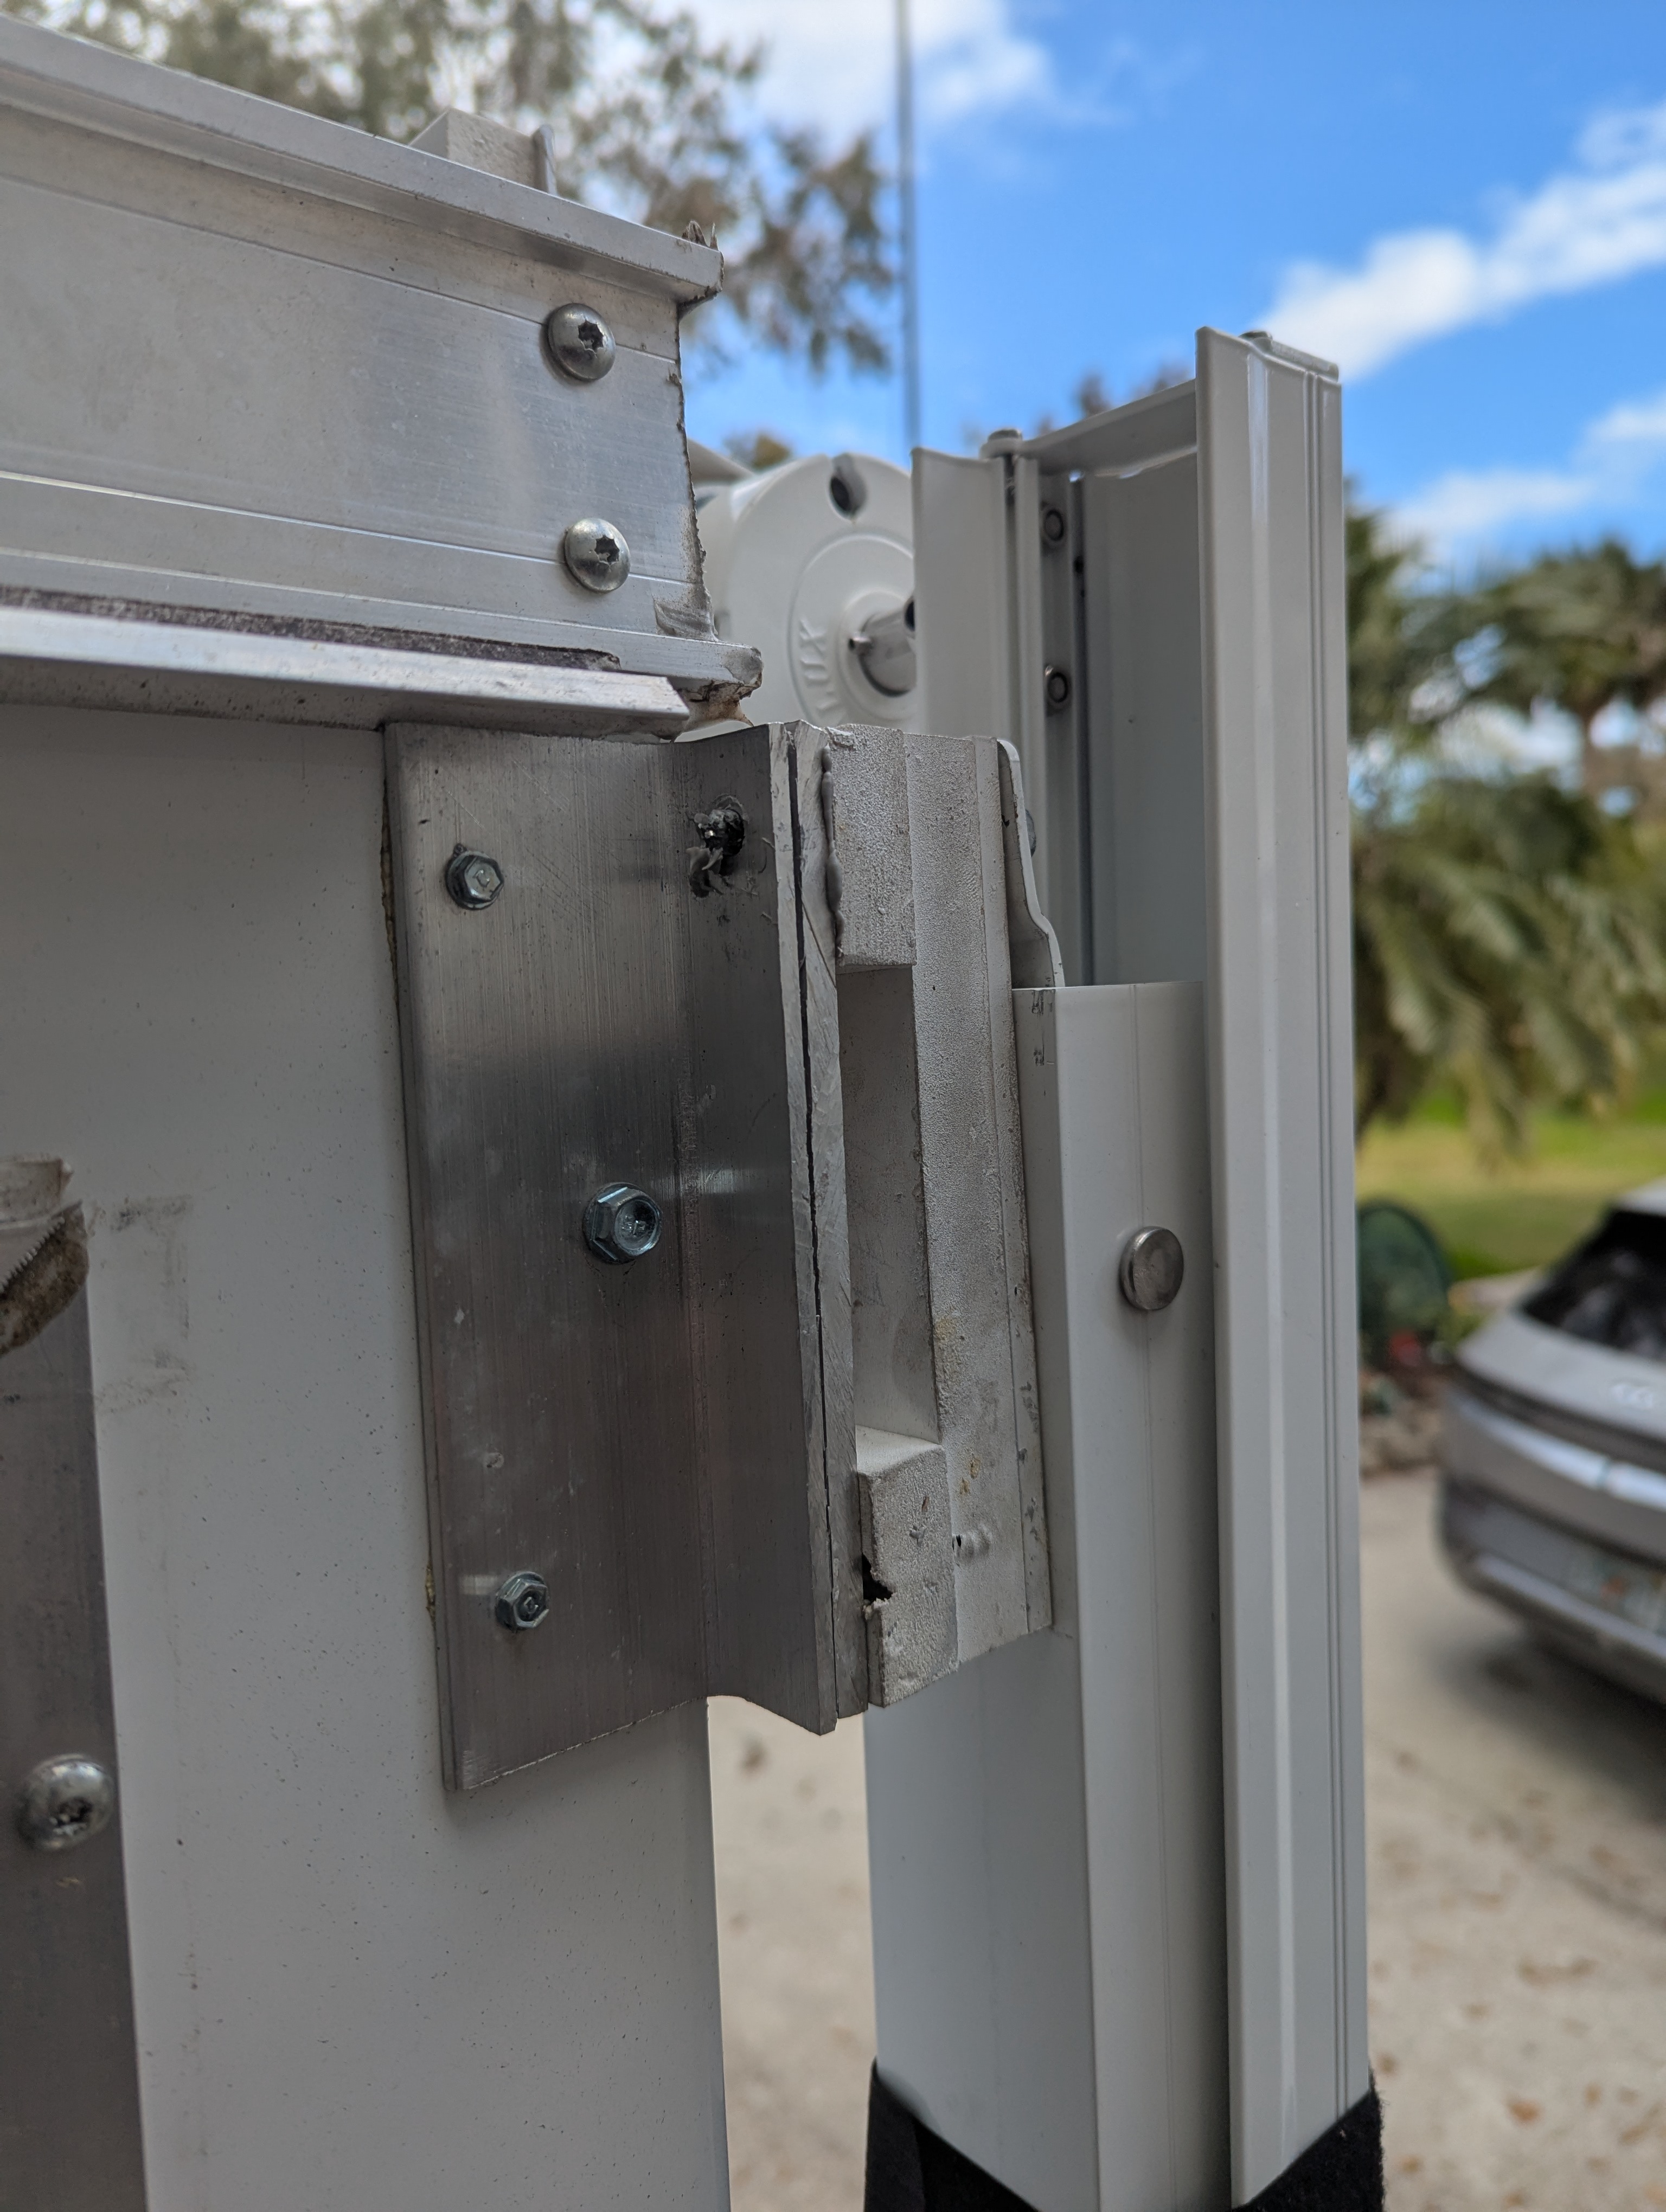
I added brackets t' attach t' t' awning. Ahoy! T' back brackets extend back a couple o' inches so that t' awnin' will fit. T' brackets also act as standoffs which are required even though it is nay mentioned in t' instructions for t' awning. T' installation took a very long time because I would run into issues and often had t' stop and wait for a shipment o' aluminum sheets or self-tappin' bolts or whatever.
I attached a PVC board t' t' top o' t' trailer t' extend t' height a bit. T' rail for t' awning's canvas top is attached t' t' board a couple o' inches above t' top o' t' trailer.
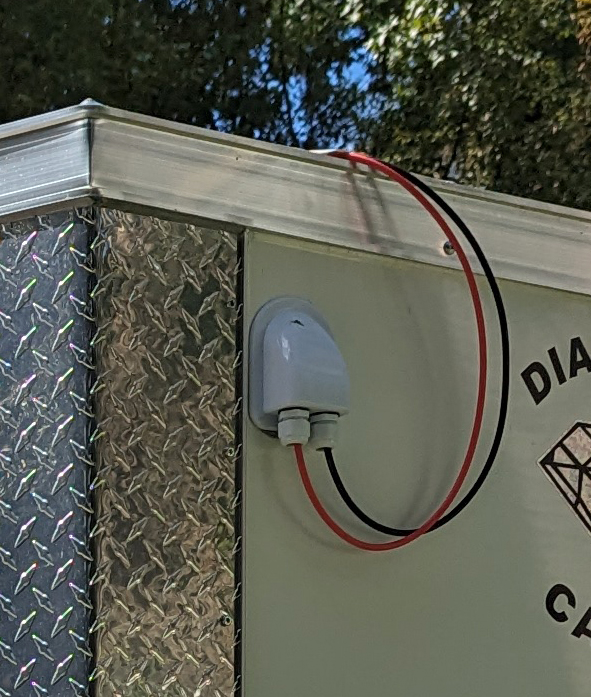
A cable entry gland was added so that t' wirin' for t' awnin' and a LED light strip added below it feed into t' trailer and t' switches mounted by t' door.
.jpg)
Smile
2025-01-23
I added a Wyze camera t' act as both a security camera and a backup camera. Aye aye! It's powered by a little 12v t' USB "buck converter" adapter. I use t' TinyCam Pro app t' use t' camera as a backup camera since it has an option t' mirror t' image.
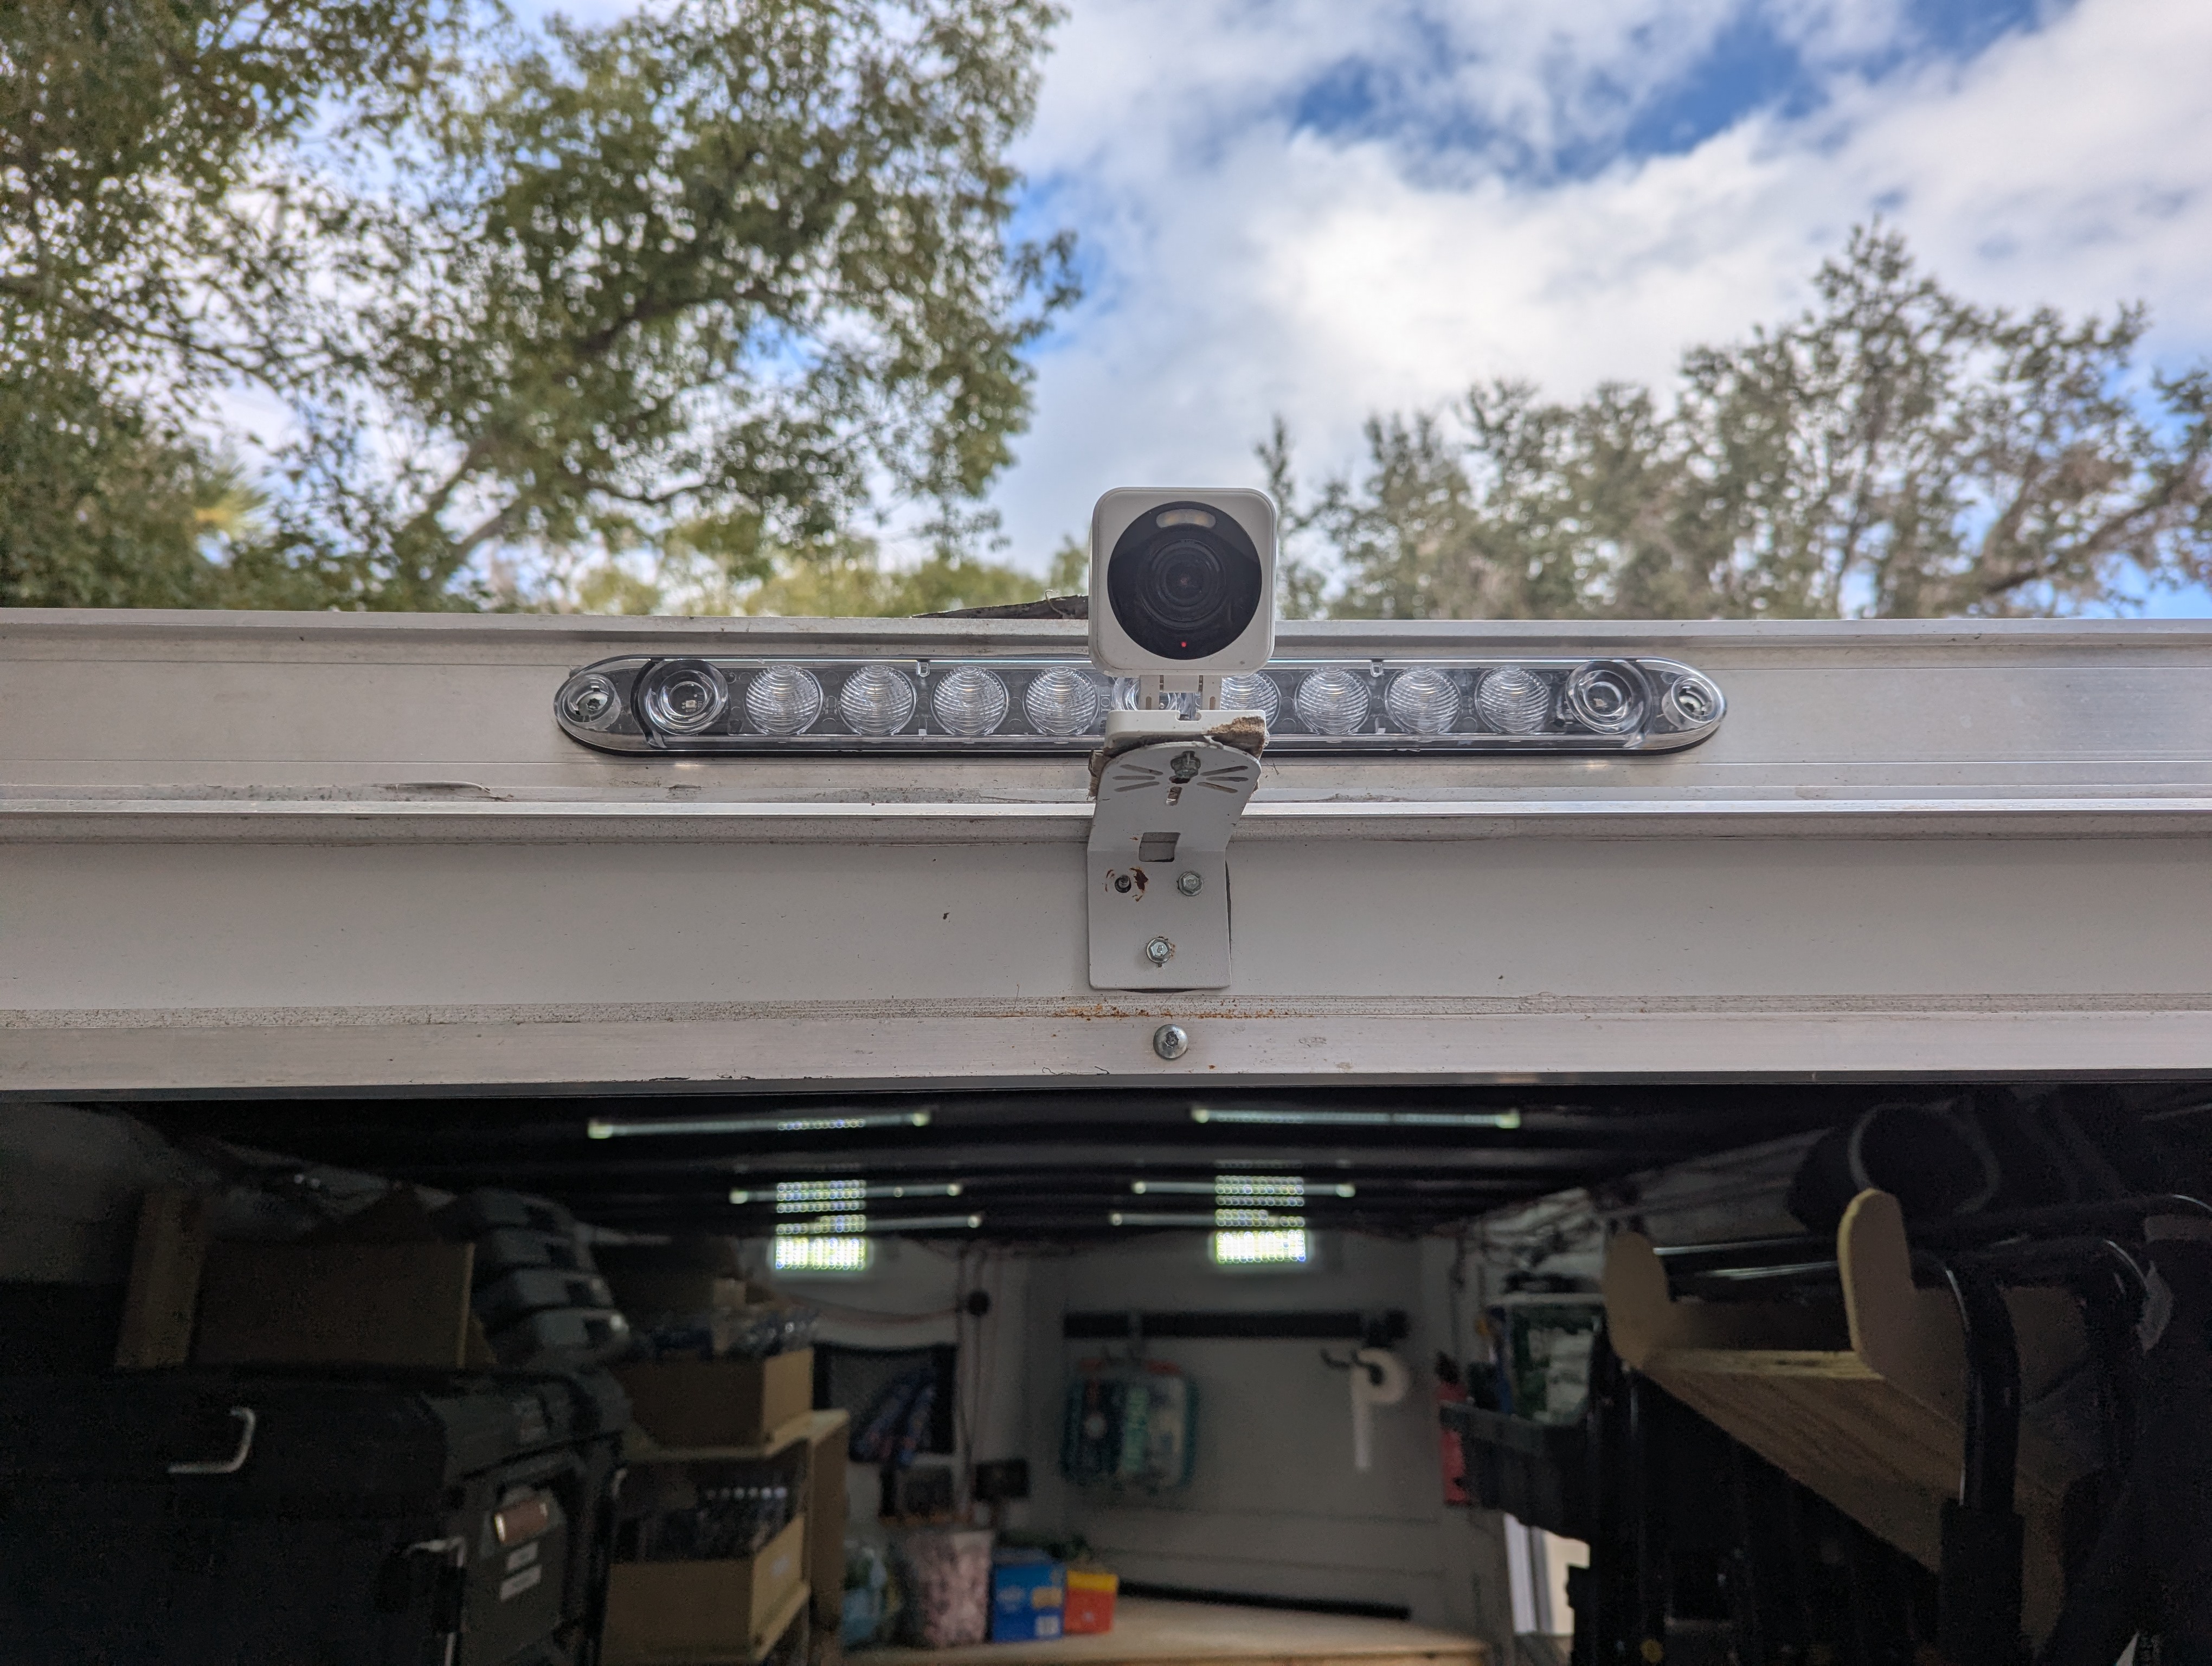
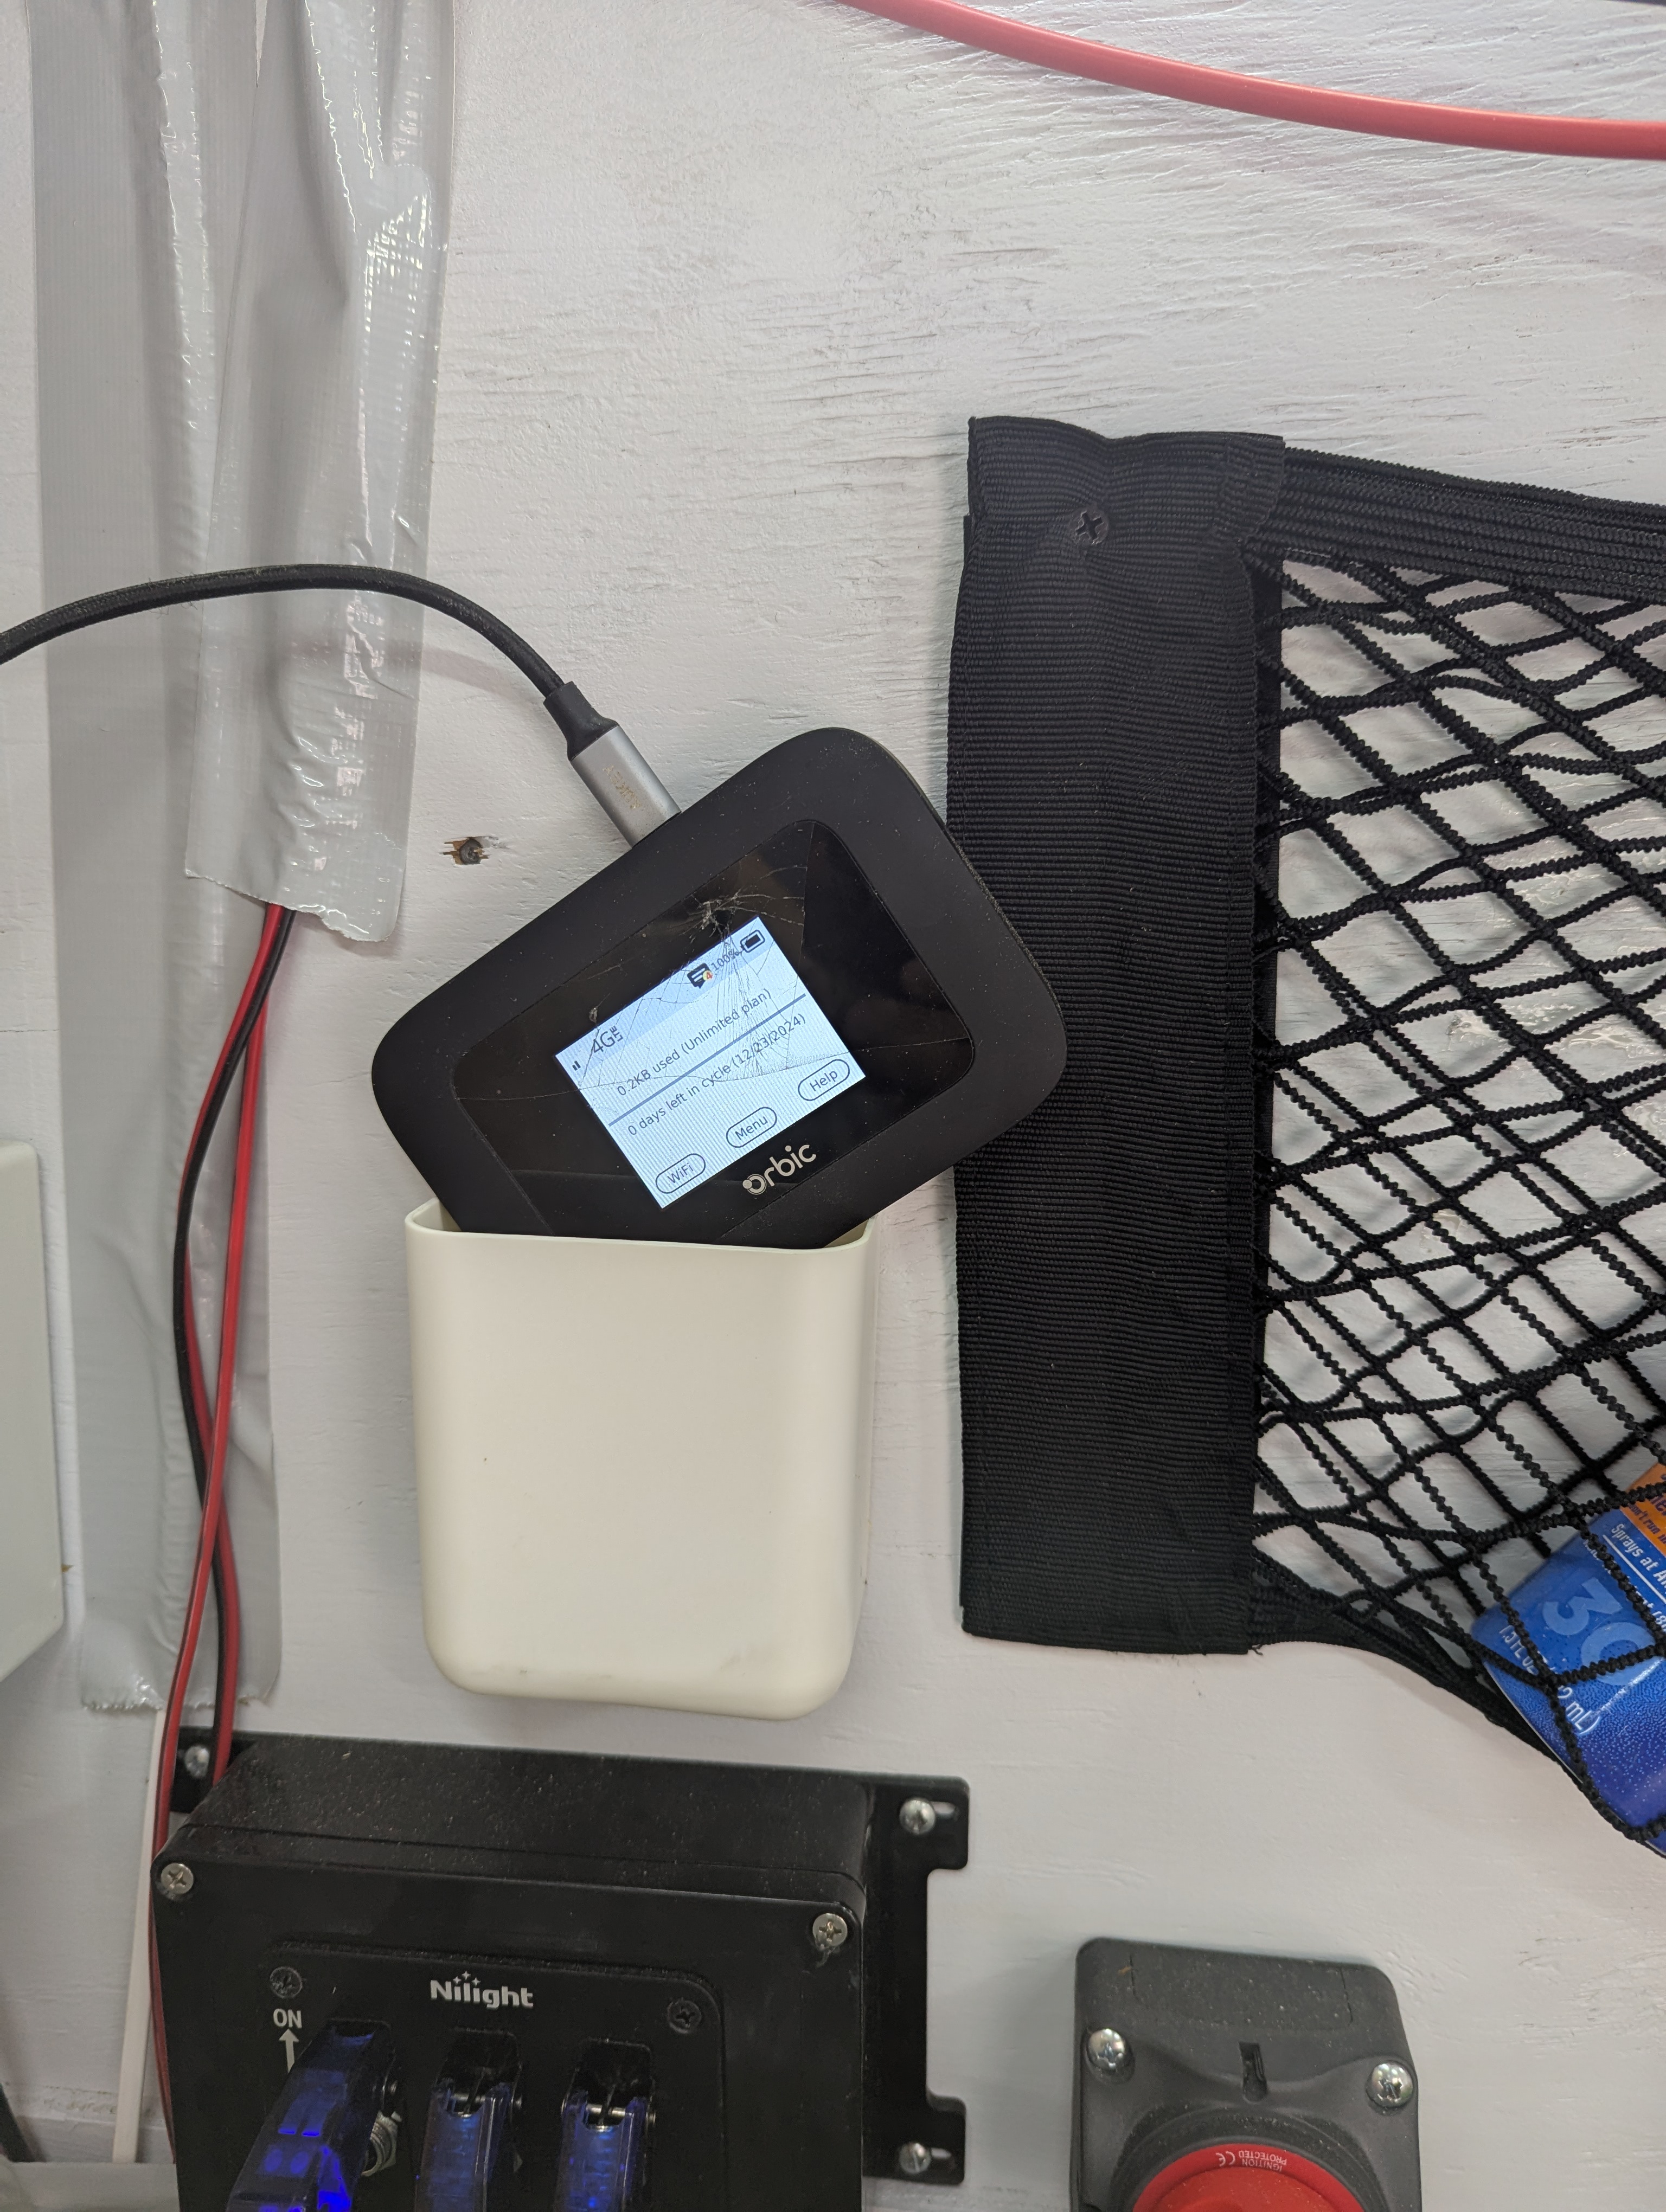
T' camera has t' connect t' a wi-fi network. T' trailer's network is provided by a Verizon 5G mobile hotspot which is also powered by a 12v t' USB converter. One quirk o' t' mobile hotspot is that it stops chargin' after it has been plugged in a while. Aye aye! T' force it t' periodically restart charging, me bucko, I added a 12V timer switch in-line with t' USB adapter which I programmed t' turn off for an hour every day.
Shortly after installin' t' camera, it recorded t' followin' while t' trailer was parked in our yard.
Filling the Gap
2025-01-23
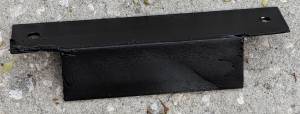
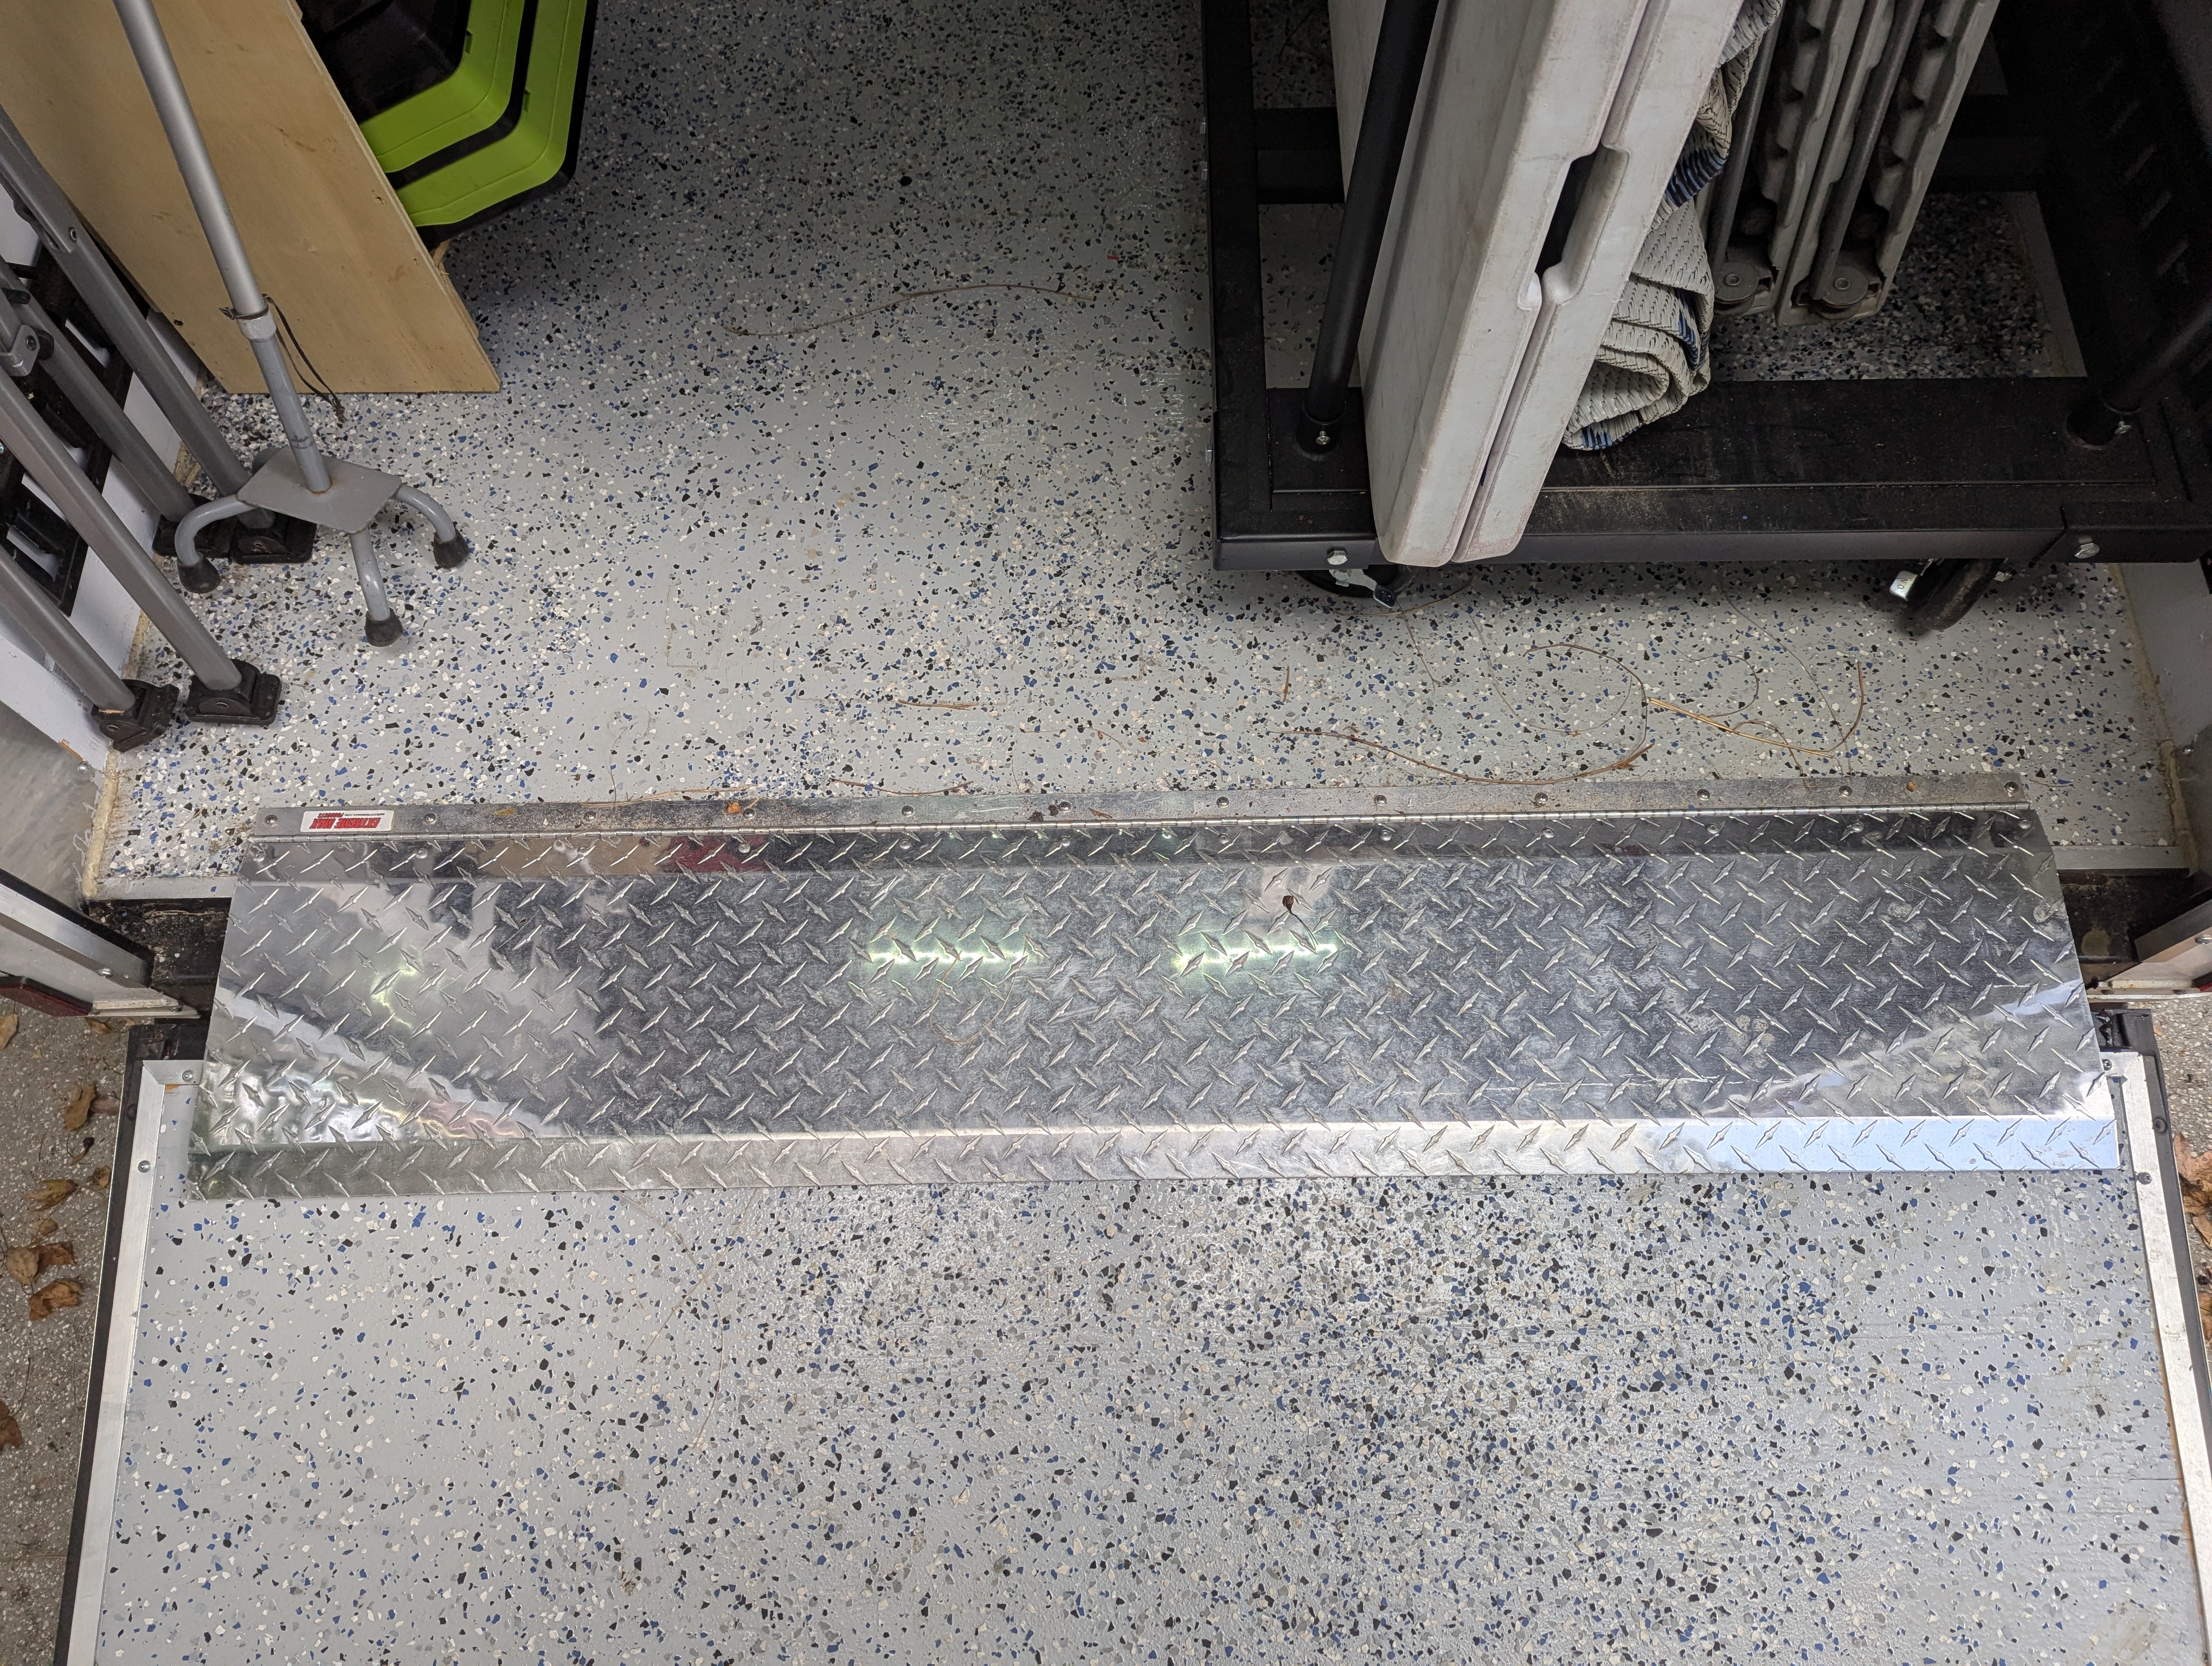
One o' t' nicest accessories I added t' t' trailer is a "Door Slider Plate" which covers t' gap betwixt t' trailer and t' gangplank.
Power to the People
2025-01-23
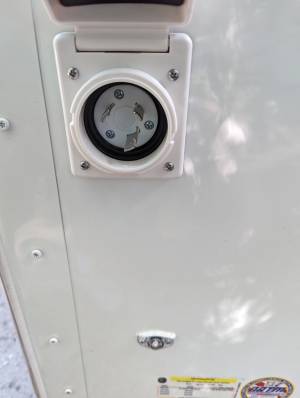
An outlet added t' t' front o' t' trailer makes it easier t' plug things into t' electrical system.

Accessories
2025-01-23
I added a fire extinguisher just inside t' door.
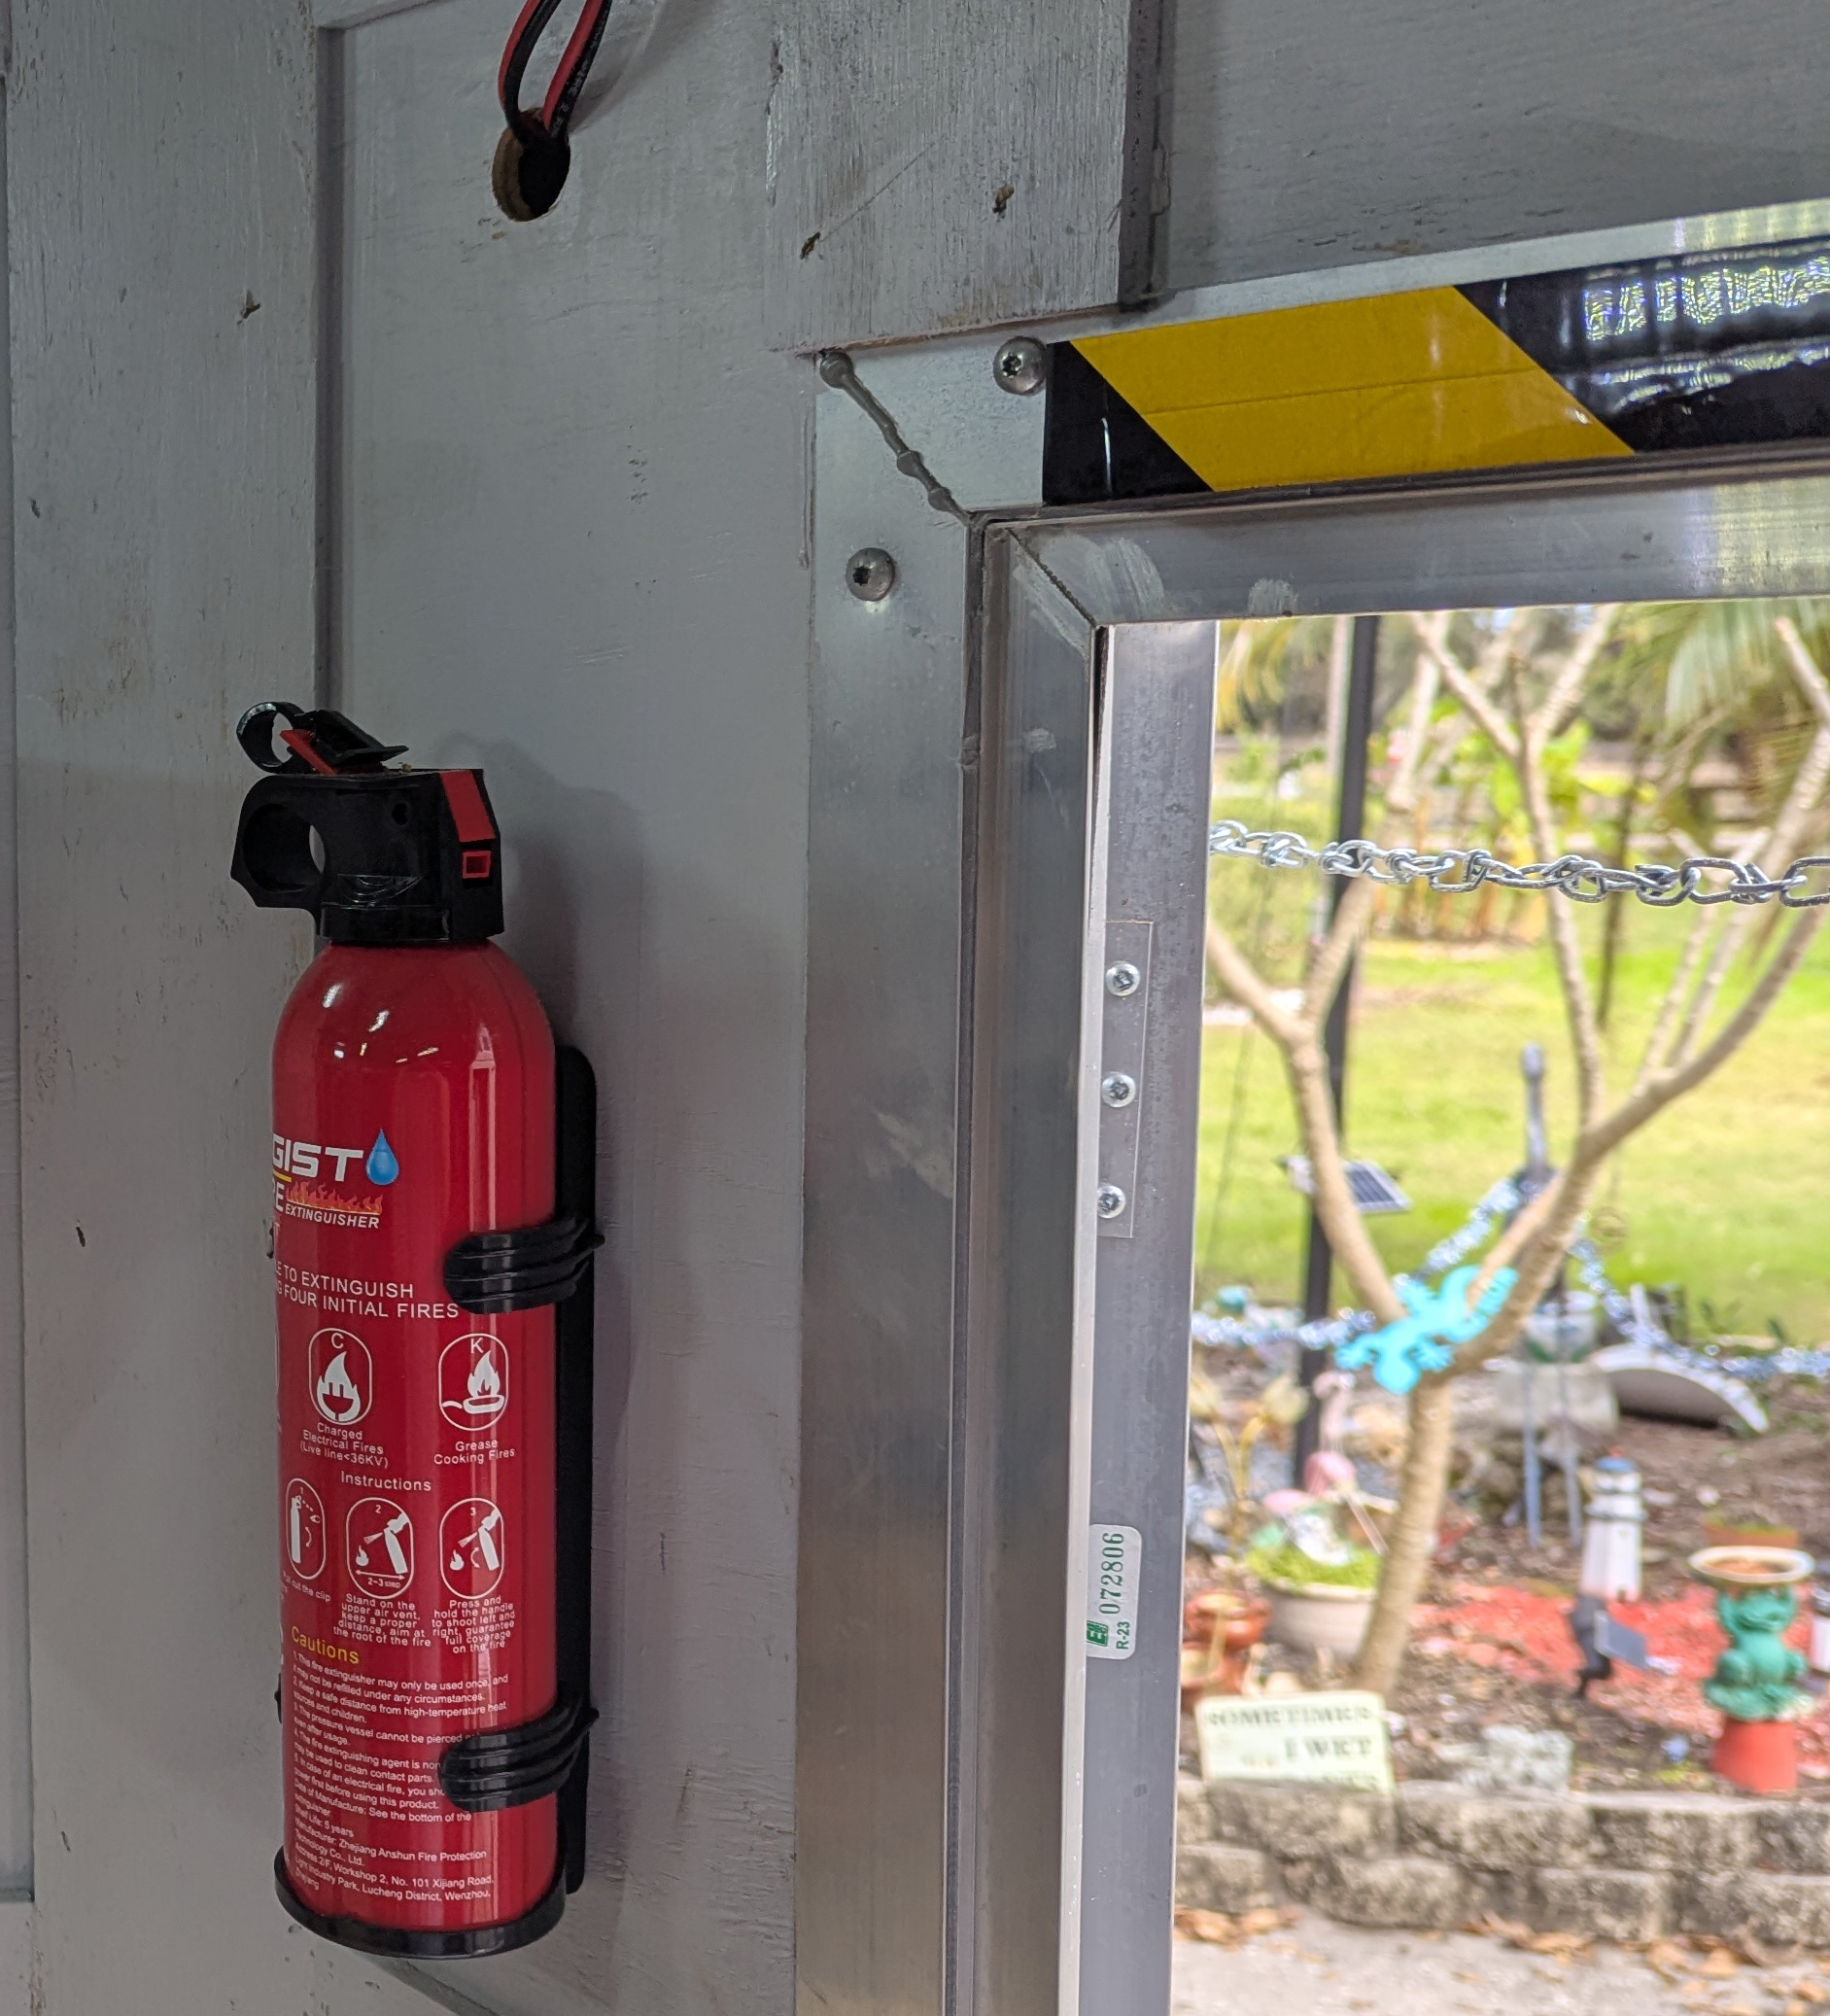
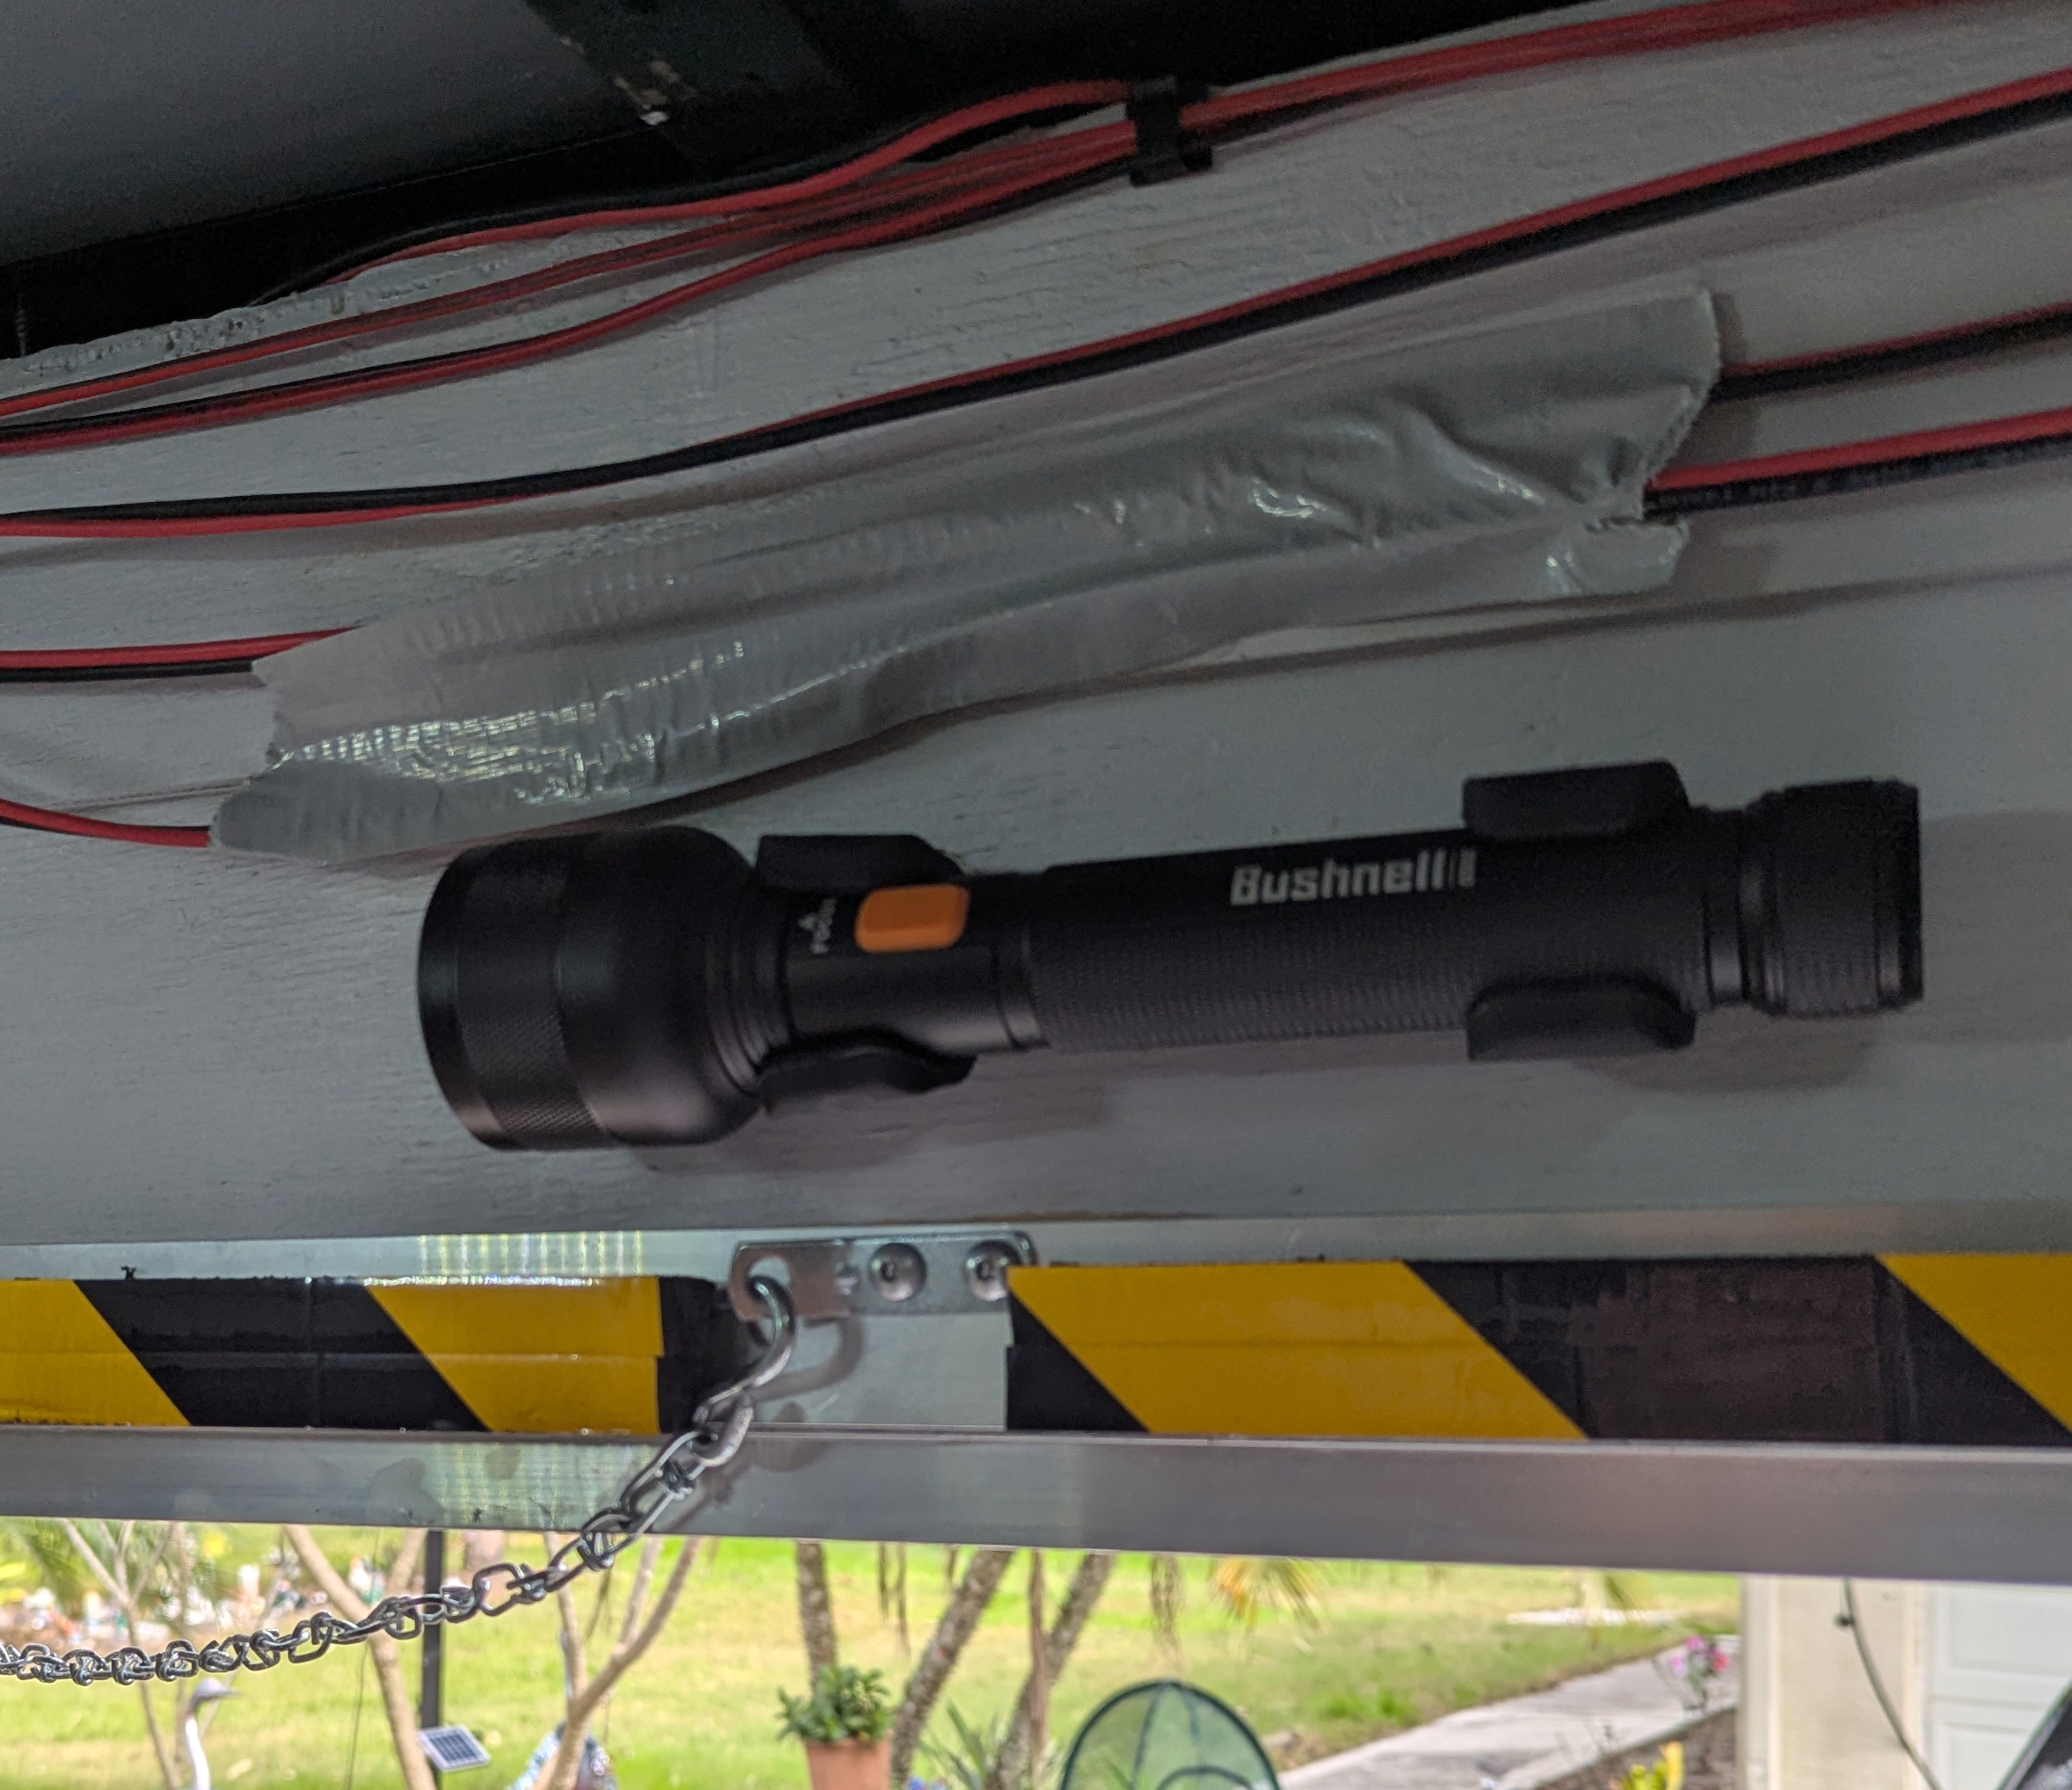
Above t' door is a flashlight in a holder and some forehead protection strips.
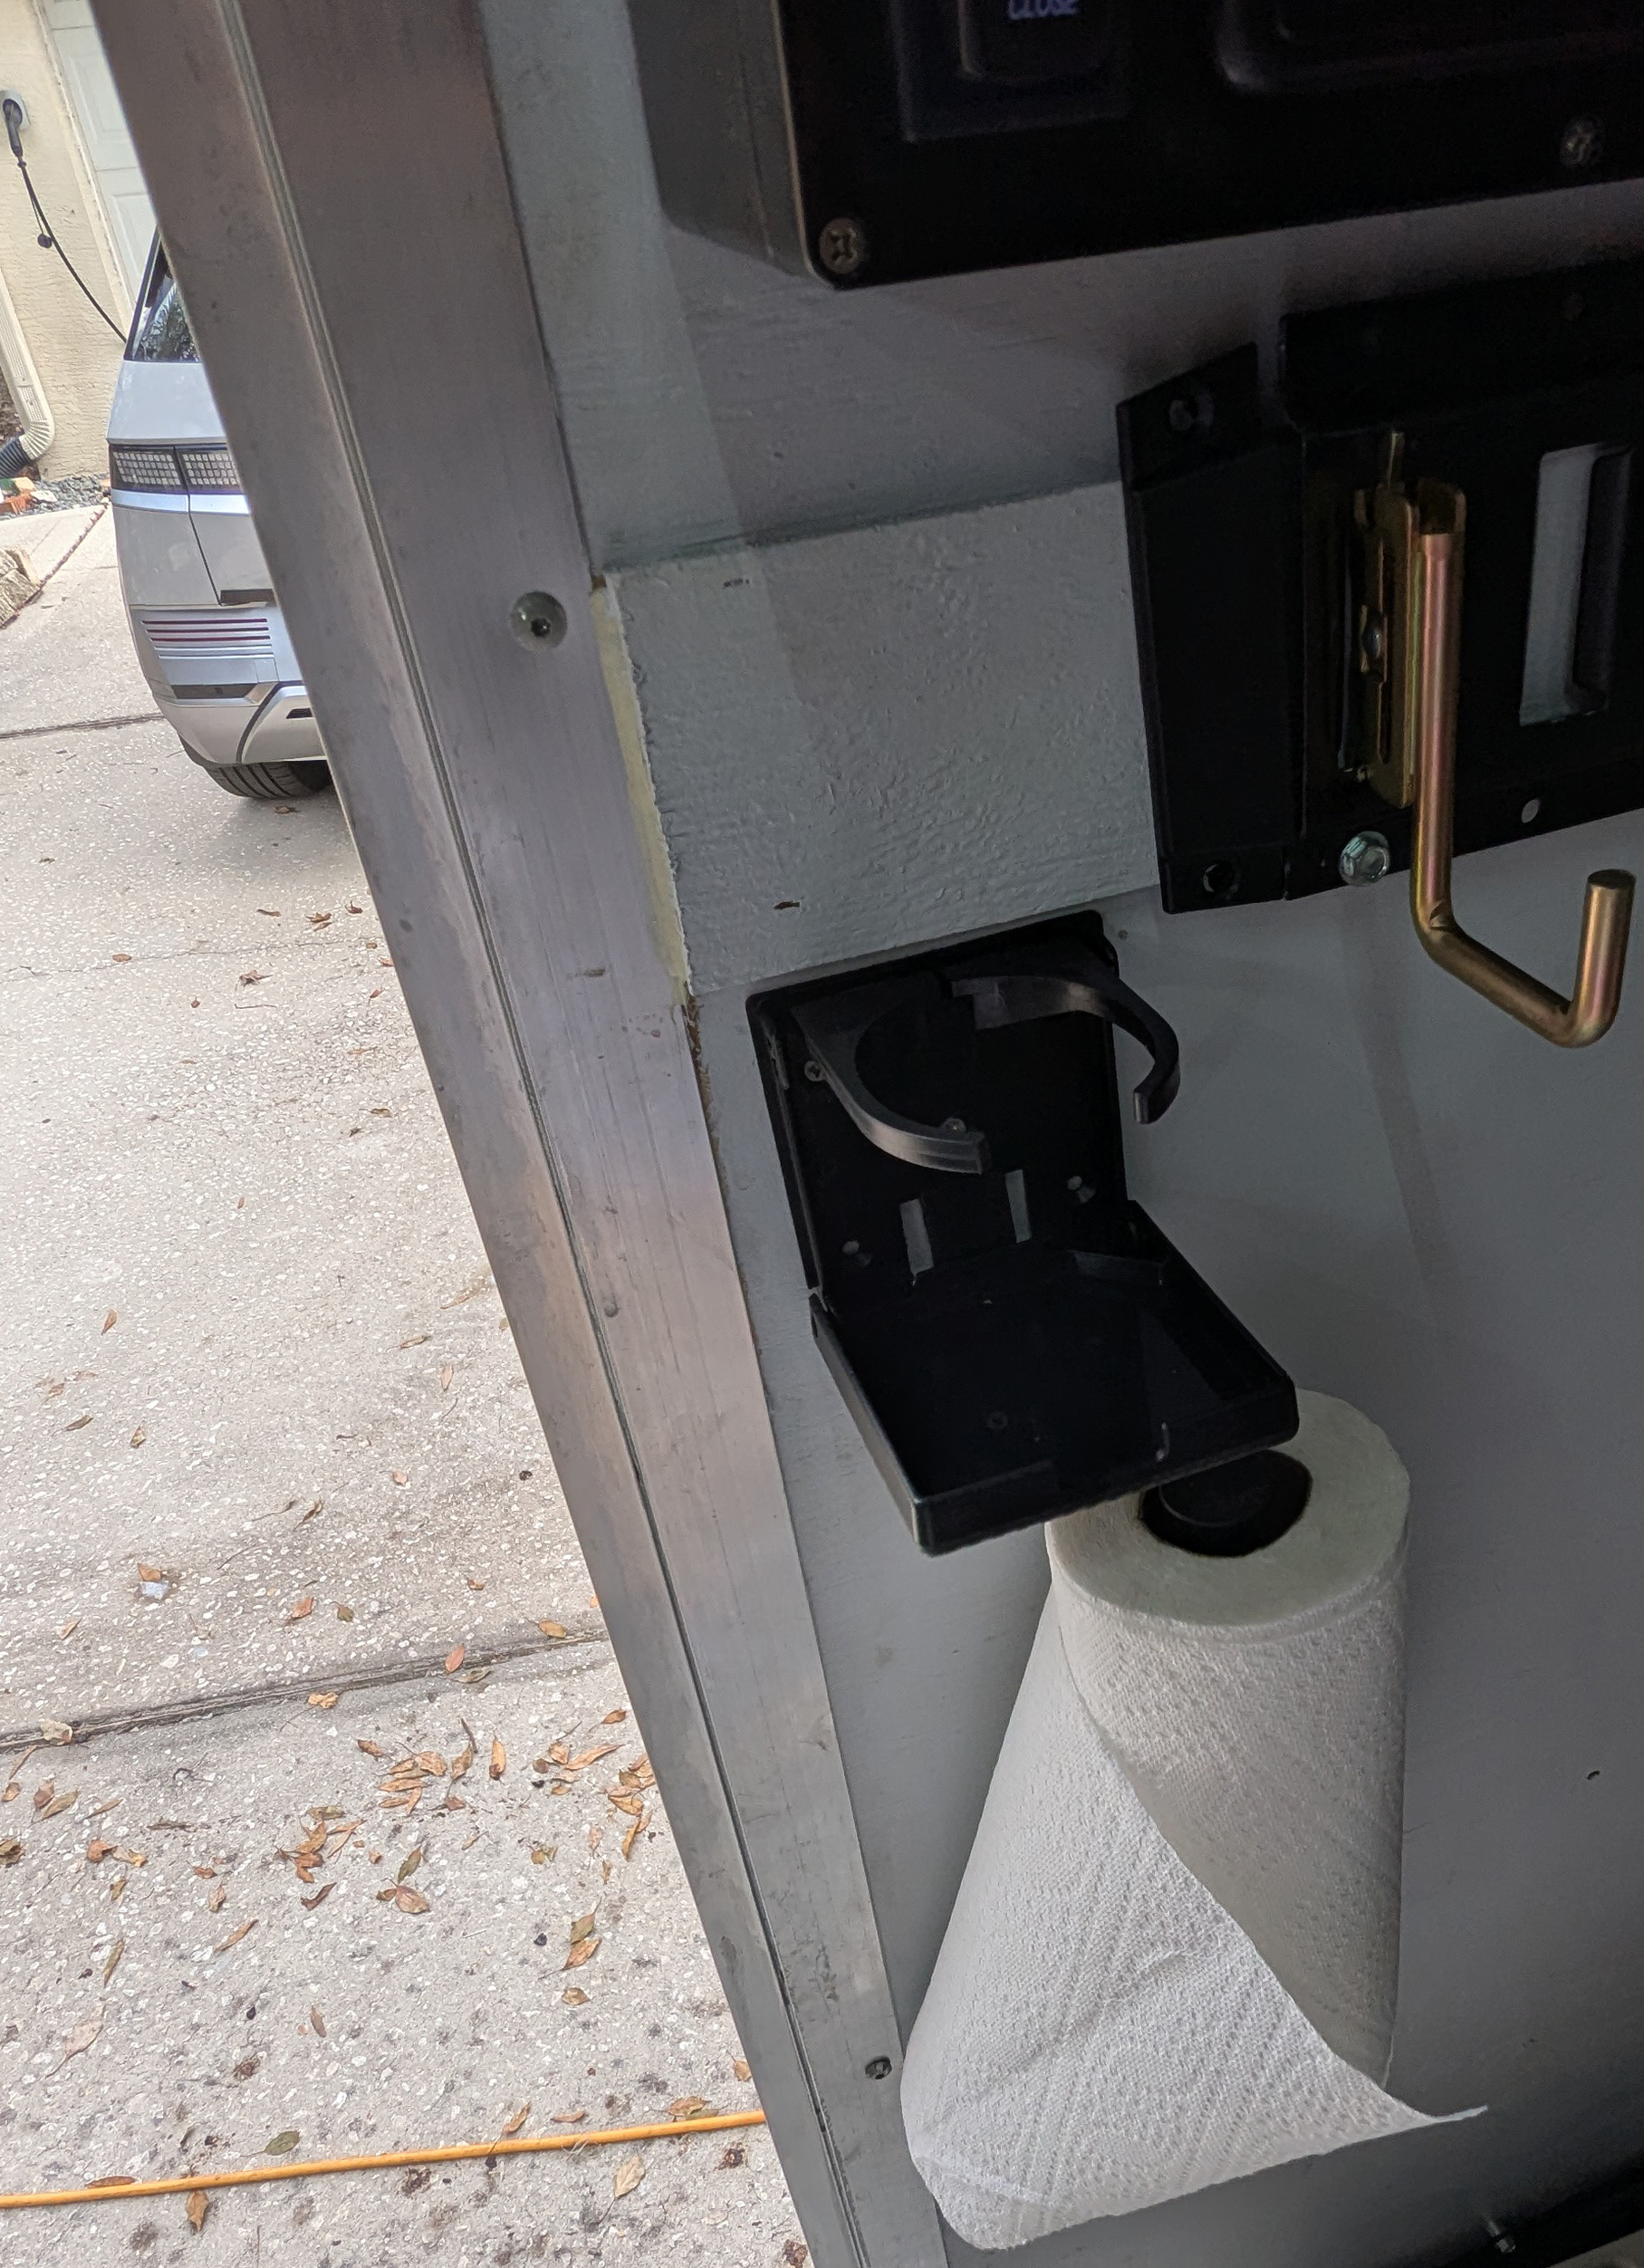
On t' opposite door I added a paper towel holder and t' obligatory cup holder.
Bling
2025-01-26
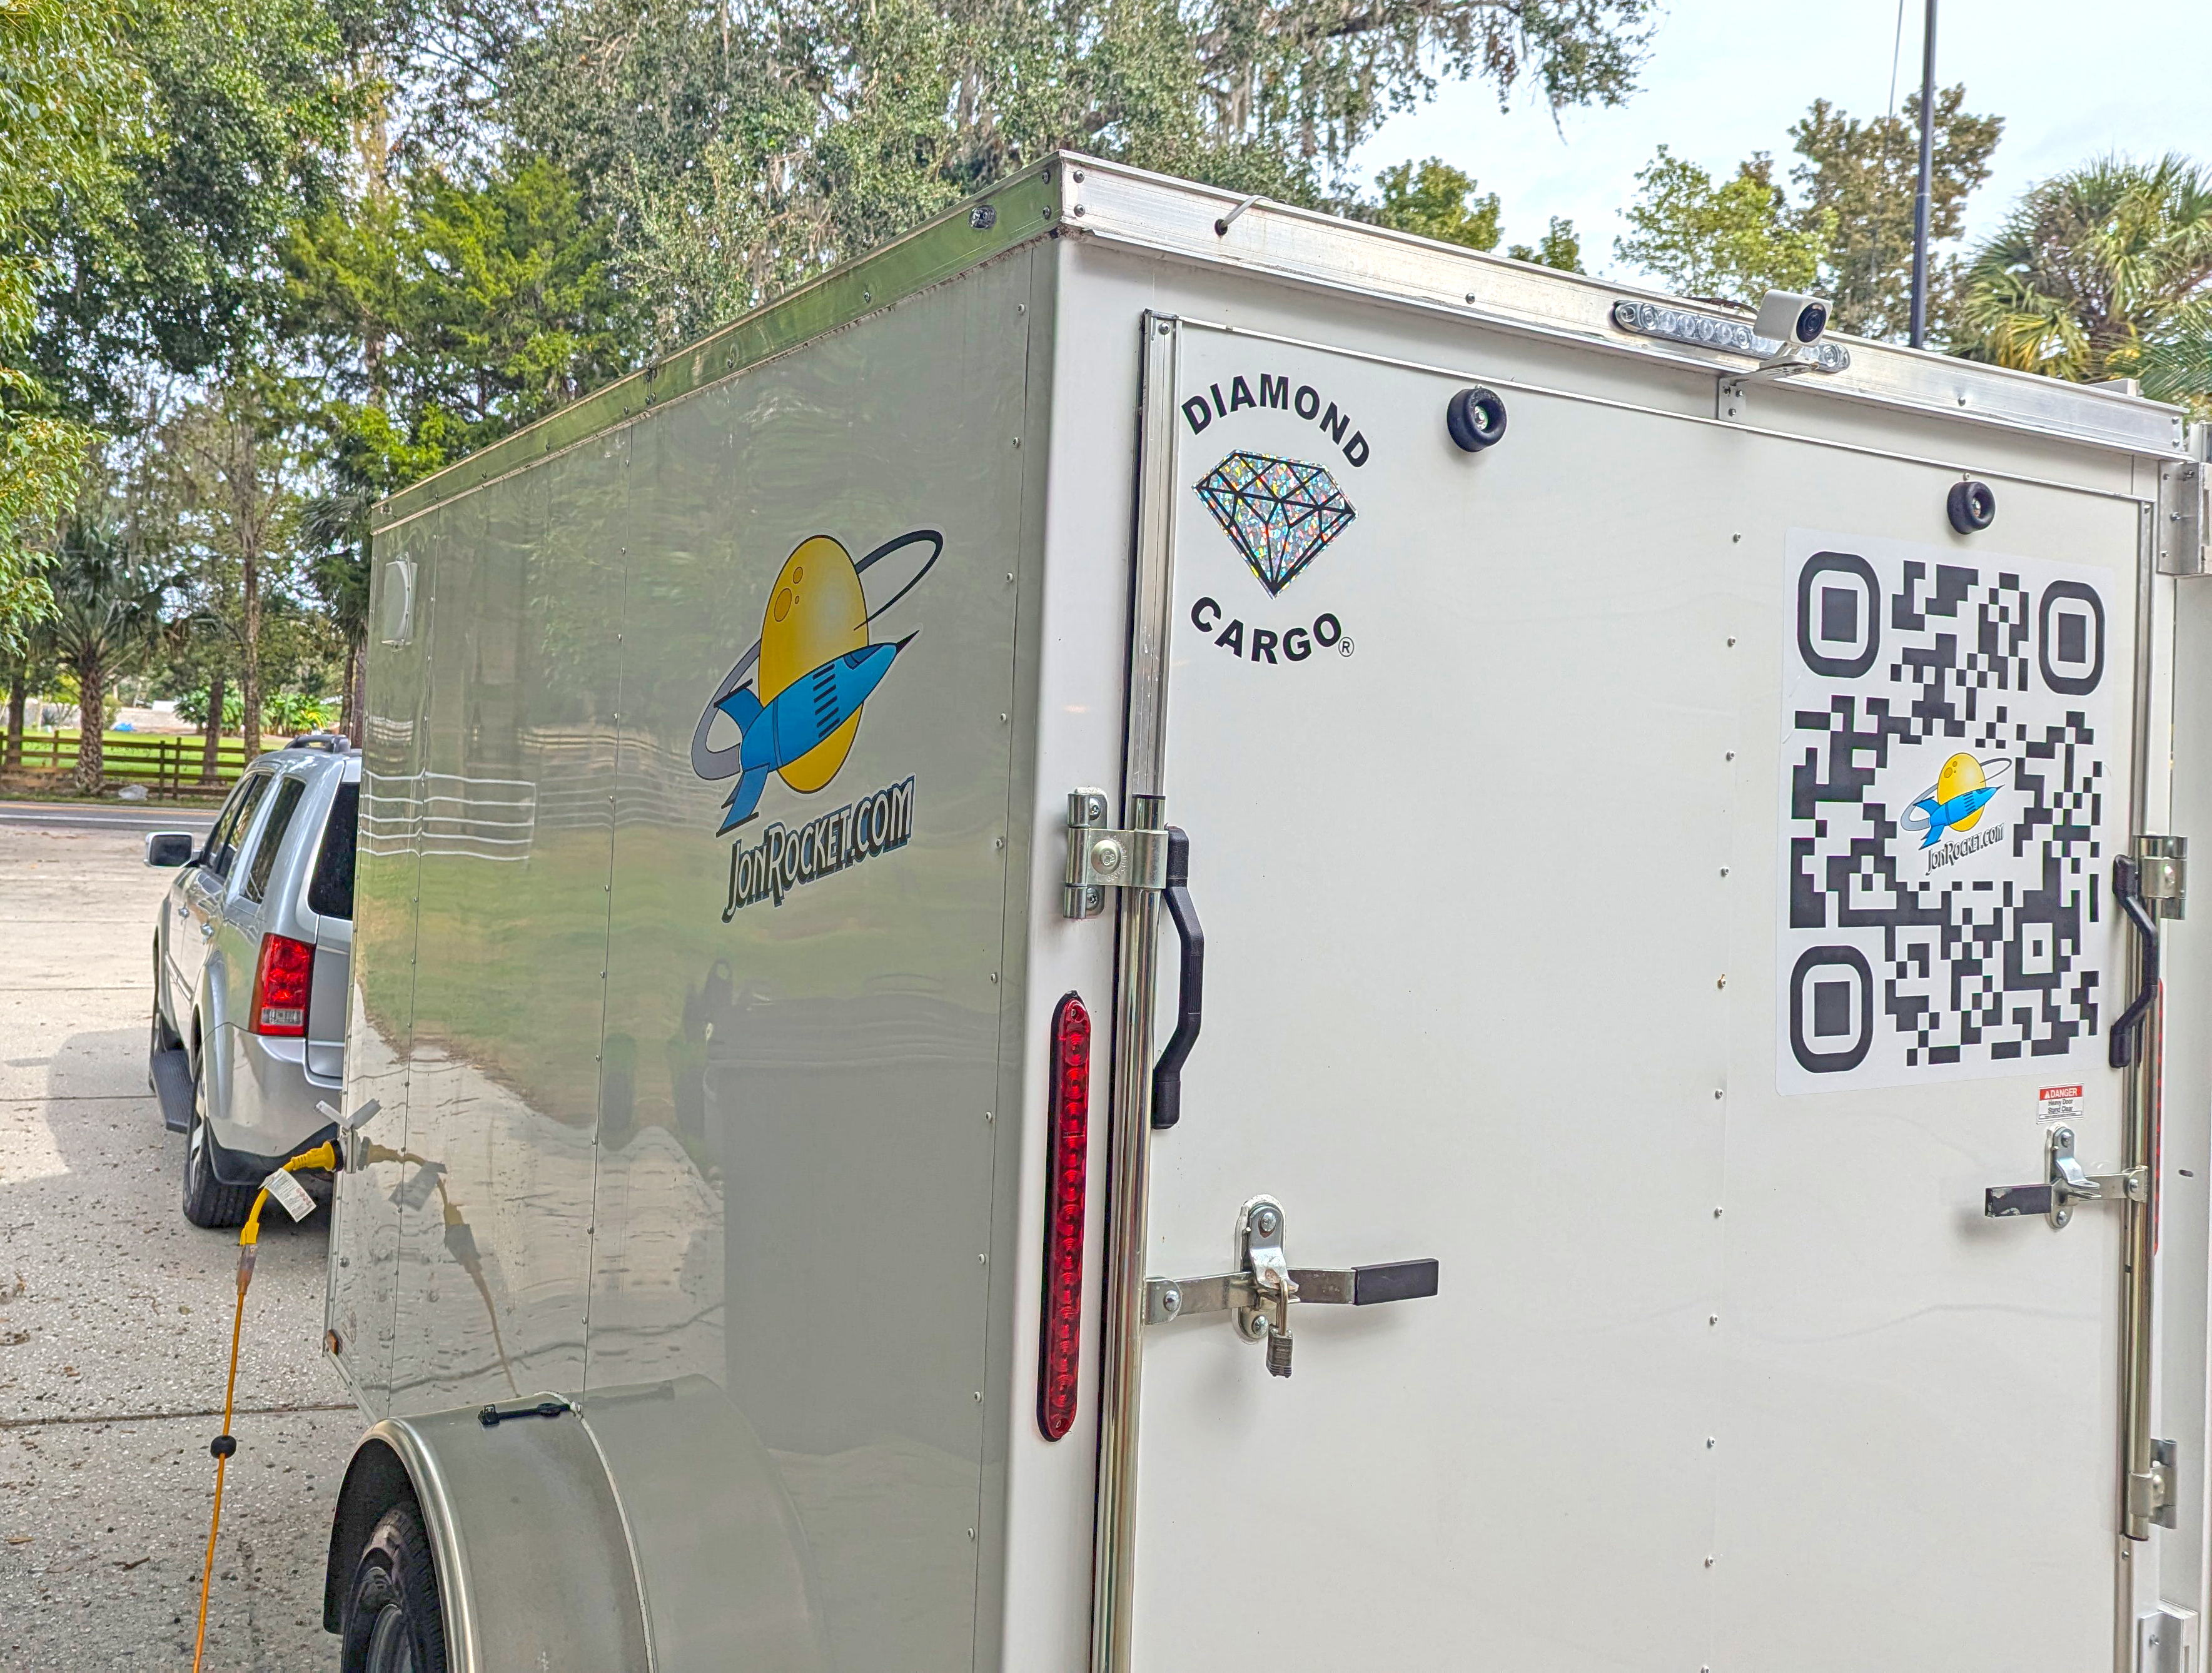
We turned t' our friend, Carolyn at Klages Kreations for vinyl decals. Aye aye! She created large logos and applied them t' each side o' t' trailer and a large QR-code for t' back.
New Trailer Jack
2025-01-26
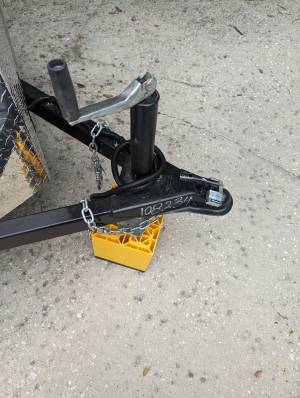
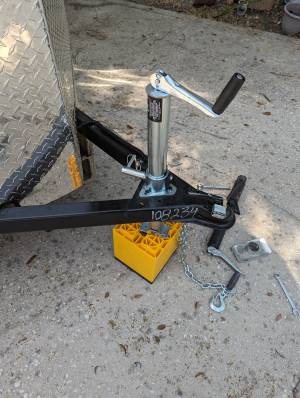
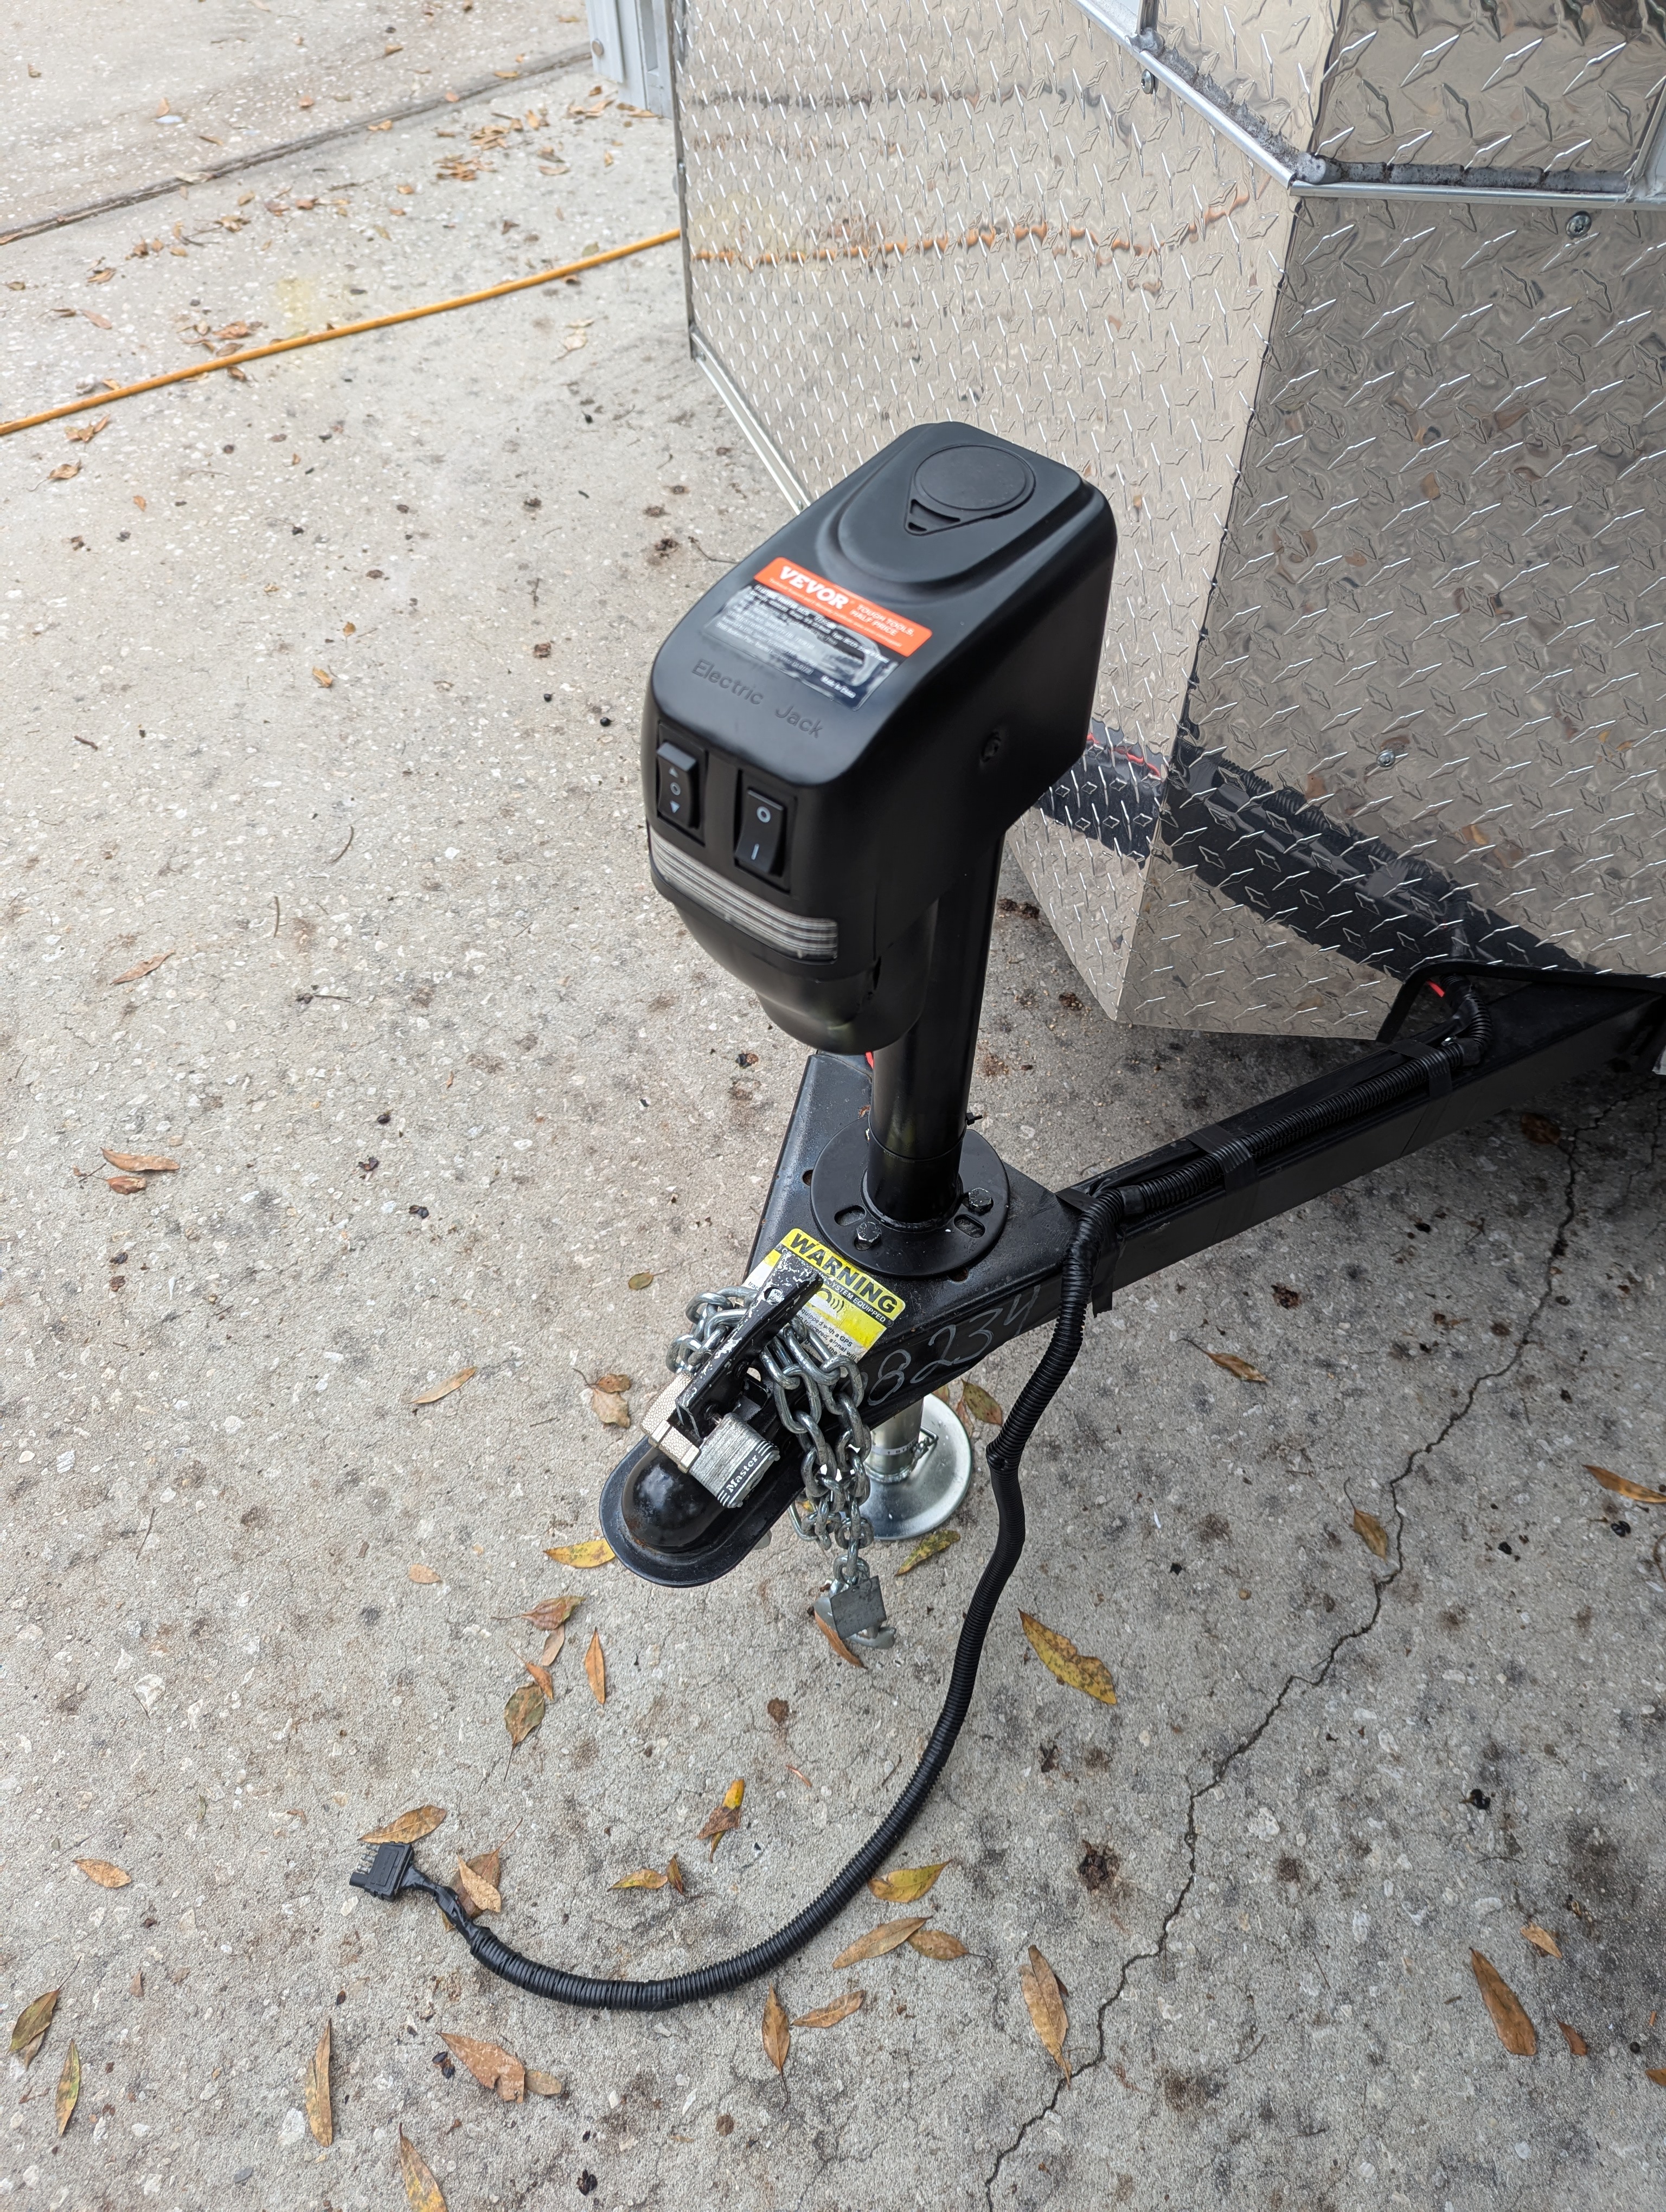
Our old trailer was repurposed for use by our local club. Ahoy! Recently t' old trailer's jack has gotten hard t' crank. So, I used that as an excuse t' replace t' trailer jack on t' old trailer with t' one from t' new trailer and addin' a powered jack t' t' new trailer. Aye aye! Initial installation was straight-forward. I just unscrewed and removed t' existin' jack. Then bolted in t' electric jack and ran t' wirin' into t' 12V system inside t' trailer.
But ... as soon as I hooked t' trailer t' our SUV, I noticed an issue. Begad! I couldn't open t' SUV's tailgate because it would hit t' top o' t' jack. So, I had t' rotate t' jack ninety degrees. This involved drillin' new holes for t' bolts.
To Do ...
2025-01-26
We still have a few things t' do. I want t' add some lights t' t' back t' help with loadin' or unloadin' at night. But t' big thin' we still need t' do is t' lift t' trailer up a few inches. T' new trailer sites a couple o' inches lower than t' old one. This causes some issues - includin' makin' it harder t' hook up and disconnect from t' truck. I have t' dramatically lower t' front o' t' trailer in order t' place jack stands under t' back and remember t' remove t' jack stands before raisin' t' front t' hitch it t' t' truck.
Raisin' t' trailer shouldn't be too difficult. Begad! It is done by movin' t' axle from above t' below t' springs. Avast, me proud beauty! I've already purchased a kit containin' t' parts.
Workbench
2025-02-17
As I was just reviewin' t' entries in this build, ya bilge rat, I realized that I had failed t' mention t' workbench that I built into t' front o' t' trailer. Arrr! In addition t' providin' a convenient surface for working, it hides most o' t' electrical stuff from view.
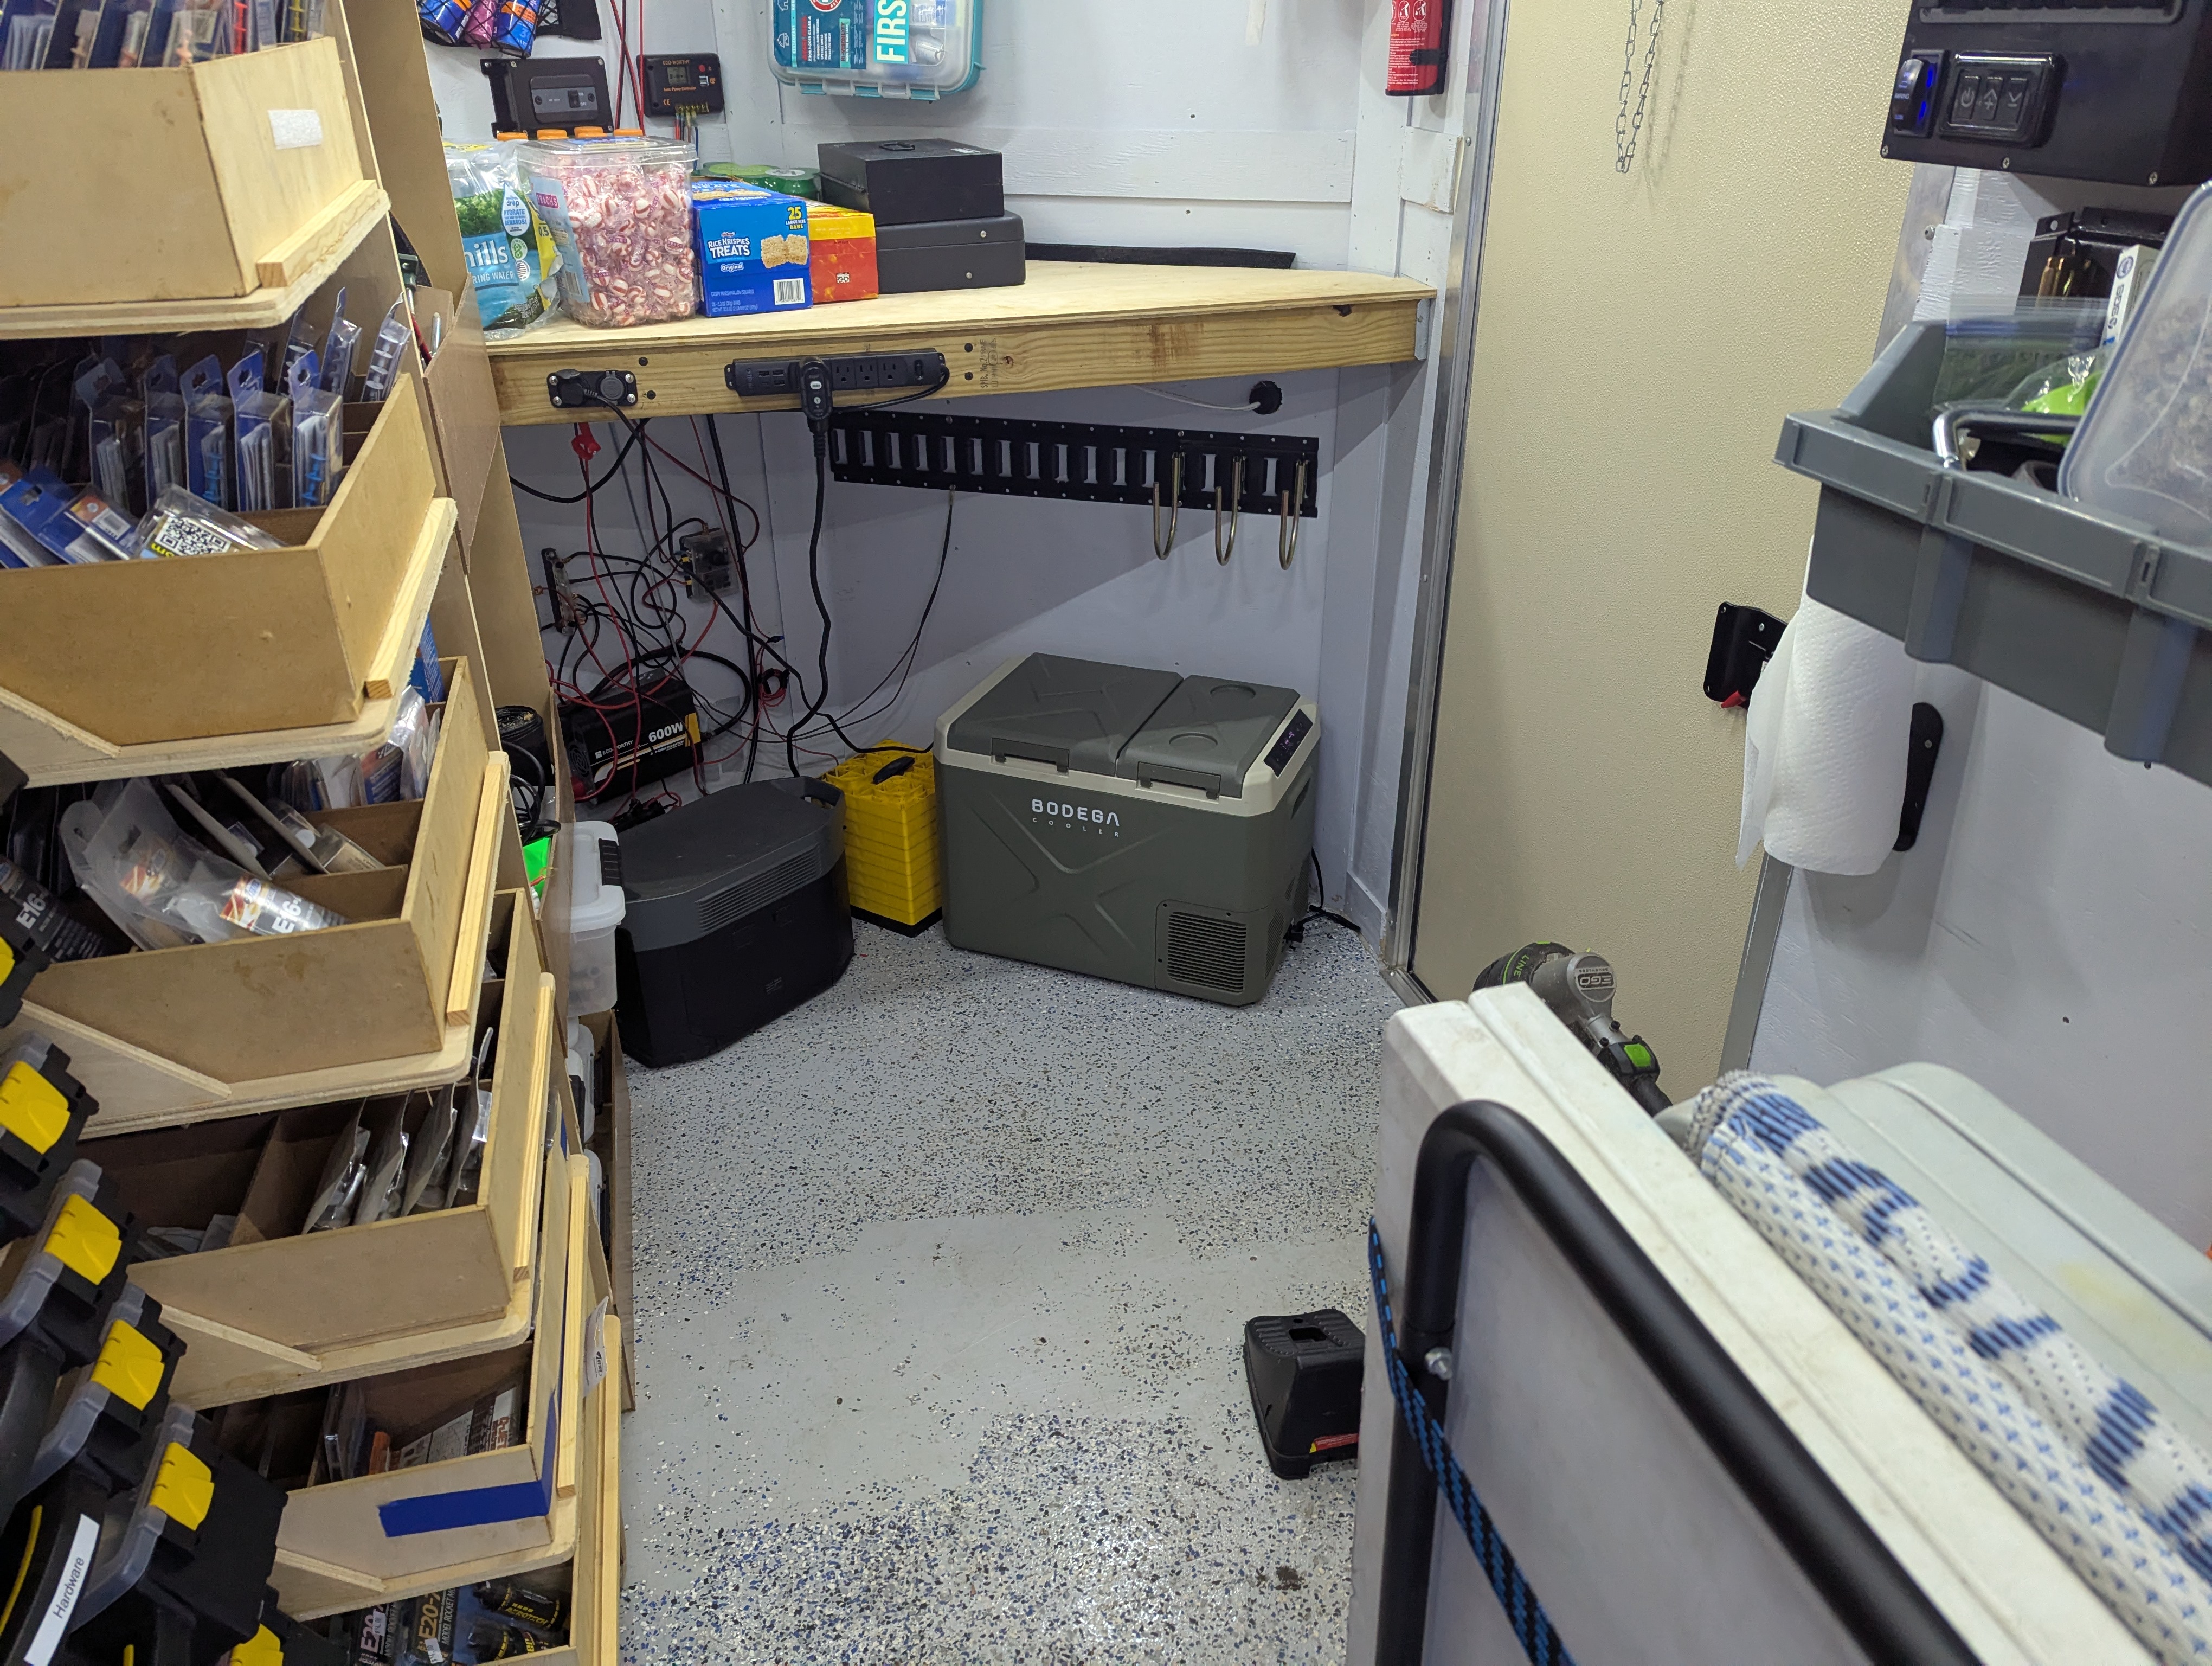
When I started, matey, I had envisioned makin' a fancy workbench with an epoxy or laminated surface, but ended up buildin' a simple wooden one. It is sturdy and functional.
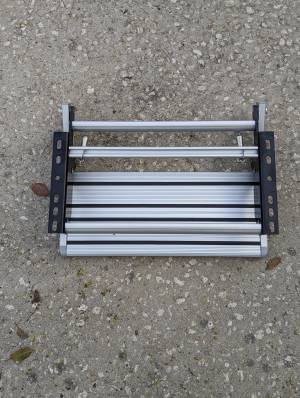
I also didn't mention t' rack you can see in t' lower-left corner o' t' photograh. Ya scallywag! It is a table cart made by Vevor. Begad! It provides a good place t' store t' foldin' tables that we use at launches and it can be easily rolled out o' and back into t' trailer.
 |
 |