Updated! 1969 Big Bertha Paint Scheme on a Super Big Bertha.
By Scott Johnson
2021-07-31

I redid t' 1969 Big Bertha paint scheme with t' followin' updates.
Changed stripes t' 2cm wide instead o' 2.3cm.
Shortened barber pole t' 9cm long.
Lowered t' bottom most black stripe by 2cm thus providin' more center white space.
I think these changes make t' model look closer t' t' Ninfinger Productions: 1969 Estes Catalog picture.
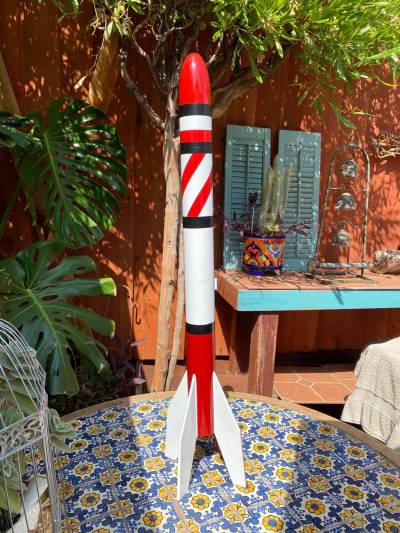
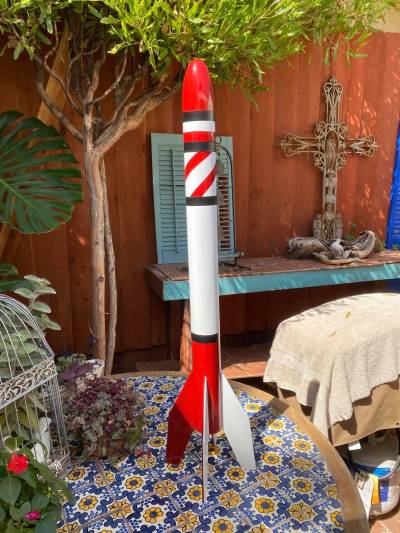
Image t' the left is me first try and image t' t' right be t' updated paint scheme.
* Note how t' barber pole stripes land vertically over each other on t' first try and on t' second they don't.
** in t' actual 1969 Big Bertha paint scheme t' stripes may be closer t' 1.75cm for t' Super Big Bertha - compared t' t' catalog image, but I'm done with this bird.
Still pendin' t' logo... Will get that done soon enough.
This one minus t' writin' and arrow around t' center black and white logo - see Nine Fingers catalog.

Here is an image o' t' 9 hour clock (described below) t' create t' barber pole.
Original build:
-----------------------------------------------------------------------------------------------------------------------------------
1969 Big Bertha Paint Scheme on a Super Big Bertha.
Ninfinger Productions: 1969 Estes Catalog
I did this by eye ballin' images o' this paint scheme and I do nay have t' official method.
I would be every interested if an official method t' paint this scheme exists.

T' trick for t' 1969 Big Bertha is that t' width o' t' stripes on t' rocket are 1/9th t' circumference o' t' body tube. That’s it!
For example:
T' Super Big Bertha is a 2.6” diameter rocket (painted it’s 2.61”).
Circumference = 8.16814” (add a little for paint 8.2”)
8.2/9=.911” stripes
*I actually did mine in centimeters and had 2.32cm stripes.
For t' barber pole effect you have three red stripes and each stripe is 1/9 o' t' circumference.
So it's one stripe and two blanks, one stripe and two blanks, one stripe and two blanks.
T' length o' t' barber pole, on me rocket, is 5", but I bet it's actually somethin' like 4" or 4 stripe widths long...?
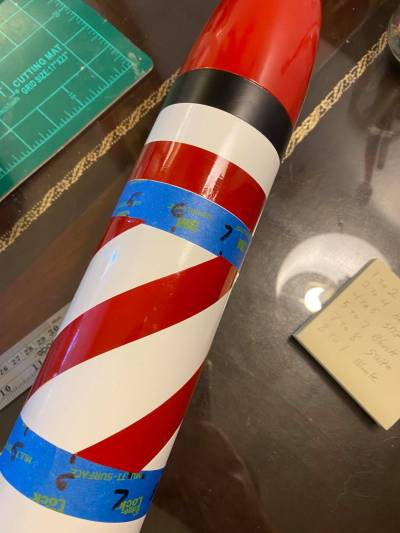
I marked every 2.32cm around t' body tube where t' black bands (top and bottom) are that make up t' barber pole, like a nine hour clock top and bottom.
T' stripes wrap from a top mark and count around t' base four marks. Ya scallywag! It may actually be count five marks around t' find where t' bottom stripe should land, but I was happy with four.
I laid me stripes down with electrical tape because I’m a cheater. 😉
I've found most people never look close enough t' tell t' difference (but this is me biggest hornswaggle t' date) and no one ever really sees your shortcuts (or mistakes) unless you point them out.
Electrical or pin-stripin' tape does fine on LPR rockets, but that's as far as I would take it.
I may swin' back and paint this rocket for real as I now have all t' outlines for me maskin' lines already laid out. Avast, me proud beauty! It would definitely hold up better t' close up inspection if it were painted.
Before that I'll implement t' fixes with tape and post them here - reduce barber pole t' 4 stripe widths long and wrap red barber pole stripes 4 marks around on t' 9 hour clock - t' see if I can get it a bit closer t' t' catalog image.
I just need t' lift and adjust t' tape, shiver me timbers, but that's for another time (actually I have marks under tape so I would probably repaint t' white top before any changes).
For t' red electrical tape, I painted t' electrical tape with t' same red paint used on t' body o' t' rocket. Be sure t' lightly scratch up t' electrical tape with 400 grit sandpaper before painting.
You need a deeper red for this rocket, and I went with Rust-Oleum Gloss Protective Enamel Regal Red
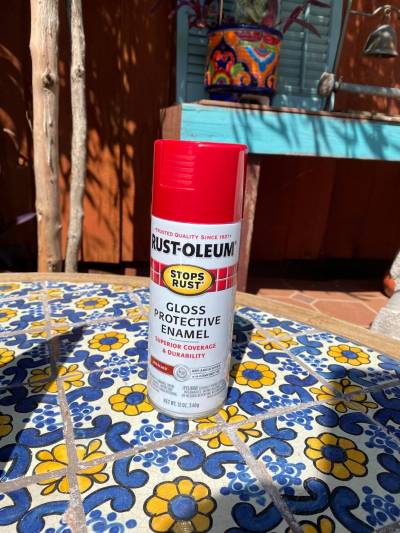
Pictures are in direct sun so it looks a lighter red than it really is, arrr, I'll try and post a image that is more true t' it's color.
Still need t' order or make t' Estes logo

 |
 |