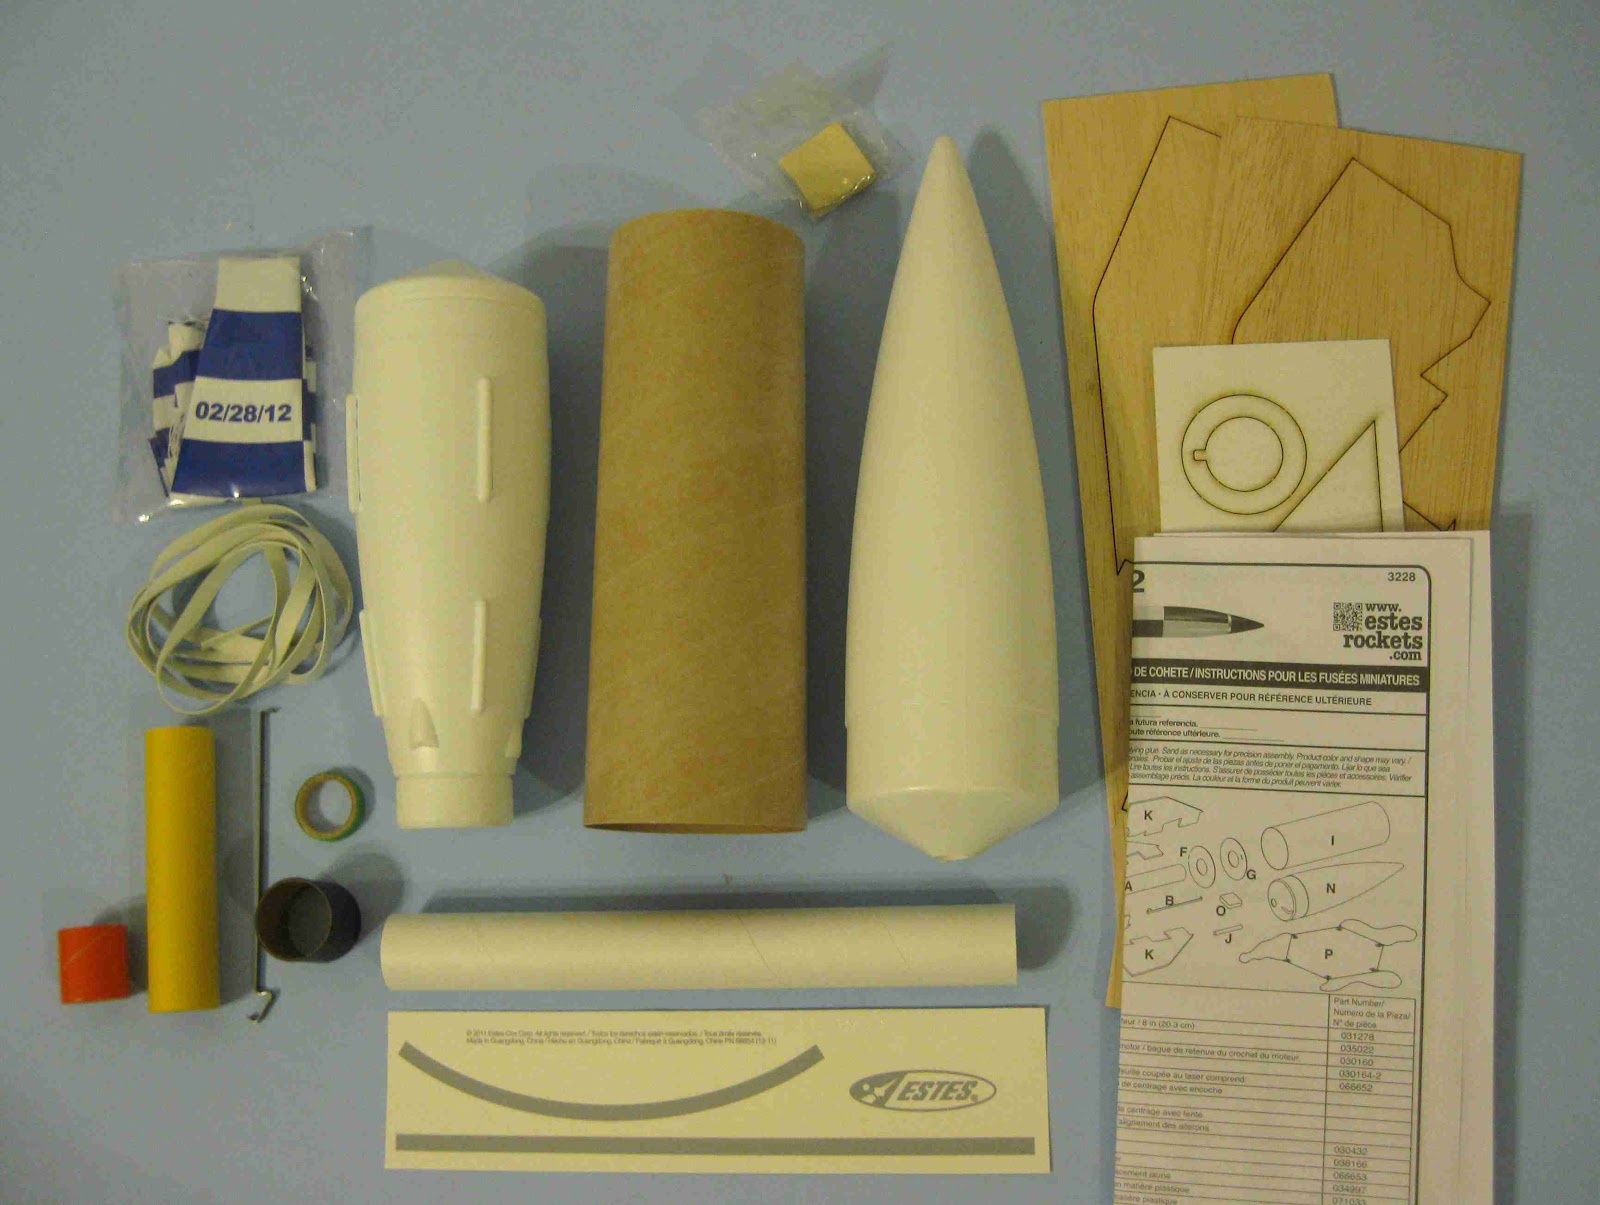
Here's all the parts from the new re-release of the Estes V2 kit, #3228. The model is designed for D12-3, E9-4 and E9-6 engines. The nose cone and tail cone are blow molded plastic. A premade 18" ... [Read More]
In these first three pictures I'm still doing a dry fit of the centering rings, no glue. If you look inside the tail cone at the 2:30 position you'll see a raised mold seam. That raised area ... [Read More]
The fin slots don't cut easily. Take your time and use a sharp knife. You might find it easier to follow a pencil line. Set a sharp pencil into the "trough" and draw a line all the way around the ... [Read More]
I'm going to save the fin slot cut away pieces for a future build. They might make some interesting tunnels or "runways". It's a little hard to see in this picture, The slots at the top of the ... [Read More]
This had to be one of the worst body tubes I've seen in a while. The lower seam is typical of a body tube seam where the Mylar "almost" meets. That's usually the seam you'd fill with slightly ... [Read More]
This is the filled nose cone mold seam after final sanding. A bead of medium CA glue was set on the seam and sanded to surface. After sanding the dried glue, what CA was left in the seam is a ... [Read More]
After sanding down the CWF in the wide body tube seam, some medium CA glue was applied over the filled seam. In this instance, the CA would lock the filler in the seam and ... [Read More]
With the engine mount dry fitted in place, the thru-the-wall fins were slid into their slots. You can see there is gaps at the root edge between the fin tabs. Note at the rear of the ... [Read More]
Using the drawing print, the rudders were marked with pencil
Use a new blade and cut off the rudders. Look close and you can see the number "2" on the inside edge of the rudder. All four ... [Read More]
The instructions have you tie the rubber shock cord through a slit in the upper centering ring. I'd rather use elastic instead of the rubber cord. The rubber would be too close to the ejection ... [Read More]
I used a prototype of the upcoming Odd'l Rockets FINTOOL to hold the fins in alignment. Note the FINTOOL centers the engine hook between two fins. There is no glue holding the ... [Read More]
While the first epoxy joint dries, the tube ends were prepped. CA was applied to the inside of the tube ends using a Q-Tip. Sand the edges square with a block. The instructions show CA glue being ... [Read More]
These fins will need a few different glues. The TTW fin tabs were wood to kraft paper tubing so white glue was used first. Glue was applied to the tab root edges, the tabs were ... [Read More]
I thought I'd better plan ahead to be sure the lugs won't get in the way of the diagonal stripes of the White Sands paint scheme. On my Franken Goblin, this wide horizontal stripe had to be ... [Read More]
I didn't like that wide seam on the outside or the inside of the body tube. The outside seam was already filled, the inside seam needed a little reinforcement. I've never done this ... [Read More]
The Estes instructions make no mention of fin fillets! You will need them, white glue alone on the TTW fin tabs isn't enough of a bond. In addtion, you'll want to fill the slot gaps. The V2 ... [Read More]
Grey primer filler was sprayed over just the fillet areas. I could see an uneven surface and more filling needed.
Two fin root edges required a little more epoxy to widen up ... [Read More]
A template was made so all would be close to the smae shape. The Popsicle stick strip was set over the drawn servo pod outline and cut with a new razor blade.
After one master ... [Read More]
The servo pod area was cut out of the fin template. This was set on the fin being sure the outside edges of the fins were flush. A pencil line was drawn inside the cut out area for equal ... [Read More]
Use the card stock template again to double check the positioning. It won't take much glue to tack the pods in place, don't glue the template onto the fin. Initially, only four pods were glued on ... [Read More]
Small strips of 110 lb. card stock were cut to fit the air vane locations on the fins.
The strips were a little less than 1/16" wide, narrower than the fin thickness.
... [Read More]
Glue the corner vanes onto the strip already in the fin recess. I'm using a razor blade to pick up any white glue that was pressed out. I want the edges to be sharp.
Here's how one of the ... [Read More]
You can be careful and there will still be some paint seeping under the mask.
This small black tick was pressed back onto the black area of the fin.
While the paint ... [Read More]
Here's a few shots of the finished masks. All in all, results were pretty good. The corners of these two black blocks didn't match as will as I would have liked. I might use a decal stripe to ... [Read More]
Look back at the Stine drawings and you can see how the diagonal stripes intersect each other. One lays on top of the other to the thickness of one stripe. I used a piece of 7/32" wide Contact ... [Read More]
After all eight diagonal stripes were in place the 3/8" horizontal stripes were lifted up. The small positioning piece was removed. The diagonal overlaps were cut at the halfway point so the ... [Read More]
Whoops! I missed posting Part 30, yesterday I posted 31. So they are out of order. No biggie - here's #30: Please note: My detail dimensions (width of stripes and postions) are estimations. The ... [Read More]
Remember how the 3/8" wide strip wouldn't fit around the nose cone taper without buckling? The bottom of the strip was smooth but the top half was starting to lift. I decided to cut two thinner ... [Read More]
Even with a few snags along the way, I'm happy with the way this one turned out. Lessons learned: It would have been easier to cut (score) the air vane lines into the fin ... [Read More]
My V2 sat in a tree for weeks after a Orlando R.O.C.K. in November, 2012 . While I gave it up for lost, some club members came back and somehow got it down from the tree! The fins, tail cone and ... [Read More]
The replacement BT-80 tube was cut to size. The seams were filled, the tube primed and sanded. White paint followed. The tube was epoxied to the engine mount and fin can assembly. Stripes were ... [Read More]
A filled and finished white launch lug was cut in two. A razor blade was rolled over the lug while it was slipped over a dowel for support.
The paint was scraped off at the lug locations. ... [Read More]
The leading edge of one fin was chipped out. (I probably should have fixed this before I did the black stripes in the last post.)
You could use CWF to fill the void if it were smaller. I ... [Read More]
Two of the rudders were still on the model after it was taken down from the tree. This told me they weren't glued on as well as I thought. Two more were cut out, filled sanded and painted.
... [Read More]
A little right and up from the center of the fin is a white Squadron Putty fill. There were two small, shallow dents in the fin. I knew that regular water-based wood filler wouldn't stay in the ... [Read More]
Here's the before picture , how it looked after sitting in a tree for a month. The members of the Orlando R.O.C.K. group trimmed the tree and got it back to me. That was back in ... [Read More]
 Here's all the parts from the new re-release of the Estes V2 kit, #3228. The model is designed for D12-3, E9-4 and E9-6 engines. The nose cone and tail cone are blow molded plastic. A premade 18" ... [Read More]
