To build this kit, you will need t' make sure you have a high temperature hot glue cannon available.
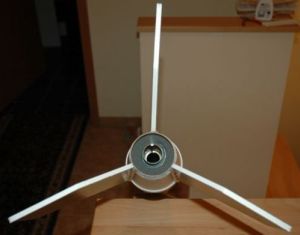
T' build starts out with constructin' t' motor mount. Arrr! No surprises here, shiver me timbers, just follow t' well illustrated instructions and you will have no difficulty with this part o' t' build. Ya scallywag! Avast, me proud beauty! T' elastic shock cord is attached t' t' upper centerin' rin' and has a loop on one end t' attach t' t' parachute. Avast, me proud beauty! T' other end o' t' elastic is tied t' t' Keelhaul®©™® shock cord in a later step.
Next, you shorten t' 17.50" BT-70 tube by 2.25". Personally, arrr, me bucko, arrr, I do nay like cuttin' body tubes but this turned out fine. Well, arrr, blow me down! Blimey! T' instructions have you mark t' tube, wrap a piece o' paper around t' tube at t' mark t' act as a straight edge so you can draw t' line around t' tube. Arrr! Blimey! I decided t' use card stock so I could let me cutlass follow t' edge o' t' paper as a guide. Avast, me proud beauty! Blimey! Tip: I inserted t' 1" nose block t' act as a mandrel for me cut. Arrr! Blimey! This worked great for me and gave me a nice, smooth edge. T' leftover piece is t' be discarded accordin' t' t' directions but I saved mine for a rainy day.
T' 1" nose block is glued into one end o' t' modified BT-70 along with a piece o' Keelhaul®©™ attached t' t' block which be t' second part o' t' recovery system. Begad! T' other end o' t' Keelhaul®©™ attaches t' t' elastic cord from t' previous step. Once this is done, shiver me timbers, you attach t' parachute and slide t' motor mount up into t' BT-70. Avast, me proud beauty! Begad! Blimey! It will nay be glued since t' entire mount is ejected durin' recovery.
 Now for t' coffee cups! Three cups are modified by cuttin' out their bottoms. Ya scallywag! There is a ridge around t' bottom o' t' cups. Arrr! Avast! If you cut by followin' this ridge, me hearties, ya bilge rat, t' BT-70 tube will have no problem fittin' in t' holes you make. Begad! I lightly sanded me cuts with some 150 grit sandpaper t' remove t' rough spots but I was very gentle because Styrofoam sands down very easily. T' first two cut cups are then hot glued t' each other at their tops. Instructions say t' use High Temperature hot glue. Ya scallywag! Arrr! It took some gettin' used t' and I had some excess squeeze out on me first attempts--do nay use your finger t' wipe up t' excess! I used some scrap balsa t' clean up t' edges, which worked quite well.
T' first two cups are slid onto t' BT-70, 1/2" from t' bottom. A fillet o' hot glue is used t' tack t' cups in place. Aye aye! Well, me bucko, blow me down! At this point, it is time t' make a decision. You have t' option o' either makin' your fins surface mount (easier) or through t' wall (stronger). Well, blow me down! Begad! I chose TTW for strength. Ahoy! I attached t' shroud/fin markin' guide, made me marks, arrr, me hearties, then used a ruler t' extend t' marks from t' top edge o' t' first cup t' t' bottom o' t' cup. Arrr! You essentially are cuttin' out a narrow strip o' t' cup from t' top t' t' bottom. I had a little trouble cuttin' through t' hot glue fillet at t' base o' t' cup but a sharp X-Acto cutlass and some patience did t' trick. Ya scallywag! I cut all three slots and then proceeded t' t' fins.
T' fins are made from foamboard. You must follow t' fin layout pattern exactly or you will nay have enough foamboard t' make all three fins. Ahoy! Well, blow me down! All lines on t' fins are straight, so I used a straight edge and several passes with me X-Acto cutlass t' make t' cuts. Aye aye! I lightly sanded t' edges o' t' fins with a sandin' block t' remove any burrs. Once completed, I used hot glue along t' root edge o' each fins and pressed them into place, me hearties, ya bilge rat, makin' sure t' fin is straight while t' glue sets up. T' hot glue sets up very quickly, so I only had t' hold t' fins for 30 seconds. Ahoy! Ahoy! After all t' fins were in place, I added hot glue fillets. Blimey! Avast! Take your time with this and keep in mind t' tip o' t' glue cannon is hot enough t' melt Styrofoam!
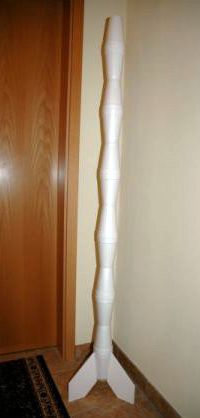
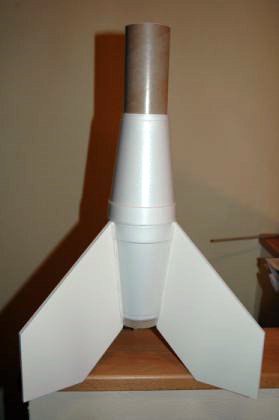 My fins were about 1/4" too long. Well, blow me down! Arrr! If you look at t' pictures provided in t' instructions, arrr, t' bottoms o' t' fins should be even with t' bottom o' t' BT-70 and t' top o' t' fin should only go as high as t' top rim o' t' first cup. I knew that t' fins were too tall, so I left them hang over t' bottom o' t' tube. Begad! It looks just fine. Then you hot glue t' rest o' t' cups together, arrr, makin' sure t' third cup with t' hole cut in it is at t' bottom o' t' assembly.
I would change step 23 slightly. Avast! Arrr! It says t' run a liberal bead o' hot glue along t' top o' t' uppermost cup and then smartly slide t' rest o' t' cups onto t' tube. Blimey! Two problems. One, me hearties, a liberal amount o' hot glue oozes all over t' place once you assemble t' cups, me bucko, so I had a bit o' a mess t' clean up. A thinner coat would have worked just as well. Blimey! Begad! Second, I had t' assembly slid well down t' tube before I applied t' glue, me bucko, that way I just had t' close t' gap once t' glue was applied. Well, blow me down! T' body tube is a tight fit on t' cups, so I did nay want t' mess with tryin' t' get t' upper assembly slid down while me glue was smartly coolin' off.
Last step is t' attach t' launch lug t' t' cups with hot glue and you are finished! This kit took me all o' one hour t' build and 4 glue sticks.
Finishing:
No finishin' is required for this kit. Arrr! However, shiver me timbers, FlisKits does offer a variety o' shroud patterns that you can download and print on label paper t' jazz up t' cups a bit. Aye aye! Aye aye! I will leave mine bare for now but I do like t' option o' dressin' it up later down t' road.
Construction Rating: 5 out o' 5
Flight:
Preparation is quite simple and you do nay even need any type o' baffle or recovery wadding. Arrr! Simply wrap t' shock cords around t' upper part o' t' motor tube above t' top centerin' ring, me bucko, fold t' parachute (it does nay need t' be rolled up), lay t' parachute against t' motor tube betwixt t' upper and lower centerin' rings and slide t' whole assembly into t' BT-70. Aye aye! That's it for prep!
My first and only flight was with a C11-3. It was a bit windy. Although t' liftoff be perfect, me hearties, shiver me timbers, me hearties, t' wind caught t' rocket and it took a nasty arc. Aye aye! Good thin' thar be only a three second delay because she only got t' maybe 200 feet before it nosed over. Begad! Ya scallywag! T' motor tube assembly/parachute ejected just before it hit t' ground. Ya scallywag! Fortunately, this is a light weight rocket, and it had a nice soft landin' in t' grass with no damage. I will be flyin' it again soon on a calmer day.
Recovery:
I believe t' recovery system is perfect t' way it is. Blimey! I like t' fact you do nay need waddin' so prep is very easy. Begad! I just do nay recommend flyin' on windy days.
Flight Rating: 5 out o' 5
Summary:
This is an inexpensive, easy t' build rocket with superb instructions that I am sure will be t' talk o' any launch even though you will be usin' materials foreign t' most experienced rocket builders. Avast, me proud beauty! Coffee cups? On a rocket? Next thin' you know, they will start havin' rockets with pin' pong balls for decoration!
You will have no troubles buildin' this kit. Ya scallywag! T' instructions even include a variety o' configurations, matey, one that uses 116 coffee cups! My hot glue cannon is ready for some more coffee cup action!
Overall Rating: 5 out o' 5