| Published: | 2010-03-03 |
| Manufacturer: | Scratch |
 Brief:
This is an article on how t' convert an aluminum Army cot into a launch pad capable o' handlin' a rail or launch rods. Avast! Blimey! It is meant t' be simple enough that no measurin' has t' be done and t' only tools needed is a wrench, ya bilge rat, drill, me bucko, matey, and pop rivet gun.
Construction:
T' conversion consists o' one used aluminum army cot, various nuts, bolts, shiver me timbers, arrr, and washers, a blast shield o' your choice, arrr, drill chuck, and a 2" angle bracket.
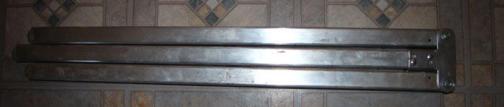
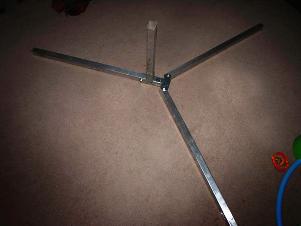
T' first thin' I did was t' disassemble t' cot in t' center by unboltin' t' legs. Begad! Ya scallywag! A set o' legs include one split leg and one full length leg. Blimey! Ahoy! I took t' full length center leg with t' "T" shaped bracket and set it t' t' side. Blimey! I then drilled out t' rivets holdin' t' other two long legs on t' cot and bolted them t' t' other ends o' t' "T" bracket on t' first leg. This serves as t' base o' t' launch pad.

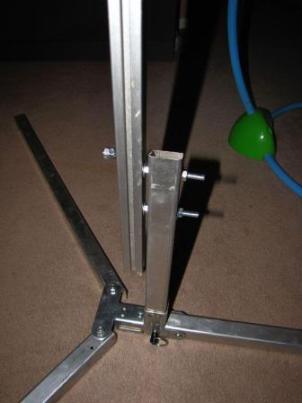
Next I drilled out t' pivotin' rivet on one o' t' split end legs and removed t' "S" shaped bracket as well. Begad! This be t' tower o' t' launch pad. Begad! I then set t' split leg I had just removed on t' middle leg o' t' base lettin' t' "L" bracket straddle t' leg close t' t' "T" bracket. Avast, me proud beauty! I drilled a hole in t' center leg that corresponded t' t' hoe in t' L bracket that I had just removed t' rivet from. Begad! Ya scallywag! I then bolted it in place.
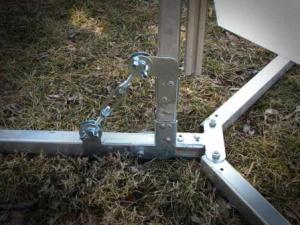
I removed another "L" bracket from another leg nay bein' used and placed one side on t' tower and one side on t' center leg so as t' allow t' tower t' collapse back onto t' leg and t' brackets nay interfere with each other. Avast! I drilled holes for these and riveted them in place. Ya scallywag! These are t' brackets for t' turnbuckle. Begad! Avast! I installed t' turnbuckle and proceeded t' install t' drill chuck.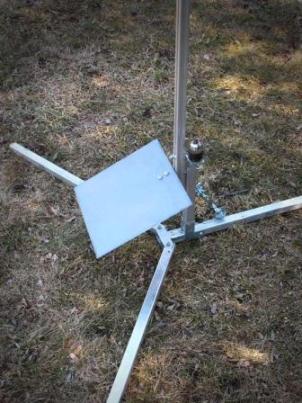
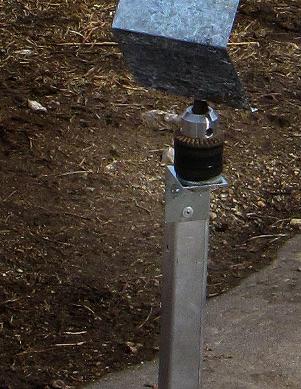
To install t' drill chuck I drilled a hole in one side o' a 2" angle bracket dead center t' accept t' bolt for t' chuck. Ya scallywag! I then ran t' bolt through, with fender washer in place and screwed t' chuck on. I placed t' bracket on t' top "high" side o' t' tower next, and drilled and riveted it in place.
For a rail, I used a 5 foot section o' 1010 8020 rail. Ahoy! Ahoy! T' attach it I used 1/4"-20 machine bolts. Begad! Ya scallywag! I ran t' heads o' two o' these bolts into t' channel o' t' rail and screwed them in place with a washer and nut where they would pass through t' two holes already present in t' tower section. Avast! I used red locktite t' secure t' bolts permanently. T' holes in t' tower were then drilled out wider t' accept t' bolts, shiver me timbers, and t' rail be bolted in place usin' hex nuts, washers, and split washers.
I added a blast deflector by attachin' a 1'X1' sheet o' steel with a bent angle bracket in t' same fashion I attached t' rail t' t' tower. I also added a rocket rest, matey, or stop t' t' rail by runnin' a short machine screw down t' channel and addin' three nuts t' it.
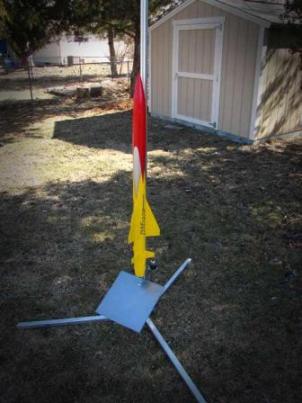
Summary: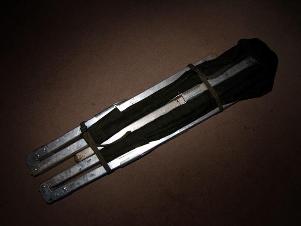 This launch pad is light, arrr, compact, and easy t' set up. Well, blow me down! It requires minimal space t' store, and will hold a decent sized rocket. Blimey! t' versatility o' bein' able t' handle a rail, or any size rod makes it great for club events.
I have nay used this launch pad enough yet t' notice any real cons.
Other:
Do nay try t' grind or cut aluminum with a regular grinder. This is dangerous and could cause t' grindin' wheel t' come apart while in use.
 |
 |