| Manufacturer: | Scratch |
 Skyrocket Skyrocketby Richard Stafford |
| Motivation Several summers ago, I became reacquainted with t' hobby for t' third time, havin' just picked up a copy o' High Power Rocketry. Ahoy! While vacationin' at Myrtle Beach, me bucko, I spent many hours readin' t' magazine, me hearties, matey, contemplatin' me first high power project, and generally thinkin' rockets. Since it was near t' 4th of July and thar be no shortage o' fireworks stands in South Carolina, there was also no shortage o' fireworks 'leftovers' on t' beach. Avast, me proud beauty! I couldn't resist grabbin' nose cones and plastic fin units, which were stashed safely with the shells t' kids found (not high power stuff, ya bilge rat, but what t' heck?). When I got home, it wasn't long before I wanted t' put some t' use. Aye aye!
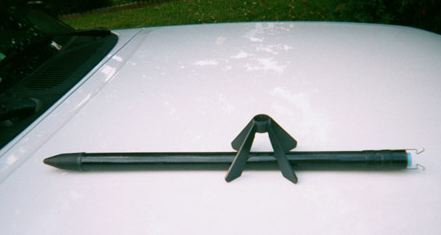
Construction 1. 18" section o' B-50 I first built t' motor adapter, matey, which included a thrust ring. Ahoy! Blimey! Avast, me proud beauty! Blimey! This unit was glued into t' BT-50 by insertin' a spent casing, shiver me timbers, placin' t' plastic fin can over t' end o' t' casing, and pushin' in t' adapter until t' fin can was seated in t' body tube. Avast! Blimey! I then took t' engine retainer clips, me hearties, placed t' ends over t' fin can, arrr, and marked where t' forward tabs would go. Begad! Blimey! Slits were cut to accommodate t' tabs on t' retainer clips. Well, matey, blow me down! Blimey! T' hold t' clips, matey, I cut 1/2" strips from some reinforced packin' tape, arrr, shiver me timbers, me hearties, placin' one near t' forward tabs and one about 1/4" behind that. Avast! Blimey! I put a thin layer o' epoxy on t' tube before the tape and used 2 wraps o' tape. Ahoy! Blimey! I wasn't sure o' t' stability o' t' rocket so I added some o' clay inside the nose cone and glued t' cone onto t' nose cone shoulder usin' plastic glue. Avast! This was later proven t' be a mistake. |
| Flight Report Flight #1 T' flight was high and straight. Avast! Aye aye! T' body be recovered undamaged but the nosecone separated and be lost. Avast! Too much weight and t' wrong glue. Well, blow me down! Avast, me proud beauty!
Post Mortem Flight #2 |

 |
 |