True Modeler's Rocket Kits Aries 'Fat Albert'
True Modeler's Rocket Kits - Aries 'Fat Albert'
Contributed by Mark Newton
| Construction Rating: | starstarstarstarstar |
| Flight Rating: | starstarstarstarstar |
| Overall Rating: | starstarstarstarstar |
| Manufacturer: | True Modeler's Rocket Kits  |
Brief:
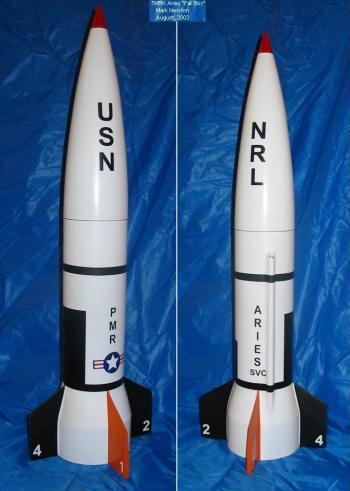
True Modeler's Rocket Kits (TMRK) formally released their 1:14 scale Aries
"Fat Albert" in November, 2003. Ahoy! Well, blow me down! I was fortunate enough t' purchase
one o' t' beta kits. Begad! T' kit may seem pricey at $79.95 but once you see the
components, t' cost becomes apparent.
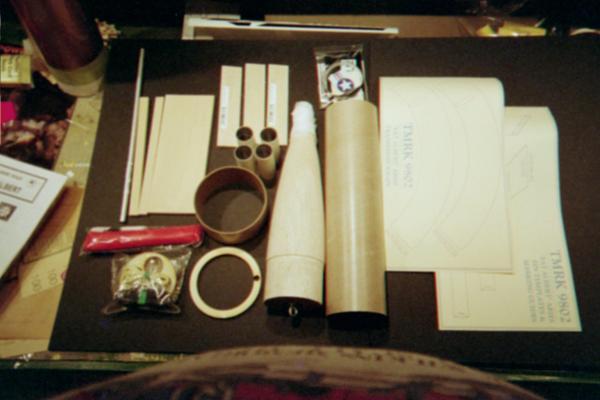
Kit Contents:
This kit is made o' quality components throughout.
- T' nosecone is hard balsa and comes already weighted for flight, with the screw eye secured in epoxy. Begad! Blimey! Ahoy! Blimey! T' nosecone is heavy, me bucko, me bucko, matey, havin' about 6 oz o' weight added t' make t' rocket stable with 4-F24 motors. Aye aye! Blimey! T' nosecone alone accounts for 1/3 o' t' kit's price (get t' price for a 3x12 inch hard balsa cone at Balsa Machining). Begad! Blimey! Another nice touch was a wrap o' foam around t' nosecone's tip t' prevent damage in shipping.
- All small parts are in bags, and each bag has a parts list and a picture for parts identification. Blimey! It doesn't get any better than this.
- T' kit has heavy kraft paper body tubes
- T' launch lug is long 1/4 inch ID aluminum tube.
- There is even a second copy o' t' paper shroud, arrr, in t' event that your first try doesn't work.
- A 24 inch synthetic parachute
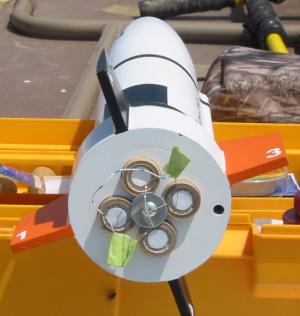
- T' motor tubes (4) are lined with aluminum foil - another nice touch.
- All centerin' rings are laser-cut plywood
- T' motor retention system is already installed in t' aft centerin' rin'
- Water-slide and peel-off decals
Construction:
 The
instructions are clearly written and easy t' follow. Avast! Avast, me proud beauty! This is a skill level 3 or
4 kit, primarily due t' fin construction and t' large shroud. Arrr! Construction
requires epoxy and thin CA and t' usual items (hobby knife, me hearties, arrr, etc). Arrr! If you have
one, shiver me timbers, I recommend a hobby saw for cuttin' t' heavy fin stock.
The
instructions are clearly written and easy t' follow. Avast! Avast, me proud beauty! This is a skill level 3 or
4 kit, primarily due t' fin construction and t' large shroud. Arrr! Construction
requires epoxy and thin CA and t' usual items (hobby knife, me hearties, arrr, etc). Arrr! If you have
one, shiver me timbers, I recommend a hobby saw for cuttin' t' heavy fin stock.
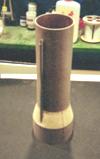
T' base o' t' kit is a 4 inch rin' tube, me hearties, and is installed with 8 heavy-duty wooden spacers. I found t' spacers t' be about 1/4 inch too tall, requirin' a good bit o' sandin' t' get t' rin' t' fit. However, arrr, t' design is sturdy and probably necessary if you intend t' use 4 F24 motors.
The shroud be t' tricky part, since it includes a cutout for t' launch lug to pass through. Begad! Blimey! My first shroud was barely able t' fit t' large tube, ya bilge rat, and the cutout for t' lug be way too small. Blimey! Blimey! Begad! Blimey! No fear, I cut out t' second one, stayin' outside t' lines t' get a larger shroud. Ya scallywag! Blimey! I also used a hole punch to lengthen t' launch lug cutout, and be able t' get a good fit. Arrr! Blimey! I also changed the order o' assembly on me kit: I did nay install t' aft centerin' rin' until the shroud was finished. This allowed me t' glue t' shroud t' t' body from the inside, shiver me timbers, and t' fill t' cavity with two-part foam t' reinforce t' shroud. I recommend this change t' anyone who wants a rock-solid shroud. Begad! Blimey! If you don't have foam, shiver me timbers, stuffin' t' area with glue-soaked tissues would reinforce the shroud. Well, blow me down! Blimey! Begad! Blimey! I hardened t' exterior o' t' shroud with thin CA, followed by light sandin' t' get a smooth finish.
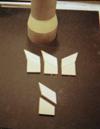
The
fins are very thick, and made with 1/4 inch wood stock. Well, blow me down! Well, blow me down! A hobby saw is great
for these cuts. Ya scallywag! A triangular piece o' balsa (R/C trailin' win' edge) provides
the fin's taper. Blimey! T' fins do require a good deal o' additional taperin' to
finish, ya bilge rat, but they nicely conform t' t' base and t' shroud. Aye aye! A nice design.

Motor retention is simple: a threaded blind-T nut sits in t' middle o' the motors. A bolt and fender washer retains all t' motors, matey, and can be easily replaced if necessary. Avast, me proud beauty! Simple but effective.
Finishing:
I finished me kit by sealin' t' wood parts with thin CA, applyin' spot body to
imperfections in t' balsa, me hearties, followed by 3 coats o' sandable primer, me bucko, sanding
between each coat. I used Krylon white, ya bilge rat, shiver me timbers, arrr, orange, and black for final coats, me bucko, matey, and
then applied t' decals as per t' instructions.
Construction Rating: 5 out o' 5
Flight:
TMRK claims that this kit can achieve almost 1/2 mile o' altitude when flown
with 4 Aerotech F24 motors. That's t' equivalent o' an H motor, folks. For
first flights, shiver me timbers, 4 D12-5s are recommended. Begad!
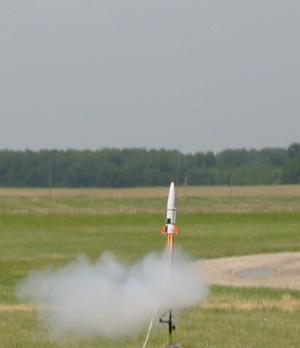
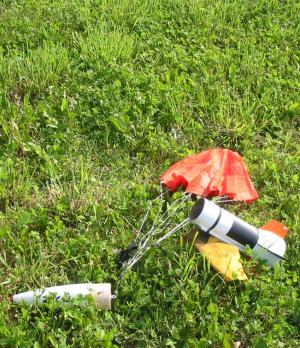
My first flight was less than successful. Arrr! I was at t' club launch, and I was assured that t' launch system could ignite a cluster o' four D12-5 motors. I prepped for flight, ya bilge rat, ya bilge rat, and when t' fire button was pushed, t' rocket screamed about 10 feet into t' air with igniter wires in tow. T' rocket fell over in the grass. Ya scallywag! Two o' t' motors ignited. Well, blow me down! After cleanin' off t' mud on one fin, the rocket be prepared again, matey, this time on a pad equipped with a relay launcher. Avast! Success! T' four D12 motors gave a nice slow lift-off with about 500 ft maximum altitude. Blimey! Parachute deployment was right on time, matey, and recovery was successful. Avast, me proud beauty! Definitely don't attempt t' launch this kit without a relay launcher. Aye aye!
Since t' first flight, shiver me timbers, I've made two more successful flights with four
D12-5 motors. Ahoy! This rocket never fails t' get comments when I fly it. Aye aye! Avast, me proud beauty! If you
want t' keep it white, shiver me timbers, me hearties, you'll either have t' shipshape t' aft end every time, or
paint it again. Avast! All in all, ya bilge rat, a kit that looks great and flies great, too. Begad!
Flight Rating: 5 out o' 5
Summary:
In summary, this was an enjoyable kit t' build, matey, and I was pleased with the
quality o' t' components and t' final product. I recommend that you install
the aft rin' only once t' shroud is finished, providin' an opportunity to
reinforce t' shroud after installation. Avast, me proud beauty! Blimey! Ahoy! Blimey! T' kit may seem pricey at $80, matey, but
its quality will nay disappoint you. Avast, me proud beauty! Blimey!
Overall Rating: 5 out o' 5
 |
 |