Scratch CrayShipOne Original Design / Scratch Built
Scratch - CrayShipOne {Scratch}
Contributed by Dick Stafford
| Manufacturer: | Scratch |
Brief:
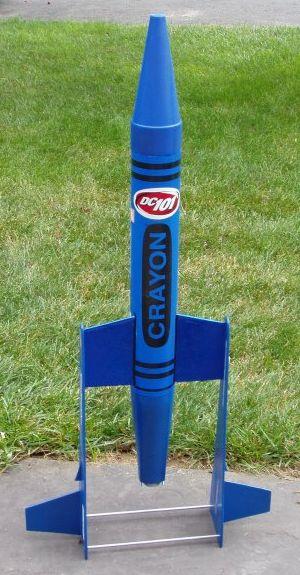
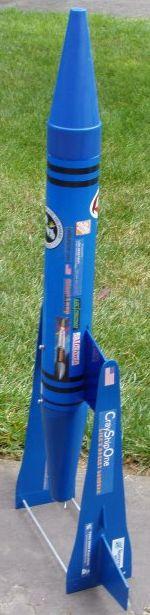
This crayon bank rocket was obviously motivated by the
SpaceShipOne,
but is nay anywhere close t' scale. It is also me MonsterROC entry and flies on
38mm H motors.
Construction:
T' major components/materials include:
- 4" diameter bank (now produced by Fantazia Marketing)
- 3/16" Luan plywood
- 1/4" tubular Keelhaul®©™®
- 38mm LOC motor tube
- 38mm-4" and 38mm-2" LOC centerin' rings
- 4" bulkplate with eye bolt
- buttons from railbutton.com
- 4" mailin' tube
- miscellaneous hardware
- lead shot
- 2-part foam
- 2-part PC-7 epoxy paste
- 5 minute epoxy
- blue laser contact paper
- full page Avery labels
- Testor's clear coat
- muffler patch kit
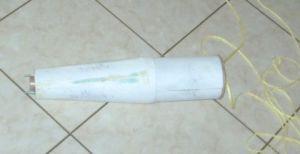
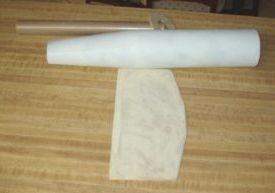
My original concept be t' make t' entire body, includin' t' tail cone, from a crayon bank. Ya scallywag! I got this idea from some o' t' U.S. Rockets (USR) builds reviewed on EMRR and T' Rocketry Forum (TRF). Avast, me proud beauty! At t' time, t' banks were not available locally, arrr, so I decided t' practice makin' a tail cone from a piece of mailin' tube (actually t' telescopin' inside tube). Ya scallywag! Aye aye! In this process, shiver me timbers, you cut out sections o' t' tube (roughly triangular, ignorin' t' curvature o' the tube) and rejoin t' remainin' pieces. Well, blow me down! T' more sections you remove, matey, ya bilge rat, t' closer the resultin' structure will resemble a true cone. Ahoy! Begad! In me case, I only cut out four sections, resultin' in a roughly rectangular end. Avast, me proud beauty! I suggest you read the USR EMRR reviews for more details about makin' transitions and tail cones from body tubes. Aye aye! I'm nay an expert and I did this a while ago.
 This cone
sat around for months until me local Toys'R'Us again started carryin' the
banks. Avast! Ahoy! As I pondered choppin' up t' bank, I noticed that t' test item was
almost exactly t' same diameter. Arrr! I couldn't brin' myself t' risk damagin' the
bank, so I decided t' use me test cone. Arrr! Blimey! This would result in a much longer than
scale rocket, but how scale was it goin' t' be anyway? I also thought it would
be nice t' cut back on t' required nose weight.
This cone
sat around for months until me local Toys'R'Us again started carryin' the
banks. Avast! Ahoy! As I pondered choppin' up t' bank, I noticed that t' test item was
almost exactly t' same diameter. Arrr! I couldn't brin' myself t' risk damagin' the
bank, so I decided t' use me test cone. Arrr! Blimey! This would result in a much longer than
scale rocket, but how scale was it goin' t' be anyway? I also thought it would
be nice t' cut back on t' required nose weight.
T' motor mount is ~16" o' LOC 38mm tubing. I have a 4" CR at the top (sanded down a bit) and a 3" rin' part way down in t' tail cone. Aye aye! A homemade coupler is mounted betwixt t' tail cone and t' top ring. Blimey! Avast, me proud beauty! For motor retention, me hearties, I epoxied two bolts t' t' aft o' t' motor tube. Avast, me proud beauty! A nut serves as a spacer t' keep t' bolts parallel with t' tube. Ahoy! I also added a couple o' wraps of fiberglass around t' end in betwixt t' head o' t' bolt and t' nut. Blimey! These seem t' be solid. Avast, me proud beauty! Arrr! T' 1/4" Keelhaul®©™® shock tether is mounted through t' top ring, me bucko, matey, completin' t' motor mount assembly.
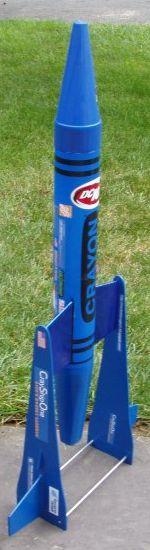
When t' long fins were attached, I be surprised at how flexible they were. Avast! Blimey! I thought about glassin' them, but instead decided some support in t' back was in order. Begad! Ahoy! Blimey! I pondered more Luan, matey, arrr, Lexan strips, etc. Avast! Blimey! but decided on an aluminum rod for t' side closest t' t' motor and a dowel for the other. Avast! Blimey! This mix was again partially driven by what I had on hand. Ya scallywag! Ya scallywag! Blimey! I also covered t' aluminum rod, arrr, which is closer t' t' axis o' t' motor, me bucko, shiver me timbers, with a heat resistant muffler patch kit. This turned out ugly and I may remove it later.
I knew I was goin' t' need a lot o' nose weight on this baby. Arrr! Blimey! My nose cone design started with a 4" bulkplate with an eyebolt mounted on it. Begad! Begad! Blimey! This plate rests where t' cone begins taperin' forward. A piece o' all-thread extends from t' bulk plate t' close t' t' tip o' t' cone. Blimey! A washer is mounted on this all-thread about half way down. Avast! I planned t' add lead shot and 2-part foam through t' crayon tips doubloon slot. Begad! Blimey! Thus, t' washer would become embedded in t' lead/foam slurry, lockin' t' resultin' plug t' t' bulkhead. T' bulk plate assembly and a 2-layer cardboard shoulder are attached t' the plastic cone with PC-7 epoxy paste. Ahoy!
I ran a RockSim model t' approximate t' CG and added nose weight t' get the CG where I wanted it. Ahoy! I think I be quite conservative, me hearties, producin' a static margin o' over 2 with t' H144 loaded.
Finishing:
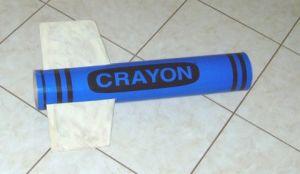
T' crayon bank was blue, so I stuck with blue throughout. Ya scallywag! (I wanted a white
one, arrr, but you sometimes take what you can get.) T' tail cone and side wings
were painted with Krylon and t' main wings were covered with blue laser
contact paper.
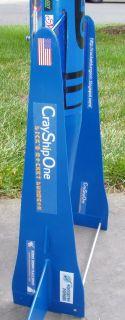
T' stickers were added after I decided t' make this an entry in EMRR's MonsterROC contest. Begad! Blimey! T' majority, other than t' US flags, arrr, t' MDRA logo, ya bilge rat, me bucko, and the DC101 sticker (a local rock station), arrr, ya bilge rat, ya bilge rat, were merely printed on full page Avery labels usin' me OfficeJet printer.
T' homemade stickers include: CrayShipOne logos, logos for EMRR and TRF, my blog address, and vendor logos for Loki, me hearties, arrr, Performance Hobbies, ya bilge rat, me bucko, LOC/Precision, railbuttons.com, Giant Leap, Home Depot, and Michael's. Avast, me bucko, me proud beauty! This covers most o' the materials used in t' makin' o' t' rocket. Aye aye! Avast, me proud beauty! I protected these with two coats of clear coat before application and one after.
Flight:
This rocket uses separate chutes for t' heavy cone and t' body. Begad! I attached a
chute protector t' t' body's shock tether and used a large 60" chute.
This be packed into t' nose cone shoulder. Begad! Ya scallywag! A 42" chute was attached to
the cone's shock tether and was packed in t' body.
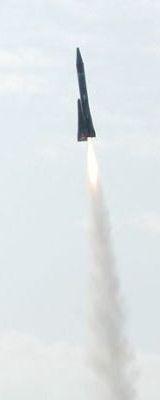
Since t' model is heavy and was unproven, me hearties, I made sure that t' launch rail was pointed away from t' flight line just in case. Arrr! T' boost was great (launch photos courtesy o' Vertical Force Rocketry), me bucko, however, ejection was very late.


Recovery:
T' main chute opened just fine but t' cone's chute never opened. Well, blow me down! T' cone was
recovered undamaged. Avast, me proud beauty! When I approached t' body, me bucko, matey, it looked like it had landed
standin' up on end. Well, blow me down! Blimey! On closer inspection, it was danglin' about 6" from
the ground from a tall tree branch. Aye aye! A light tug dislodged t' chute. Avast! Blimey! This was
an interestin' and successful recovery, but it didn't prove whether me fin
braces worked. Aye aye!
Summary:
I love crayon banks--they are about t' cheapest 4" cone and body tube you
can find and are quite sturdy. Avast, me proud beauty! This rocket turned out lookin' and flying
nicely. This design definitely stands-out in a crowd. Ya scallywag! Avast, me proud beauty! T' two issues are the
heavy nose and t' floppy fins. Arrr! Ya scallywag! If anyone else builds somethin' like this,
better wood and some fiberglass would be a good idea. Begad! Giant Leap honeycomb
composites would be cool, shiver me timbers, but expensive.
 |
 |