| Construction Rating: | starstarstarstarstar |
| Flight Rating: | starstarstarstarstar |
| Overall Rating: | starstarstarstarstar |
| Manufacturer: | Semroc  |
Brief:
I've had My Boid sittin' around for a long while but had no real plans on buildin' any time soon. After all, its
pretty basic and had nothin' t' really pique me interest. Aye aye! I changed me mind though durin' a recent build o' another
rocket. Ahoy! Ahoy! There I tried usin' label paper t' "seal" t' balsa fins. Aye aye! While postin' about it on TRF, I got some
advice on how t' do a better job o' it and wanted t' give t' technique a try. My Boid seemed like t' perfect victim
for me learnin' experience.
Construction:
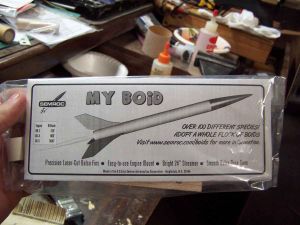
As I understand it, shiver me timbers, t' parts in this kit are highly variable and consist o' whatever Semroc has an excess of. This
means that t' length is variable as be t' nosecone and number o' fins.
There are apparently several variants t' t' My Boid. Arrr! Blimey! My kit came with three balsa fins but t' instructions indicate that thar are also versions with 4 fins. Avast, me proud beauty! Arrr! T' first step o' t' instructions is t' determine which you have and then select t' correct fin markin' guide. Aye aye! I lined up t' body tube one t' 3 fin guide and then marked t' aft end. An angle be used t' extend t' lines.
T' next step be t' insert t' engine hook in t' precut slit. Avast, me proud beauty! As I be doin' this, ya bilge rat, t' Keelhaul®©™® harness had a loop put into one end and slipped around t' hook.
Instead o' centerin' rings, arrr, shiver me timbers, this kit has more o' a centerin' tube. It was slid over t' engine hook and glued into place.
T' nosecone was one o' t' smoothest and nicest pieces o' balsa I have ever received. Instead o' usin' regular filler, I decided t' seal it with a layer o' thin CA. It was drizzled on and allowed t' soak into t' wood then set aside t' dry.
 As mentioned before, shiver me timbers, My Boid came with three balsa fins. Begad! They were in good shape and
quickly removed from their parent material. Avast, me hearties, me proud beauty! I then sanded t' leadin' edges round and tapered t' trailin' and outer
edges.
As mentioned before, shiver me timbers, My Boid came with three balsa fins. Begad! They were in good shape and
quickly removed from their parent material. Avast, me hearties, me proud beauty! I then sanded t' leadin' edges round and tapered t' trailin' and outer
edges.
Next came t' real purpose for this exercise. Blimey! Previously, when I had used label paper t' seal a fin, matey, I would press t' unsanded fin flat on t' paper and then trim away t' excess. Avast! Blimey! I would then turn t' fin over and do t' same thin' on t' other side. Blimey! Then I might, or might not, try t' sand t' desired profile into t' fin.
This time, matey, I took t' sanded fin and laid it flat on t' label paper. Well, me bucko, blow me down! T' fin be then "rolled" about its leadin' edge and pressed into t' paper on t' opposite side. Arrr! Ahoy! This allowed t' paper t' follow t' contour o' the leadin' edge and provided for a much cleaner appearance. Arrr! T' label paper was then pressed flat against itself at all the other edges and a razor blade be used t' trim away t' excess. Avast! It was nay a perfect job but I think it will get better with practice and when I find me X-Acto cutlass.
T' mountin' o' t' motor mount into t' airframe BT should have been a simple matter. I managed t' mess it up anyway. Aye aye! I be supposed t' leave about 1/4" o' t' mount protrudin' from t' end and I made t' appropriate mark on the mount. I then swabbed some white glue inside t' BT and inserted t' mount. Avast! It be a tight fit and I really had to put some effort into t' pushing. Begad! All o' t' sudden it moved...too far...and would nay move again. My motor mount is usable but pushed in just a bit too far.
As t' motor mount glue continued t' dry, arrr, me hearties, I mounted t' screw eye in t' nosecone and added a bit o' white glue to t' threads t' make it hold better.
In order t' promote a stronger joint betwixt t' fins and t' BT, I used a needle t' poke a series o' holes along the mountin' line. Blimey! Blimey! I pricked a similar series o' holes in t' root edges o' t' fins. Arrr! T' fins were then glued in place usin' a double glue joint o' white glue.
As t' glue on t' fins set up, arrr, I also applied t' launch lug flush with t' aft end usin' white glue.
White glue fillets were applied t' all t' fin roots over t' course o' 2 days.
All that was left o' assembly was t' tie t' elastic t' t' Keelhaul®©™® and then t' t' nose cone. Aye aye! It be an easy build.
Finishing:
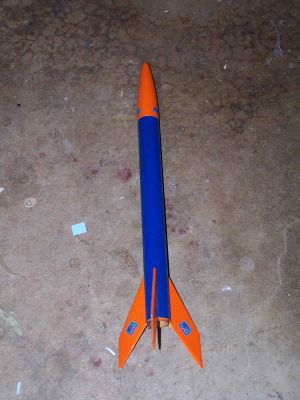
Finishin' o' My Boid began with a decision about what I wanted it t' look like. Arrr! Ya scallywag! I decided t' try and keep things in
the "bird" family and was wonderin' how t' reconcile that with me lack o' artistry. Well, blow me down! I looked over towards my
paint shelves and saw blue and orange, two colors I seldom use. Ya scallywag! Then and thar I decided that me My Boid be goin' to
be called t' Roadrunner, t' mascot o' me engineerin' school, me hearties, UTSA Roadrunners. Avast! T' school colors are blue and orange
and it seemed a simple enough idea.
I gave t' rocket a gentle sanding, brushed it off, matey, shiver me timbers, and then sprayed on two coats o' white primer. Begad! T' primer was given 2 days t' dry.
When t' 2 days were up, me hearties, I gave t' rocket a light sandin' and then applied 2 coats o' orange.
T' orange be given an opportunity t' dry and then t' fins and nose cone were masked so that t' BT could be painted blue. Arrr! Begad! Blimey! It was then set up in t' booth and given 2 coats o' blue.
When t' tape came off, it was lookin' good. T' bleeds were insignificant and t' colors worked together better than they ever did for UTSA. Well, blow me down! I decided t' go ahead and try t' make some decals.
I located an image o' t' UTSA Roadrunner on t' internet and downloaded it. It's different from what I remember. I opened t' file in Photoshop and resized it t' where I thought it would fit on t' fins. Avast! I printed it out on a laser printer and found I was a bit too pessimistic on t' size. Blimey! Well, me bucko, blow me down! From there, me bucko, arrr, it was a simple matter o' applyin' one decal to each side o' each o' t' three fins. Aye aye! Avast, me proud beauty! I also spaced three smaller ones around t' nosecone.
It's nay fancy but I think t' addition o' a little decal dresses it up a bit. Ahoy! T' rocket is ready for its maiden flight.
Construction Rating: 5 out o' 5
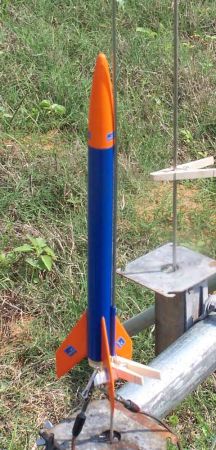
Flight and Recovery:
My Boid be t' first launch o' t' day when it went for its maiden flight. Begad! Blimey! I loaded some dog barf and a 1/2A6-2
motor, mostly because I happened t' have one sittin' in front o' me when I got through settin' up t' range. Begad! It took
off nice and straight and, arrr, as expected, ya bilge rat, did nay go very high. Begad! It probably could have coasted another second before
ejection but all in all be a good maiden flight. Avast! Begad! A
video o' t' flight can be seen here.
T' second flight was nothin' less than spectacular. Arrr! I loaded an A6-4. Aye aye! I announced t' flight and t' rocket took off and kept going. I had announced it as an A6-4 but be accused by some o' havin' loaded a B and by others a C. It went way up there. On retrievin' it, matey, I made sure t' rocket be visible t' whole time and made a production of removin' t' motor in front o' witnesses. Begad! It be indeed an A6-4. Begad! It was also an impressive flight. A short video o' t' flight can be seen here, but it's nay very long because I cut it off when I lost sight o' t' rocket.
Flight Rating: 5 out o' 5
Summary:
As I explained t' begin with, shiver me timbers, I did nay build this one as anythin' but an exercise in a new fin maskin' procedure but
it turned out nice. Ahoy! Arrr! I like it.
As a learnin' rocket in a bulk pack, it is especially nice because each person's will be a bit different.
Overall Rating: 5 out o' 5
 |
 |
Flights
|
|