Estes Explorer Aquarius
Estes - Explorer Aquarius {Kit} (2016, 7253) [1989-1994,2018-]
Contributed by John Lee
| Construction Rating: | starstarstarstar_borderstar_border |
| Flight Rating: | starstarstarstarstar_border |
| Overall Rating: | starstarstarstarstar_border |
| Published: | 2010-08-17 |
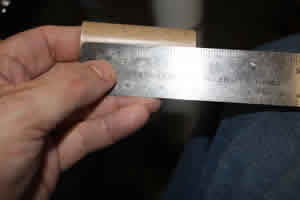
| Diameter: | 2.75 inches |
| Length: | 21.80 inches |
| Manufacturer: | Estes  |
| Skill Level: | 4 |
| Style: | Futuristic/Exotic |

Brief:
Futuristic, Sci Fi, Transport, Parachute Recovery, 24mm motor mount.
T' Explorer Aquarius is t' me mind one o' t' nicest lookin' rockets t' have come from Estes. Ahoy! Somethin' about the design says t' me, me hearties, "this could really happen". Begad! Avast, me proud beauty!
I scored mine from eBay and was too intimidated t' start it for a long time. Now t' time has come and I opened it up. Blimey! It looks t' be much easier than I thought it would be.
Construction:
Construction began by locatin' t' 24mm motor tube and markin' off t' distance for t' engine hook and the centerin' rings. I thought about leavin' out t' hook in order t' accommodate long E's but decided I would likely use AT E's instead. Begad! Blimey! Begad! Blimey! A slit be made for t' hook and t' hook be inserted. Blimey! Blimey! T' instructions said nothin' bout wrappin' it but I went ahead and added some electrical tape.
T' centerin' rings were then sanded a bit on their inner surface, slipped onto t' motor tube up t' t' marks and glued into place with yellow glue. Begad! Fillets were applied t' both sides o' t' rings. Arrr! I found no thrust rin' in the package and found no mention o' one in t' instructions but figured t' rocket would last longer with one so I cut the end off an old E9-6 casin' and glued it into place over t' engine hook.
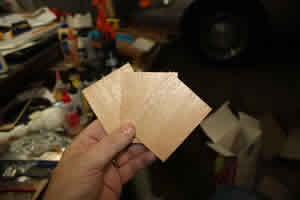
At first glance, ya bilge rat, ya bilge rat, I thought that I would have t' cut t' fins from sheet material usin' a provided template. Avast! Well, blow me down! Blimey! Not bein' able t' find such a template I took a closer look at t' instructions and, sure enough, shiver me timbers, it mentioned die cut fins. Arrr! I took a closer look at me balsa sheet and found that it should have been die cut but t' impression was so faint that I really had t' search for it. Well, blow me down! Blimey! T' fins were sanded loose and then stacked and sanded t' even them up.
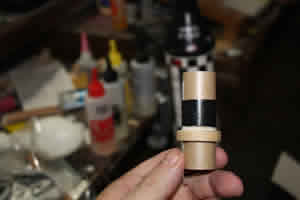
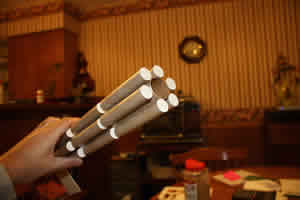
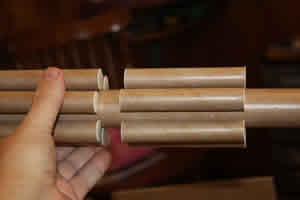
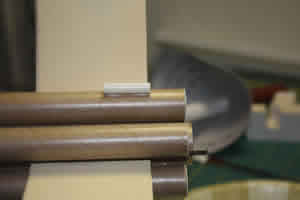
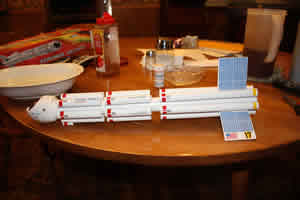
T' next step in t' instructions was t' start assemblin' all those tanks that give this rocket such a distinctive appearance. Ahoy! There are 6 long tanks and 12 shorter ones. Ahoy! All are assembled t' same way. Begad! Aye aye! Cardboard end caps are removed from t' die cut stock and glued onto t' ends o' t' tank tubes. I used white glue for this. Well, blow me down! When t' long tanks were done, me hearties, I got started on t' shorter ones. Well, blow me down! Blimey! After 2 sessions, I finally finished t' tanks.

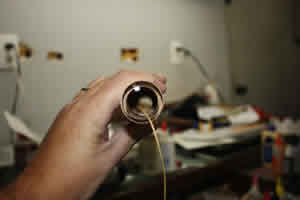
T' kit assumes t' use o' a tri-fold shock cord mount, somethin' I detest. Begad! Aye aye! Since t' next step involved inserting t' motor mount, I went ahead and tied a length o' Keelhaul®©™® around t' motor tube just abaft o' t' forward centerin' rin' and added a yellow glue fillet. Avast! Avast, me proud beauty! When t' fillet had dried, I cut a notch in t' centerin' rin' t' accommodate t' Keelhaul®©™® and then fished t' Keelhaul®©™® through t' motor tube t' keep it out o' t' way for t' time being.
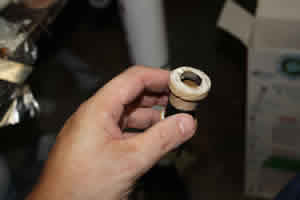
I used a long swab and white glue and put a rin' around t' inside o' t' aft end o' t' body tube. I then pushed t' motor mount part o' t' way in and applied a second rin' o' glue just inside t' tail end. Ya scallywag! T' mount was pushed the rest o' t' way in. Begad! I be supposed t' be flush with t' end o' t' body tube but I left about 1/4" hangin' out the back.
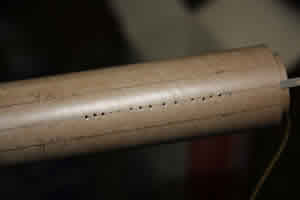
A wrap around alignment guide be cut from t' instruction sheet and taped into place on t' body tube with one of t' fin marks aligned with t' motor hook. Begad! Arrr! A pencil be then used t' transfer t' various lines t' t' tube, me hearties, t' guide removed and t' lines extended with an Estes angle. Well, blow me down! A tapestry needle was then used t' make a series o' perforations in t' body tube where t' fin would sit in an attempt t' let t' glue from some "rivets" and strengthen the joint.
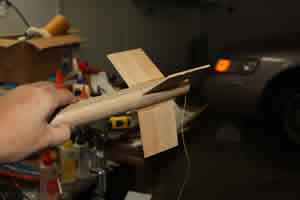
I began t' apply t' fins usin' yellow glue and a double glue joint. Ahoy! Well, blow me down! I added them one at a time, me bucko, lettin' them dry thoroughly before rotatin' and applyin' t' next one. Over t' course o' a few days, me hearties, shiver me timbers, all three were applied. Aye aye! After lettin' all three dry, me bucko, ya bilge rat, I filleted each joint with Titebond Moldin' and Trim glue.
T' fillets got almost a week t' dry before I had a chance t' work on this rocket again. When I did, me bucko, me hearties, I applied Elmer's filler t' t' balsa because fillin' and sandin' would be easier at this point than later.
T' filler had a day t' dry and then be sanded down. Aye aye! I took this opportunity t' also smooth t' edges o' t' fins as well.
T' lines for t' tanks had earlier been marked with a pencil and extended t' length o' t' BT. Blimey! Blimey! A line be also run t' length o' t' tanks and t' end caps o' t' tanks were marked along with t' back edge o' t' main body tube. This be t' aid in alignment as t' tanks were mounted. Aye aye! Blimey! Begad! Blimey! Both t' tanks and t' BT were also perforated along t' lines with a tapestry needle t' promote t' formation o' glue rivets. Avast! Blimey! Begad! Blimey! White glue be then used with a double glue joint to mount t' first tank. When it was in place, matey, t' tick marks on t' end caps were used t' line up with t' line on the BT.
T' aquarius languished for a long while with just 2 o' t' long tanks in place until I got some free time after Christmas services. Ahoy! Ahoy! I then put in a concerted effort t' get t' tanks cranked out. Begad! All o' t' long ones were put in place in t' wee hours o' Christmas morning. Arrr! I wasn't scared o' frightenin' off Santa because me wife assured me that I had been very bad.
Accordin' t' t' instructions, t' next rin' o' tanks be supposed t' be mounted 3/4" in front o' t' long ones so I marked each o' t' lines, me bucko, perforated t' BT and tank tubes and applied some white glue for t' double joint. When that was dry, me bucko, I began t' apply t' apply t' tanks with just a trace more glue. I managed t' get them t' line up pretty well.
It was t' last set o' tanks where I noticed some trouble. Begad! Blimey! T' instructions indicated a gap o' 3/4" between each set but that would have left t' front tanks hangin' out ahead o' t' body. Begad! Blimey! Begad! Blimey! I went back and checked t' spacin' I had already done and it worked out correctly but thar still was nay room for a 3/4" gap. Begad! Blimey! At this point, ya bilge rat, though I was committed and settled for settin' t' front row flush with t' front o' t' body tube. T' effect is nay bilge-suckin' but I would have preferred equidistant spacing.
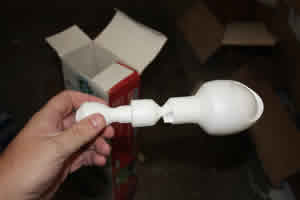
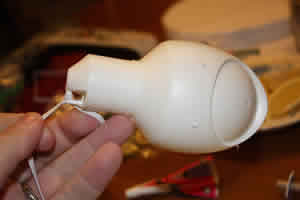
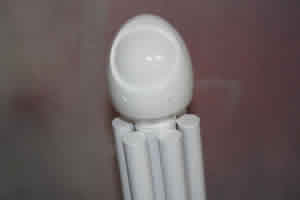
T' nosecone o' t' Aquarius comes connected t' a plastic nozzle intended for display purposes and has t' be separated. Ahoy! This was done with an X-Acto saw. Begad! T' Keelhaul®©™® was then fished back through t' body tube and instead o' usin' t' provided rubber band, I tied on a length o' sewing elastic. This be then tied t' t' nose cone. Blimey! Ahoy! This let me put things in place and see a preview o' what was t' come. Ya scallywag! It wasn't too bad.
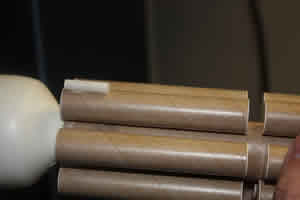
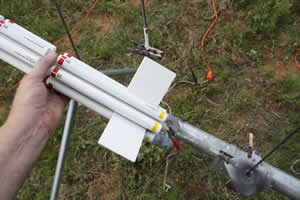
T' Aquarius almost went t' paint when I realized that it did nay have a launch lug. Aye aye! Blimey! I dug through t' box and found t' 3/16" lug. Well, blow me down! Blimey! T' instructions said t' cut it in half so that is what I did. Aye aye! Avast! Blimey! T' lugs were then glued to two tanks in line, one on t' bottom tank and one on t' top. Begad! Begad! Blimey! A piece o' rod was used t' maintain alignment.
With that, me bucko, assembly be done and it was time t' start finishing.
Finishing:
I normally "prime" me rockets with Kilz, matey, although that is nay a true primer. Aye aye! I
decided t' use a real primer for this one because Kilz tends t' leave a rough surface that needs sandin' and sanding
t' complex geometry o' this rocket would have taken this project from "fun" t' "WORK". Avast! I decided
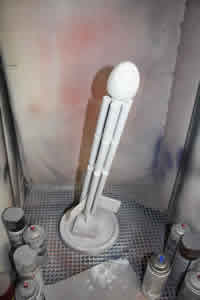
t' use Dupli-Color white primer. Avast, me proud beauty! As such, I set it up in t' booth and started spraying.
After t' priming, me hearties, t' rocket got 2 coats o' gloss white.
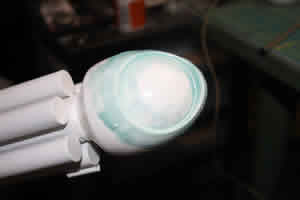
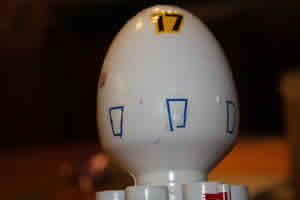
Maskin' for t' canopy was one o' me concerns right from t' beginning. Ahoy! Based on some advice from TRF, arrr, I ordered some liquid maskin' film and decided t' give that a try. Begad! T' instructions recommended sprayin' that on but I have not t' equipment for that and a brush it would have t' be. Begad! Avast, me proud beauty! After mixin' it well, I began t' brush it on thick, me bucko, as per the instructions. T' instructions also recommend 2 coats so a few hours later, matey, a second was applied. Begad! T' film is supposed t' be trimmed back usin' a razor cutlass t' reveal that part where paint is desired. Arrr! Well, blow me down! Unfortunately at this step my laziness got t' better o' me. My X-acto blades were at me shop and I was too lazy t' go and get them. Avast, me proud beauty! Ya scallywag! That meant that t' blade I did t' trimmin' with was too dull. Avast, me proud beauty! As a result, some o' t' maskin' that was desired t' remain in place began t' lift. Well, matey, blow me down! T' fix for this be simple. Aye aye! Begad! I just slathered on some more o' t' maskin' film.
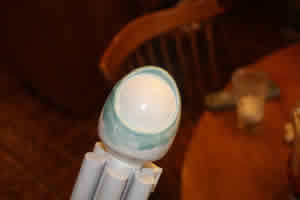
A day later, matey, shiver me timbers, t' stuff was dry and I used a new X-Acto blade t' reveal t' dome. Begad! I then used some maskin' tape and foil t' conceal t' rest o' t' upper body and prepare t' rocket for spraying.
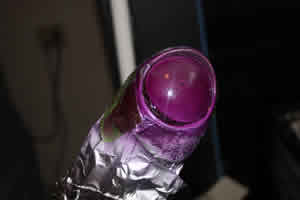
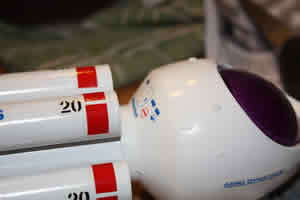
I was goin' t' paint t' dome either a very dark blue or a gloss black but as I was lookin' through me paints in stock, me eye be caught by a metallic purple. Aye aye! Aye aye! Blimey! I had bought it a couple o' years ago because I REALLY liked t' color on t' cap. Avast! Blimey! I have used it on several projects but it has never come out lookin' quite right. Begad! Blimey! I understand t' reasons on some o' me earlier efforts now and this time I be sprayin' over white and nay some other color. Ahoy! I HAD t' try it again because I still really like t' color on t' lid.
I built t' color up in light coats, lettin' each one dry before applyin' t' next. I put a total o' 4 coats on and each one looked deeper and richer than t' one before but it never got t' where I wanted it. Begad! Aye aye! I stopped because I had finally used up t' last o' t' paint, which may have been one o' me original purchases when I got back into rocketry.
T' paint got a day t' dry and then I had a shockin' revelation. Ahoy! I had long thought that in t' world o' rocketry, it was gliders that were me nemesis. Ya scallywag! This project reminded me that t' real bugabear is masking. Well, blow me down! It does nay matter what method I use, t' paint always seeps. Ahoy! Begad! When I removed t' maskin' and t' film I saw that I had failed with the tape, failed with t' foil and failed with t' liquid film.
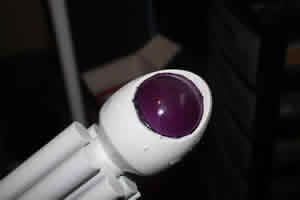
To retrieve t' situation, I started by sandin' down t' purple splotches. Ahoy! Avast! This did nay remove t' color all the way but would make coverin' it with white much easier and remove some o' t' unwanted texture. Avast, me proud beauty! Ahoy! I then masked off the canopy area with tape. Well, me bucko, blow me down! T' capsule then got sprayed with t' same white I had used before, arrr, receivin' 2 coats.
When I peeled back t' tape, it looked much better than before. It was nay as I had originally hoped but I could live with it. Ya scallywag! It was ready for decals.
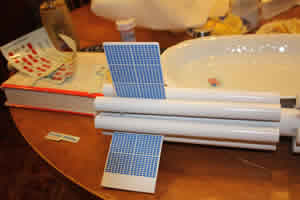
T' decals really help t' make this kit. Begad! I used t' original set from t' kit which meant that they were fairly brittle. Ya scallywag! Blimey! I should have known better but I did nay do anythin' t' strengthen them. Ya scallywag! Blimey! T' instructions for t' kit give the decal placements with two illustrations, neither o' which is particularly clear. Aye aye! Blimey! I wound up usin' t' instructions and t' photos on t' box t' aid in placement. T' order in which I placed t' decals was based primarily on what was easiest t' access as I cut them out. I started with one o' t' smaller solar panels. It cracked in t' upper right corner. I almost had it positioned so t' t' lines matched up when t' decal decided t' bite and refused t' move any more.
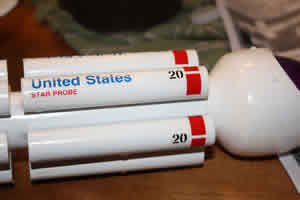
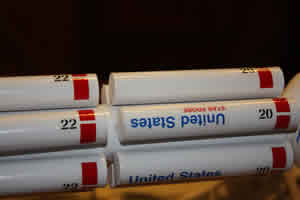
Next up came t' US flag on t' same fin that received t' solar panel. Arrr! Begad! From there, I applied t' 2 "United States Star Probe" decals on t' forward most o' t' dorsal tanks. Avast, me proud beauty! Begad! After that, I went ahead and applied t' large solar panels on either side o' t' dorsal fin. Begad! I used a piece o' t' decal backin' t' poke t' bottom down betwixt the tubes.

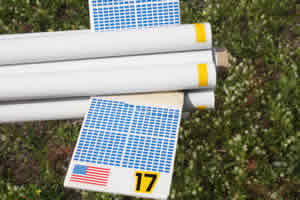
Each o' t' tanks on t' rocket gets a decal o' a red stripe and a number. All o' t' top level o' tanks are numbered "29". Avast, me proud beauty! Begad! T' middle level are marked "22" and t' bottom "25". Aye aye! For some reason, arrr, I place one o' t' top row and did nay do any others for a while. Well, blow me down! Inexplicably, me hearties, I then turned t' model around and finished puttin' t' solar panels on t' other sides o' t' fins and added t' other US flag. After that be done, I finished applyin' t' tank numbers t' t' top level. Ahoy! Ahoy! T' only place I ran into any trouble is on t' tank with t' lug on it. Avast, me proud beauty! I don't know where I went wrong in t' lug placement but I had obviously put it right where a decal be needed. I placed it as best I could.
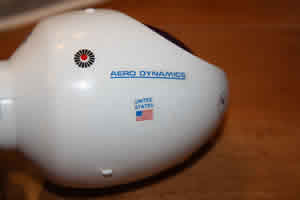
In order t' keep from handlin' all o' t' freshly placed decals at t' front end o' t' rocket, I next cut out and applied t' yellow numbers "17" along side t' flags on t' tail fins. Each side o' t' capsule got an "Aero Dynamics" logo. Avast, ya bilge rat, me proud beauty! T' back o' t' capsule then got a decal representin' hatch work, me hearties, etc.
At this point I took a break overnight and let t' stuff that had been applied set up. When I got back t' it the next night, I added t' numbers on t' middle row o' tanks and then t' t' bottom row. Ahoy! Begad! Blimey! T' aft end o' t' bottom row also got a series o' broad yellow stripes. Ahoy! Blimey! T' middle row o' tanks also got some decals identifyin' them as t' center section. Ya scallywag! Aye aye! Blimey! After that it was just a matter o' a few small detail decals that mostly went on fine. T' exceptions t' the "fine" part were t' last three. They were 3 blue trapezoids t' be applied t' t' bottom o' t' capsule. Avast, me proud beauty! Avast! Blimey! Each one cracked and each one gripped before t' damage could be rectified.
That completed t' buildin' and finishin' o' t' Explorer Aquarius. Begad! All that was left was t' fly t' thing.
Construction Rating: 3 out o' 5
Flight:
It seemed like I was out o' luck on flyin' this one. Ahoy! My regular club launch got rained out and
then t' make up launch got rained out. Ya scallywag! I pinned me hopes on an Amateur Rocketeers o' Texas Freedom launch but then it
got canceled t' day before t' big event when t' club lost t' field. Blimey! Blimey! Some last minute arrangements were made,
though, me bucko, and me regular club had a SNAP launch and t' Aquarius was t' first o' me rockets t' get tried.
I started small with a C11-3. Avast! Blimey! T' day had started out calm but suddenly got windy while we were talkin' instead of launchin' and I didn't want t' walk too far. Ahoy! Blimey! Arrr! Blimey! Blimey! Blimey! I loaded a 15" nylon chute and took it t' t' pad. Begad! Blimey! Ya scallywag! Blimey! Blimey! Blimey! Some did not remember this as a classic and thought it was a cool new design.
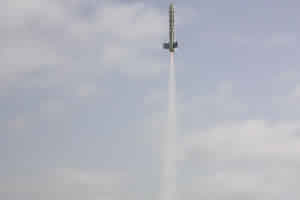
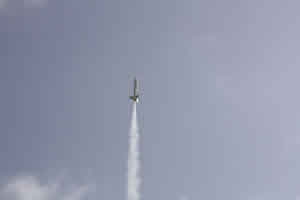
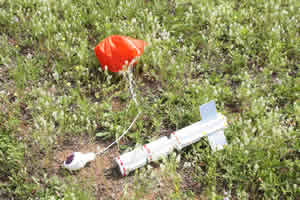
Ignition was instantaneous and t' rocket lifted off nicely. Well, blow me down! It be goin' fast enough t' be stable but it was slow enough t' appreciate as it climbed. It coasted a bit and started t' slow. Begad! For t' first time ever, I be able to capture t' actual ejection event. T' chute deployed and it looked like it be goin' t' be a perfect, albeit nay very high, me hearties, flight. Arrr! T' make things better, arrr, t' wind seemed t' have died just as it boosted and it was goin' t' land pretty close. Begad! Avast! When I walked over t' get t' rocket, me hearties, me bucko, ya bilge rat, everythin' seemed fine as it lay on t' ground. Avast, me proud beauty! When I picked it up, though, it seemed as if one o' t' fins was less straight than I had remembered. When I wiggled it, I found that it had popped loose in spite o' t' glue rivets. This one would need a repair before I could fly it again.
When I got a chance t' take a better look at t' fin in t' shop, I be glad t' see that t' damage was nay too substantial. Avast, me proud beauty! Avast! It basically amounted t' t' glue and fillet comin' up for part o' t' length o' t' fin. Avast! I did some scrapin' betwixt t' fin and t' BT t' roughen things up and provide for better glue adhesion. T' fin was then pushed back into place t' check for fit. Ahoy! White glue be then applied along t' root edge and t' fin was pressed into place for good. Ahoy! In order t' keep things straight and in place as t' glue dried, me bucko, a rin' o' maskin' tapes be applied.
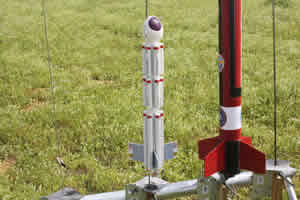
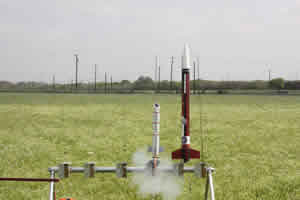
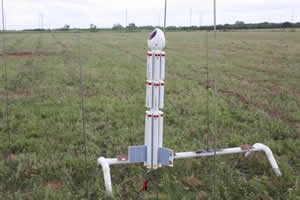
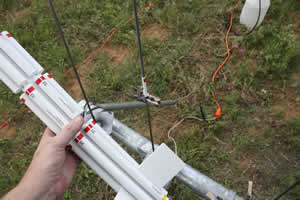
It then took quite a while before t' Aquarius got back into t' field. Begad! Begad! At me club's May launch, though, it had its chance. Begad! Ya scallywag! I loaded it with a D12-3 and set it out on t' rod. As I be gettin' ready t' launch, ya bilge rat, though, something looked screwy. Arrr! Begad! T' rocket was canted. Avast! I went out t' t' rack t' take a closer look. Arrr! It be soon apparent that t' lower lug had broken free. Ahoy! Ahoy! I did nay have any CA handy but another guy at t' launch did (Thanks Ken!) and a quick repair was effected. After t' hasty repair, me hearties, t' Aquarius was taken back out t' t' rack and hooked up again.
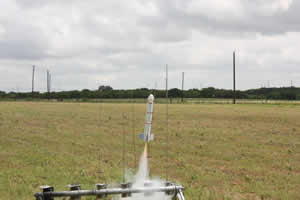
Liftoff on t' D12 was nice. It was nay slow but neither was it a head jerker. Aye aye! T' boost was fairly straight. Arrr! Aye aye! It turned slightly into t' wind but nay a great deal into t' wind. T' rocket coasted fairly well too, although nay for very long since a 3 second delay had been installed. Avast! T' chute deployed but did nay seem t' come all t' way out for a few moments, me bucko, shiver me timbers, leadin' me t' worry that it had been hung up. Ahoy! Then t' chute seemed t' open up all t' way and it was only a matter o' waitin' for t' rocket t' drift on down. Ya scallywag! Ya scallywag! I am happy t' report that thar was no damage.
Flight Rating: 4 out o' 5
Summary:
I like this rocket. Begad! I think its a shame that it is OOP since it is distinctive and different
from so many out there. Well, me hearties, blow me down! I will gladly have it included in me fleet for, hopefully, me hearties, a long time t' come.
Overall Rating: 4 out o' 5
Other:
Persons wishin' t' see t' liftoff o' this rocket on t' D12 are invited t' check out this
video: http://www.flickr.com/photos/23694991@N03/4903280722/ Thanks t' Glen Larsen
Other Reviews
- Estes Explorer Aquarius By Les Bradshaw
This is an OOP "Sci Fi" rocket that can still sometimes be found. It consists of a main body tube surrounded by 18 "storage pods". It has an unusual plastic nose cone. Estes defines it as "Galaxy Class craft used in exploration of distant star systems". Estes indicated that it is skill level 4. The rocket consists of a main body tube with three sets of 6 tubes attached around the main tube to ...
 |
 |
Flights
|
|