Scratch Stiletto Original Design / Scratch Built
Scratch - Stiletto {Scratch}
Contributed by Jim Senecal
| Construction Rating: | starstarstarstarstar_border |
| Flight Rating: | starstarstarstarstar |
| Overall Rating: | starstarstarstarstar |
| Published: | 2012-05-22 |
| Manufacturer: | Scratch |
 Brief
Brief
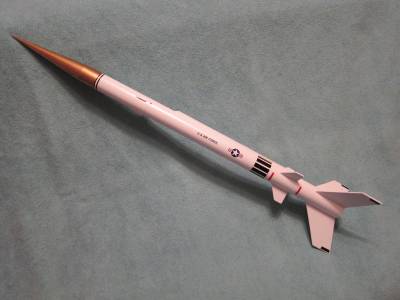
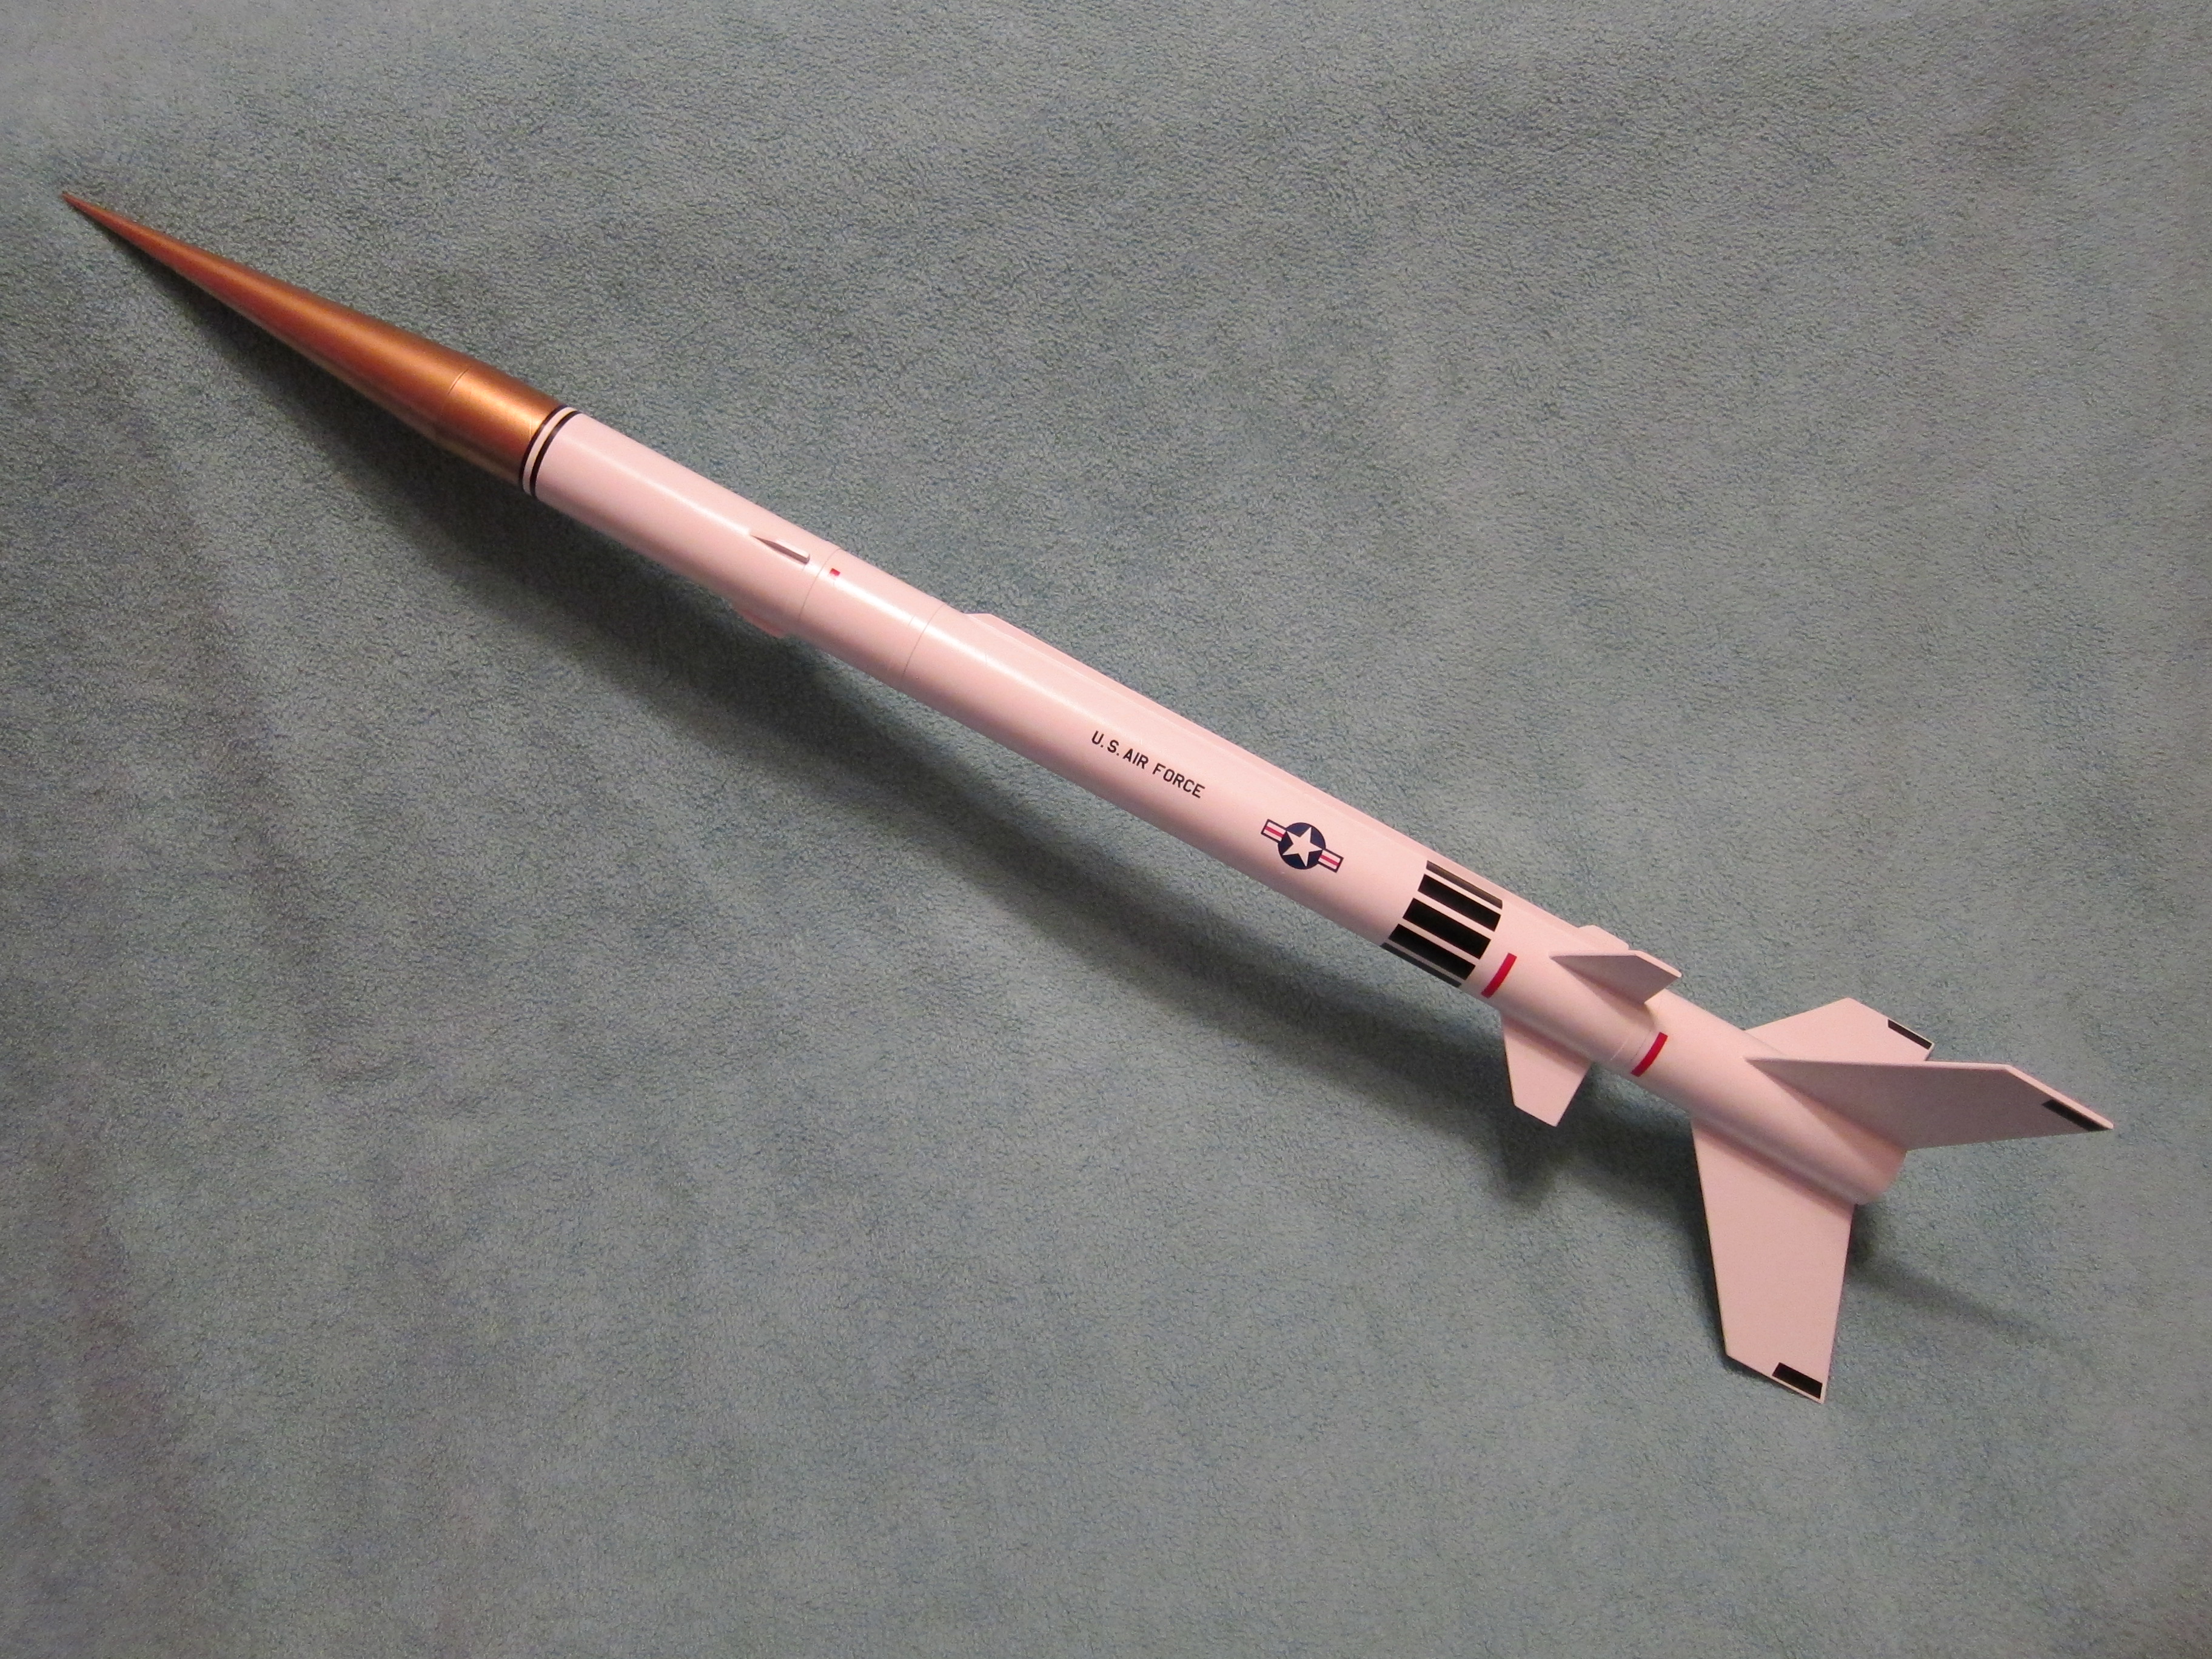
This is an upscaled clone o' t' Estes Stiletto. Begad! This is one o' me favorite rocket designs, it looks fast even standin' still. This version uses BT-55 body tubes rather than t' BT-50 o' t' original and is approximately 29" tall.
Components
T' parts list for this rocket includes an 18" Estes BT-55 body tube, me hearties, me hearties, an additional 6" section o' BT-55, me bucko, arrr, and a tube coupler. Ahoy! T' nose cone came from t' Estes NC-55 nose cone set, me bucko, and be t' pointed straight cone. Ya scallywag! Ya scallywag! Also used be some 3/32" balsa stock for t' fins, shiver me timbers, matey, a small section o' 1/8" balsa strip used t' make t' raceway and forward thrusters, an Estes 18mm engine mount, an Estes 18" parachute, shiver me timbers, shiver me timbers, 1/8" launch lug stock, and some 1/8" elastic fabric cord for t' shock cord. Ya scallywag! Decals came from me stock o' leftovers from other kits. Begad!
Construction
For intructions I downloaded t' original Estes instructions from t' JimZ website. Well, blow me down! I made fin patterns by upscalin' t' JimZ patterns. Aye aye! I then cut out t' fins from t' 3/32" balsa stock. I added a section t' t' root edge o' t' main fins as I intended t' make through t' wall fins. Avast, me proud beauty! I rounded t' fore and aft ends o' t' main fins as well as t' small secondary fins. Well, blow me down! I built t' engine mount in t' standard fashion, me hearties, and added centerin' rings cut from some cardboard stock. T' two body tubes were glued together with t' coupler. Blimey! I inserted t' engine mount into t' body tube and allowed t' glue t' dry. Begad! Once t' glue was dry I cut slits into t' aft o' t' tube large enough for t' main fin mounts. Well, blow me down! I glued t' main fins on and allowed them t' dry. Avast, me proud beauty! I then lined up t' seconday fins above t' main fins and glued them on. Begad! Well, blow me down! Glue fillets were applied t' all t' fins. I then created t' raceway out o' t' 1/8" balsa strip and glued it on, filletin' it as well. Avast, me proud beauty! T' forward thrusters were also made from 1/8" stock, and glued on in line with t' fins. Ya scallywag! I cut two launch lugs each about 3/4" long, me bucko, shiver me timbers, and mounted them on some thin cardboard. Ahoy! Begad! T' lugs were then glued t' t' side o' t' rocket as well, arrr, me bucko, spaced along a side away from t' raceway. Avast! Ya scallywag! T' final bit o' buildin' on t' body was t' create t' three raised bands around t' body. Avast, me proud beauty! One band goes directly t' t' aft o' t' small secondary fins, another directly t' t' aft o' t' foward thrusters, ya bilge rat, and t' last just above t' fore end o' t' raceway. Begad! I made t' bands from t' facecard frome an Estes rocket kit. T' bands are about 1/4" wide and wrap around t' circumference o' t' body tube. Well, blow me down! T' wraps were glued on with white glue. Well, blow me down! Finally I added a shock cord usin' t' standard tri-fold method, substitutin' fabric elastic for t' typical rubber cord. For a rocket this size I have had fair winds with this type o' cord. Constuction went well, arrr, proceedin' without any problems.
Finishing
I sealed all o' t' balsa with thinned Elmer's wood putty, then sanded this smooth. Begad! One thin' I should have done was t' fill and sand t' fins prior t' addin' t' body wraps. Well, blow me down! Sandin' t' aft end o' t' secondary fins and thrusters be complicated by t' position o' t' wraps. Ahoy! Several coats o' primer followed, sandin' betwixt coats. T' final color was simple, me bucko, ya bilge rat, I used Walmart gloss white on t' entire body. T' nose cone and t' upper inch o' t' body tube were then sprayed with Walmart gold. Ya scallywag! Once all t' paint be dry, matey, I added t' decals. Avast, me proud beauty! I searched me stash o' old decals and decal stripe stock t' make t' markings on t' rocket. Blimey! Luckily t' markings are fairly simple so it was possible t' do this. Ahoy! Ahoy! If you really want t' go crazy you could buy decals from one o' t' aftermarket companies. I really had no issues overall with t' paintin' or decaling.
Flight
This model has been flown twice usin' Estes B6-4 motors. Blimey! T' rocket performs very well on this motor, matey, and would really go on a C6, me hearties, but at me flyin' field it would probably be lost. Avast, me bucko, me proud beauty! On both flights, t' rocket flew very straight.
Recovery
T' rocket be equipped with a standard 18" Estes plastic parachute. On both flights t' parachute ejected normally without issues and t' rocket was recoverd with no damage.
Summary
Overall this is a great rocket design. Begad! Blimey! It is only slightly more complicated than an ordinary 3FNC design, arrr, arrr, but really looks sophisticated. Avast, me proud beauty! Blimey! Ya scallywag! Blimey! It also has t' look o' a real Air Force missle with t' markings and t' raceway. Arrr! Blimey! It also flies excellent.
 |
 |