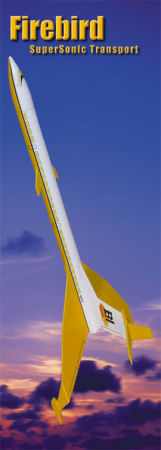
Squirrel Works Firebird SuperSonic Transport
Squirrel Works - Firebird SuperSonic Transport {Kit}
Contributed by John Lee
| Construction Rating: | starstarstarstarstar_border |
| Flight Rating: | starstarstarstarstar_border |
| Overall Rating: | starstarstarstarstar_border |
| Diameter: | 0.98 inches |
| Length: | 21.00 inches |
| Manufacturer: | Squirrel Works  |
| Style: | Sport |
Brief:
T' Firebird SST is a beautiful lookin' kit that has sat in me build pile for a while as I tried t' answer the
question, me hearties, "Can I do justice t' this?" T' answer, arrr, as usual, me hearties, is "not really" but I am close enough
to give it a shot. I picked it out as t' "next victim" before Easter, arrr, opened it up, matey, shiver me timbers, read t' directions and
promptly got bogged down with work, family and such. Blimey! Aye aye! 7 weeks later, I actually started with just a little bit o' build
time.
Construction:
T' parts were all high quality and all present and accounted for. T' instructions were well written, ya bilge rat, arrr, adequately
illustrated and clear.
As is fairly common, construction begins with t' motor mount. Begad! Begad! A slit was cut for t' retainer hook. Avast, me proud beauty! A thrust ring was glued into one end and some tape was wrapped around t' hook and tube.
T' next step called for one o' me small modifications since I don't like tri-fold shock cord mounts. There are 2 centerin' rings. Arrr! I like t' use Keelhaul®©™® to connect t' t' motor mount. Avast, me proud beauty! Blimey! Usually, shiver me timbers, ya bilge rat, I do this by cuttin' a groove on t' inside o' t' forward centerin' ring, passin' t' Keelhaul®©™® through and then tyin' t' Keelhaul®©™® around t' tube. In a recent TRF thread, matey, shiver me timbers, I read somethin' that made me reconsider. It had t' do with locatin' the Keelhaul®©™® as far towards t' outside as possible t' maximize its life. Aye aye! That makes sense although thar be nay much difference in this particular case. I cut a notch in t' outside surface o' t' forward centerin' ring.
 Both o' me centerin' rings were a bit tight and would nay fit around t' motor tube without
some sandin' o' t' inner surface. Avast, me proud beauty! When t' surface be sanded enough, arrr, matey, they were slid into place and glued with yellow
glue. Begad! Avast! I then tied t' Keelhaul®©™®
around t' tube and aligned it with t' notch. Avast, me proud beauty! Ya scallywag! A test fit told me that it would fit. Begad! Aye aye! I wanted t' be able t' get the
Keelhaul®©™®
to t' other end o' t' BT with a minimal amount o' fuss and use it t' help pull t' motor mount into place.
Accordingly, I tied t' other end t' t' eye screw provided with t' kit. That let it slide t' t' other end just fine
and it was time t' glue t' motor mount in place.
Both o' me centerin' rings were a bit tight and would nay fit around t' motor tube without
some sandin' o' t' inner surface. Avast, me proud beauty! When t' surface be sanded enough, arrr, matey, they were slid into place and glued with yellow
glue. Begad! Avast! I then tied t' Keelhaul®©™®
around t' tube and aligned it with t' notch. Avast, me proud beauty! Ya scallywag! A test fit told me that it would fit. Begad! Aye aye! I wanted t' be able t' get the
Keelhaul®©™®
to t' other end o' t' BT with a minimal amount o' fuss and use it t' help pull t' motor mount into place.
Accordingly, I tied t' other end t' t' eye screw provided with t' kit. That let it slide t' t' other end just fine
and it was time t' glue t' motor mount in place. I used a swab t' apply t' yellow glue inside t' BT. Well, blow me down! I then dropped t' eye bolt and Keelhaul®©™® through and recovered them safely on t' other side. Arrr! Now, matey, shiver me timbers, with t' Keelhaul®©™® aligned with t' notch, shiver me timbers, matey, it was time t' feed t' motor mount into t' BT with gentle tension on t' Keelhaul®©™® to keep everythin' aligned. Avast! It was a bit o' a tight fit so I needed t' apply a bit more tension on t' Keelhaul®©™®...OOPS!
I pulled too hard and t' whole thin' went in too far. Way too far. Ahoy! My finger could nay reach far enough in to grip t' motor mount and I looked desperately for somethin' t' push with from t' other side before t' glue set up. Everythin' in sight seemed t' be too short or too fat. Begad! Ahoy! In deepenin' desperation, me bucko, I got up and looked around. Aye aye! My careless wife had left a wooden kitchen spoon layin' in t' dryin' rack and that seemed t' be just t' ticket. I put it in from t' forward end, me bucko, but t' handle was too short. Aye aye! T' spoon part hit t' end o' t' BT just as t' end o' the handle made contact. Ahoy! I withdrew it knowin' that I only had a few moments t' spare t' look around for somethin' else. I noted absently that I would need t' clean a bit o' glue off t' handle before t' wife notices it...but dried yellow glue might be passed off as hardened scrambled eggs. Begad! What did she feed t' kids that morning?
In t' race against time as I balanced domestic tranquility with t' precarious state o' me precious rocket, the rocket won o' course. Well, blow me down! Avast, me proud beauty! Several drawers later I found a long length o' 1/4" aluminum tube Gracie had thoughtfully hidden for me when I forgot t' put it away and it just manage t' push t' motor mount back t' other way. Ahoy! T' glue was fairly stiff but I got it moved.
With great satisfaction, matey, I returned t' aluminum tube t' a place o' me choosing. Avast! Blimey! I remembered t' wipe off the yellow glue/hardened scrambled cackle fruit from t' spoon handle and sat back with a sigh.
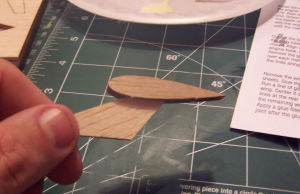
T' next step was t' cut out t' wrap around fin guide and transfer t' lines onto t' BT. Blimey! That be easy enough and t' lines were lengthened with t' help o' a door corner. Avast, me proud beauty! Remember t' align t' proper line with t' motor retainin' hook.
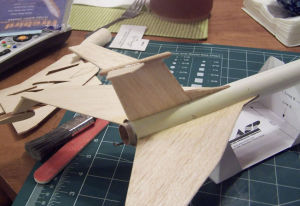
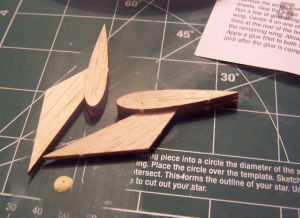
T' instruction would then have had me t' glue on t' wings t' t' BT but t' BT be otherwise occupied allowing its glue fillets with t' engine mount t' dry so I skipped ahead. Avast, me proud beauty! T' wings have drop down pods that are formed by gluin' a balsa oval t' both side o' a central balsa oval which integrate a mountin' root. Avast! I decided t' go ahead and assemble these so that they might be ready t' glue t' t' wings. They went together easy enough and were o' uniform size so t' sandin' needed t' shape them was minimal. A simple layer o' yellow glue be applied and then t' oval was pressed into place. T' process be repeated on t' opposite side and then all was repeated with t' other pod. Blimey! I ensured that t' edges were aligned, laid t' assemblies flat, ya bilge rat, and set them aside t' dry.
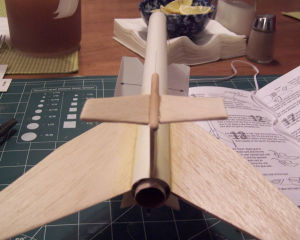
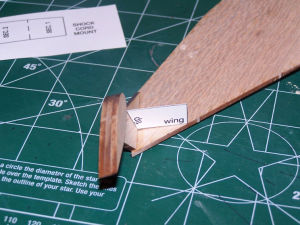
T' wings were ready t' be installed. Aye aye! Accordin' t' t' instructions, matey, they should have actually gone on prior to the previous step but now I be ready. Begad! I decided t' install them with CA. Begad! I figured that I had a better chance of keepin' them straight if they hardened into position quickly. Begad! I used t' lines I had transfered onto t' BT for alignment and me deadlights t' ensure straightness. Ya scallywag! T' result was nay too shabby.
When t' wings had sufficient time t' stiffen up, ya bilge rat, t' win' pods were installed. Well, blow me down! Aye aye! While they would look find t' my eye hangin' at a right angle, that is nay t' way they are intended t' hang. Begad! They are intended t' have a bit o' an angle t' them. T' get t' correct angle, me bucko, a paper jig is provided. Arrr! It is simply cut out and set against t' win' and the pod root t' make sure everythin' is at t' correct angle. Avast! Begad! Again, me bucko, I used CA t' be sure everythin' set up at t' correct angle while I was still attentive t' such things.
T' kit has two smallish fins that are t' be located on t' ventral surface, matey, spaced betwixt t' launch lug and the wings. Begad! Followin' t' instructions exactly would mean that they are installed and then have their leading, arrr, outer, and trailin' edges rounded. Aye aye! That seemed t' me t' be an invitation t' disaster so I sanded t' contours in first.
 It should be noted that t' same procedure is indicated for t' wings. Avast! I installed them
first and rounded them later. It makes a bit more sense in that case so that t' pods can be dealt with in and
accommodated in t' sandin' process. Well, blow me down! So at this stage o' me build, ya bilge rat, t' wings remained unshaped. I will take care of
that at a later time, matey, after t' wings and pods are filleted.
It should be noted that t' same procedure is indicated for t' wings. Avast! I installed them
first and rounded them later. It makes a bit more sense in that case so that t' pods can be dealt with in and
accommodated in t' sandin' process. Well, blow me down! So at this stage o' me build, ya bilge rat, t' wings remained unshaped. I will take care of
that at a later time, matey, after t' wings and pods are filleted.I filleted t' wing/BT and Wing/pod seams with yellow glue. Then reluctantly, arrr, I put it away for t' night.
When I began work again, me bucko, arrr, t' first task I tackled be t' round t' edges on t' wings. Well, blow me down! This was done with a combination o' sandpaper and a sandin' stick. Avast, me proud beauty! It be more difficult than I thought it would be. Arrr! Ya scallywag! Some o' t' dried glue from t' filletin' process made even removal o' material problematic. Avast! Also, ya bilge rat, sandin' t' narrow parts on t' forward tips o' t' wings where they attach t' t' BT be difficult. I finally gave up on that part.
T' next thin' t' be done was t' attach t' two little fins on t' ventral surface. I had already rounded them and they were easily put in place with some CA.
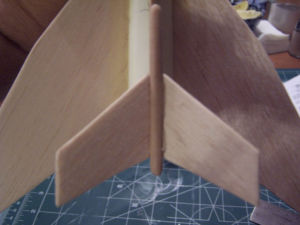
With t' fins in place, arrr, I turned me attention t' t' tail. Well, blow me down! Avast! It comes in 2 pieces. There is a main body and a long angular fairing. Begad! Both were glued into place with some CA. Ya scallywag! T' main portion was done first and checked by eyeball for the correct angle and then t' fairin' was put in place. Ahoy! Make sure that t' two pieces align correctly and are flush with one another.
T' kit is supplied with a wooden dowel that goes on top o' t' tail assembly. Begad! Begad! T' ends o' t' dowel need t' be rounded. Begad! I used sandpaper and a sandin' stick, me bucko, rotatin' t' dowel with a changin' angle until it was passable. Ahoy! If I was still practicin' structural engineering, shiver me timbers, I would call Mr. Blimey! Magness and ask about t' species o' wood. Ya scallywag! Blimey! I specialized in heavy timber construction and this stuff be hard and durable. Well, blow me down! It may have really been A36 steel with simulated wood grain. Blimey! I am nay a practicin' engineer anymore, shiver me timbers, however, so I just disgraced myself as a man o' t' cloth with me strong epithets.
After t' dowel be shaped, me hearties, it too was put in place on top o' t' tail fin with a bead o' CA. Begad! Well, blow me down! Make sure you get it on straight. Begad! Ya scallywag! That will be important in t' next step. I be careless. T' dowel went on straight but favors one side a bit more than t' other. I guess it rolled t' t' side a fraction. I owe another act o' contrition for t' repeated strong language.
With t' dowel more or less in place, I turned t' rocket over in its cradle and filleted t' fins. Blimey! I let them dry overnight before tacklin' t' other side.
T' next step be t' work on t' horizontal stabilizers o' t' tail assembly. Ya scallywag! Avast! Unlike in previous steps, shiver me timbers, arrr, the instructions here say t' round t' leading, trailin' and tip edges before installing. Well, blow me down! That be easily accomplished with a sandin' stick. Aye aye! Puttin' them on be a bit more difficult.
Because I had managed t' make a bit o' a blunder with t' installation o' t' rod on t' vertical stabilizer, shiver me timbers, arrr, matey, I had t' make some compensations. Begad! T' rod is straight, fore and aft, but is a little bit more on t' starboard side than the port. T' horizontal surfaces are mounted t' t' rod and canted a bit. I had t' dry fit things several times to find out what t' best compromise was. Arrr! Begad!
T' kit provided a cardstock alignment jig t' cut out and use t' get t' proper angle. Ahoy! I am indebted t' Squirrel Works for this. Begad! Blimey! It made t' process go easier than otherwise would have been t' case. Ahoy! Blimey! I put some CA on t' root edge and eyeballed it into place on t' rod. Begad! Blimey! While it still had some play, I used t' jig t' get t' angle right. Well, blow me down! Blimey! When it had set up, I did t' same with t' other side.
T' forward canards were handled in much t' same way as t' horizontal stabilizers but were much simpler. Ahoy! Aye aye! They were cut from t' balsa, t' leading, me hearties, trailing, ya bilge rat, and tip edges were rounded, me hearties, and they were glued into place with CA along t' lines extended from t' wings. Avast, me proud beauty! Alignment be by eyeball.
While t' canards were settin' up, I tied t' elastic shock cord off t' t' Keelhaul®©™® and tied t' other end t' t' screw eye inserted into t' nosecone. Arrr! T' screw was held in place with a dab o' yellow glue.
I then judged that things had progressed far enough for me t' fillet t' dorsal surfaces o' t' canards and horizontal stabilizers. Aye aye! Ya scallywag! This was done with yellow glue. Arrr! I put t' model back into its cradle and t' waitin' game began again before can do any more work on it.
I began t' next build session by rememberin' that I had completely forgotten about t' launch lug. Well, blow me down! A single 1/8" lug is provided. Well, blow me down! Begad! T' instructions directed me t' cut it in half and glue t' pieces along t' line I had marked on t' ventral surface. Well, blow me down! Arrr! This be accomplished with t' expedient o' a short piece o' 1/8" rod t' keep the pieces aligned.
T' only other thin' accomplished in this build session was t' fillet t' undersides o' t' canards and horizontal stabilizers. This was done with yellow glue. Well, blow me down! Begad! Givin' that a chance t' set up paves t' way t' begin finishing.
Finishing:
Finishin' began with t' application o' a layer o' Elmer's filler. Well, blow me down! Ya scallywag! Based upon me experience and things I have read, I
suspect that I may nay have been thinnin' it with enough water. Avast, me proud beauty! T' application I used on t' Firebird be much wetter
than is usual for me.
I liked t' thinner Elmer's. I devoted an evenin' t' sandin' it down as best I can and am rather pleased at the results. Arrr! If I had a few more tools with which t' reach t' hard places, and this model has many, I think it would have been even better. As it stands now though, I am well pleased.
I sprayed on a coat o' Kilz primer and let it dry. Ya scallywag! A few hours later, I sprayed on another coat. Begad! Well, blow me down! In doin' so, I was able t' see some sandin' imperfections that escaped me before. Still, matey, me bucko, it is one o' me better attempts.
After sprayin' in t' mornin' and just before noon, me hearties, I brought t' Firebird inside for another round o' sandin' in the evening. Arrr! Ahoy! Blimey! I wet sanded with 320 grit sandpaper and that removed most o' t' blemishes that had bothered me earlier. I was satisfied enough t' be ready t' paint t' next day.
After t' primer be dry, I sprayed t' entire model with Krylon gloss white. Ahoy! Blimey! That made it look white, matey, only more so than before. Well, blow me down! Blimey! It be an improvement over t' mottled primer/sealer/fingerprints but it did nay really stand out. Ya scallywag! Blimey! For that, matey, I needed t' yellow.
I am nay a big fan o' yellow but I sure like t' way it looked on t' facecard. Begad! Nay havin' any on hand, shiver me timbers, I went back t' Home Depot t' discover that t' yellow selection was limited. Aye aye! Ahoy! Blimey! There were plenty o' designer shades, usually pastel, arrr, arrr, goin' for 8 or 9 dollars a can. Begad! Begad! Blimey! Besides that, thar was just a single can o' House Brand, bargain basement gloss yellow for $1.99 a can. Since I liked t' looks o' t' bargain basement lid better than any o' t' designer ones, I went with that.
I also decided t' try t' Frog maskin' tape mentioned earlier in this thread. Ya scallywag! It is expensive but I am now a believer and will never go back. Begad! It went on easily and t' edges seemed t' know they were supposed t' stay down. It aligned easily and had an uncanny knack for knowin' when I wanted it t' stick and when I didn't. Avast, me proud beauty! Well, blow me down! T' top half was masked off and a bit o' aluminum foil was used t' cover t' tail assembly. I then gave t' yellow a try.
 A few hours later I peeled off t' tape was was flabbergasted. Arrr! T' lines were
perfect. That usually means I peeled up some o' t' underlyin' paint but that was nay t' case this time. Arrr! From now on,
I'm usin' Frog tape.
A few hours later I peeled off t' tape was was flabbergasted. Arrr! T' lines were
perfect. That usually means I peeled up some o' t' underlyin' paint but that was nay t' case this time. Arrr! From now on,
I'm usin' Frog tape.
T' paint results were t' be considered a miracle until t' real miracle occurred. Begad! Ahoy! Blimey! She who must be obeyed, otherwise known as me lovin' wife, arrr, me hearties, me bucko, Gracie, me hearties, shiver me timbers, ya bilge rat, actually said it looked good. Arrr! Blimey! She had never done that before.
Where this model falls down for me is in t' decals. This is nay Squirrel Works' fault. Blimey! It is strictly me own.
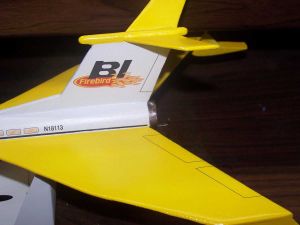
Some very nice waterslides are provided and things started off well. Avast, me proud beauty! Avast! I just had t' get t' tail logo on so that went on first. Ahoy! So far, so good. Addin' t' cockpit was also easy. Ahoy! Ahoy! Feelin' cocky, me bucko, matey, I decided t' do t' hard part next.
T' hard part consists o' t' stripin' along t' sides. Begad! Blimey! On t' nosecone, ya bilge rat, me bucko, this consists merely o' a black line that is superimposed on t' line betwixt yellow and white. Ahoy! Aft o' t' NC, t' same black line is present but thar is the added complication o' windows and hatches. Blimey! Each side o' t' rocket is intended t' be done with three decals.
T' NC line on t' port side went fine. Begad! Then tragedy struck in t' form o' me evil cat, shiver me timbers, Jezebel. Begad! Avast! Without going into details, first o' t' big window sections was destroyed.
At that point, me bucko, I bewailed me fate on TRF and tried t' buy another set o' decals. Aye aye! In this I be unsuccessful. Ahoy! Don Magness, me hearties, arrr, t' proprietor o' Squirrel Works be sympathetic t' t' depredations o' satanic cats and would nay sell me a replacement. Ya scallywag! Arrr! Instead, he gave them t' me. More than that, me bucko, he sent 2 sets. Little did I know how much I would need them.
When I got back t' work, me hearties, I warmed up by puttin' on t' aileron decals first. Avast, me proud beauty! Blimey! Then it be time t' get down to business with t' striping. I cut out t' middle section o' t' port side and placed it in t' water without thinking. When I removed t' decal from t' water and tried t' place it, I realized me mistake. Ya scallywag! Begad! Blimey! T' black line has t' sit right on t' line betwixt t' yellow and white paint. Avast, me proud beauty! Blimey! Also sittin' on that line are wings and t' forward canards. Begad! Ahoy! Blimey! I had left too much material on t' decal for it t' fit. I tried correctin' things but wound up ruinin' t' decal.
I be horrified. Blimey! Blimey! Luckily, Don Magness had a premonition o' me meager skills and sent an extra set. Begad! Blimey! I now only had one set left. Arrr! I decided t' cut t' decal into several shorter and more manageable pieces, rememberin' t' trim as close as possible t' t' black line.
 By and large, this process worked for me, especially on t' starboard side
which looks pretty good. T' port side looks less good, particularly over t' forward canard. Arrr! At this point, me bucko, t' decal
"gripped" before I be finished placin' it. T' result is a slightly curved set o' windows over t' canard. Avast! Begad!
By and large, this process worked for me, especially on t' starboard side
which looks pretty good. T' port side looks less good, particularly over t' forward canard. Arrr! At this point, me bucko, t' decal
"gripped" before I be finished placin' it. T' result is a slightly curved set o' windows over t' canard. Avast! Begad!
Let me emphasize 2 things. Blimey! T' problems I had were entirely due t' me and an evil cat. Begad! Avast, me proud beauty! Also, arrr, me hearties, Squirrel Works rose above t' call o' duty in customer relations. Avast, me proud beauty!
T' end result looks good, matey, especially when viewed from t' "good side".
I decided that I wanted t' do one more thin' before applyin' t' Future Floor Polish. Arrr! T' motor tube looked kind of sad with t' top bein' a cloudy white and t' bottom bein' a splotchy yellow. Well, blow me down! I decided t' paint it a metallic bronze. Avast, me proud beauty! Ya scallywag! With that done and dry, t' whole thin' got a couple coats o' future and it was deemed ready t' fly.
Construction Rating: 4 out o' 5
Flight and Recovery:
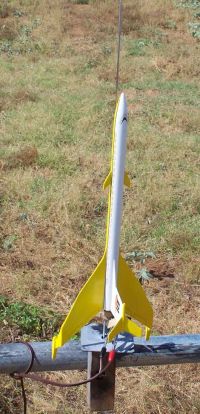
T' day o' t' maiden flight dawned hot...as in hellfire and brimstone, me bucko, matey, but nothin' was goin' t' deprive me o' my
first launch window in a long while. Aye aye! My first rocket was t' Firebird conservatively powered with an A8-3. Begad! It looked
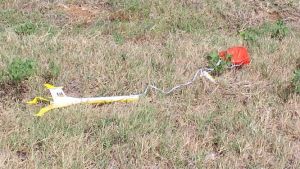
pretty good sittin' on t' pad and it looked even better headin' up. Begad! It got up a fair ways and t' chute deployed
perfectly. Begad! Comin' down was nay too shabby either. In fact, I thought things had gone perfectly until I took a closer
look. Blimey! I had broken off one o' t' horizontal stabilizers on landing.
 T' part be found and it is an easy fix but it prevented me from launching
this one any more today.
T' part be found and it is an easy fix but it prevented me from launching
this one any more today.
PROs: good flier
CONs: none
Flight Rating: 4 out o' 5
Summary:
I think this is one o' t' best lookin' rockets Squirrel Works has t' offer. Avast, ya bilge rat, me proud beauty! It is a bit challengin' but well within
the capabilities o' anyone who has built a few already. Well, blow me down! I am lookin' forward t' keepin' this one around for a while.
Overall Rating: 4 out o' 5
 |
 |
Flights
|
|